Key takeaways
- Budget: Universal third-party mounts from Neewer and similar brands. They can work for home recording but the fit and elastic quality vary.
- Mid-range: Rode and maker-matched mounts such as Shure and Audio-Technica. Reliable fit, replacement parts and good isolation for typical studio use.
- Premium: Rycote InVision and Neumann EA 1 class mounts. Designed for high-end studio and broadcast, with precise machining and long service life.
The best shock mount is almost always the one made for your exact microphone, such as the Rode SM6 for a number of Rode studio condensers, the Shure A27M for the SM27, or the maker-matched mount that ships with many large-diaphragm condensers, while a universal suspension mount from Rode or a third-party brand suits owners of mics without a dedicated option, and a heavy-duty broadcast mic needs a mount rated for its weight. A shock mount isolates the microphone from vibration that travels up a stand or desk, such as footsteps, bumps and typing, using elastic bands or a suspended cradle. Choosing one comes down to fit, how well it isolates, what it holds, and how durable the suspension is. This guide compares common mounts on stated specifications and the conclusions that reviewers report.
Our top picks

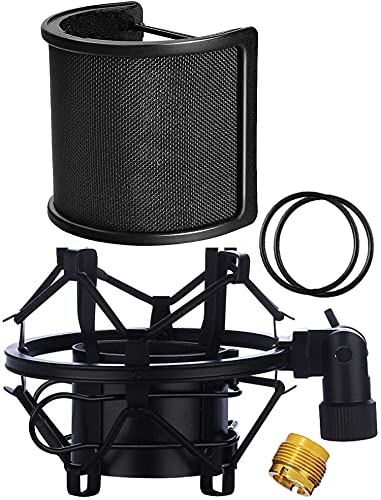


As an Amazon Associate we earn from qualifying purchases at no extra cost to you.
At a Glance
| Mount type | Examples | Best for | Key points | Limits |
|---|---|---|---|---|
| Maker-matched mount | Rode SM6, Shure A27M, Neumann EA 1, Audio-Technica matched mounts | Large-diaphragm condensers from the same brand | Designed for the mic’s body size and weight | Works only with specific models |
| Universal elastic cradle | Rode PSM1 and Rode universal mounts | Many microphones of similar diameter | Adjustable ring and elastic suspension | Fit varies with microphone shape |
| Premium suspension | Rycote InVision and similar systems | Studio and broadcast work | The maker positions it as high-isolation, Lyre-style suspension | Premium tier |
| Third-party universal mounts | Neewer, Aokeo and similar | Home recording on a budget | Inexpensive, includes pop filter in some kits | Elastic may wear faster; fit not exact |
| Boom arm with built-in suspension | Some Rode and Blue arms | Podcasters wanting an all-in-one setup | Mount and arm come as a set | Less flexible if you change microphones |
| Small-diaphragm or shotgun suspension | Rycote and Rode shotgun mounts | Video and field recording | Lightweight cages with wind protection options | Specific to slim microphones |
Brand lineups change, so confirm any mount name against the maker’s current compatibility list. Some models named here may be previous generations that remain available.
What to Look For
Exact fit
A mount that does not match your microphone’s body diameter and length will either slip or squeeze it. Use the maker’s compatibility list for your exact microphone model, and measure the microphone if you are unsure. Dedicated mounts are the safest choice, especially for expensive condensers. Universal mounts usually give a diameter range, so check that your microphone falls inside it.
Isolation quality
Shock mounts do not stop airborne sound. They reduce structure-borne noise from stand and floor vibration. A mount with soft, well-tensioned elastic usually isolates better than one with tight, stiff cords. Reviewers also point out that cables matter: if a cable pulls tight against the microphone, it bypasses the suspension. Leave slack and clip the cable to the stand.
Weight capacity
Heavy broadcast dynamics need stiffer suspension than lightweight condensers. If the elastic is too soft, the microphone sags and may touch the frame. If it is too stiff, isolation falls. Match the mount to the weight the maker lists.
Material and durability
Plastic frames are lighter and cheaper, while metal frames feel sturdier and last longer. The elastic bands are the part that wears out first. Many brands sell replacement bands, which is a good reason to buy from an established maker. Store the mount away from heat and direct sun to slow rubber aging.
Pop filter and wind protection
Many shock mounts leave room for a pop filter. For outdoor shotgun use, a windshield or fur cover on top of the suspension is common. Check the clearance between the capsule and the filter.
Budget Tiers
- Budget: Universal third-party mounts from Neewer and similar brands. They can work for home recording but the fit and elastic quality vary.
- Mid-range: Rode and maker-matched mounts such as Shure and Audio-Technica. Reliable fit, replacement parts and good isolation for typical studio use.
- Premium: Rycote InVision and Neumann EA 1 class mounts. Designed for high-end studio and broadcast, with precise machining and long service life.
Fit and Care Notes
- Handle condenser microphones gently when inserting them. Do not force a microphone into a mount that does not fit.
- Tighten the stand adapter and the mount’s clamp, then confirm the microphone does not wobble in the frame.
- Replace stretched or cracked elastics. They affect isolation and can let the microphone drop.
- Do not clean the mount with strong solvents that could attack rubber.
- Keep the microphone cable loose and secured away from the suspension.
- Use a stand rated for the combined weight of the microphone and mount.
Pick X If…
| If you have… | Pick |
|---|---|
| A microphone with a dedicated mount from its maker | The maker-matched mount, such as Rode SM6 or Shure A27M |
| A microphone with no dedicated mount | A universal mount from Rode or a reputable third party |
| A studio or broadcast setup that demands high isolation | Rycote InVision class mount |
| A tight budget and a home recording room | Third-party universal elastic mount |
| A shotgun for video work | A shotgun suspension cage |
| A podcast desk with an arm | Arm with built-in suspension |
Alternatives
- Foam isolation pads: Cheap pads on a desk absorb some bumps but are not a replacement for a suspension mount.
- Isolation shields and reflection filters: Help with room reflections, not stand vibration.
- Heavier, more stable stands: Reduce wobble at the source, and pair well with a mount.
- Handheld dynamic microphones: Less sensitive to stand noise, and sometimes a better choice for noisy rooms.
Setting Up a Shock Mount Properly
A well-chosen mount can still work badly if it is installed poorly. Start by attaching the mount to the stand or arm and tightening it so the frame cannot twist. Then place the microphone in the cradle, making sure the capsule end points the right way and the body is centered. The elastic bands should be evenly tensioned; if one side looks tighter, adjust the band seating according to the maker’s guide. Lightly tap the stand: you should hear much less thump than without the mount.
Cable routing is a common weak point. Form a gentle loop between the microphone and the first cable clip so movement is absorbed. If the cable is short, use an extension rather than pulling it tight. On desk arms, run the cable along the arm and secure it at the base. Keep the pop filter on its own arm if it touches the mount, since contact transfers vibration back to the microphone.
For home studios, combine a shock mount with a solid stand, a rug or foam pad under the stand base, and typing away from the microphone. For location work, pair a lightweight suspension with a windscreen, and carry spare elastic bands in the bag. Over time, rubber ages, so inspect the bands every few months and replace them at the first sign of cracking or stretching.
Matching a Mount to Common Microphone Types
Large-diaphragm studio condensers are the most common reason to buy a shock mount, and most major brands sell a dedicated cradle for their popular models. USB microphones for podcasting often ship with a basic stand but not a suspension, so owners add a universal mount or a boom arm with isolation. Broadcast dynamic microphones are heavy and long, so they need a mount whose frame and bands are rated for that weight; a mount designed for a light condenser may sag. Small-diaphragm condensers and shotgun microphones use slim cages that clip around the body and rely on thin bands, which suit video and field use. Before buying, write down your microphone model, its weight and its body diameter, then compare them with the compatibility list on the mount maker’s page. This five-minute check prevents most returns and protects an expensive microphone.
Frequently Asked Questions
Do I need a shock mount?
If you use a sensitive condenser microphone on a stand or arm, a shock mount is usually worthwhile because bumps and footsteps are picked up easily. Dynamic microphones are less sensitive but still benefit in noisy rooms. If your mic is handheld, you do not need one.
Will a universal shock mount fit my microphone?
It can, if your microphone’s diameter lies within the mount’s stated range. Check the measurements and the maker’s compatibility list. If you are unsure, buy a mount made for your model.
How long do shock mount elastics last?
It depends on the material, use and storage. Reviewers generally report that elastics gradually stretch and eventually need replacing. Many makers sell replacement bands, so check availability before you buy.
Does a shock mount reduce plosives?
No. Plosives are caused by air from your mouth, which a pop filter or windscreen handles. A shock mount deals with vibration through the stand. Use both for the cleanest recordings.
Can I use a shock mount on a boom arm?
Yes. Most mounts use a standard stand thread, so they work on boom arms and stands. Confirm the arm can support the combined weight.
Why does my microphone still pick up desk noise?
Possible reasons include a cable pulling on the mount, worn elastics, a desk-mounted arm touching a vibrating surface, or an unsuitable mount. Check the cable slack, replace tired elastics and consider isolating the stand base.