Knowing the way to allow XMP generally is a large profit to a PC gamer because it means that you can modify your reminiscence settings in addition to reap the benefits of a lot quicker reminiscence speeds. If you discover that your system has some points multitasking or your loading occasions are a bit irritating, then enabling XMP may help treatment this problem.
It’s price noting that your BIOS will fluctuate primarily based on what model your motherboard is so might not appear like our BIOS under. However, all BIOS layouts are related sufficient so it’s best to be capable of discover your manner round or reap the benefits of the search function to search out the XMP settings.
It additionally could be price getting ahold of your motherboard’s guide in case you’re not sure of the way to boot into your BIOS or nonetheless are unable to determine the way to allow XMP. If it doesn’t have any point out then your system is probably not suitable.
Tools and necessities
- PC or laptop computer you wish to allow XMP on
Steps for the way to allow XMP
- Restart your PC or laptop computer and boot into the BIOS
- Navigate to the Advanced settings choice after which the Memory part
- Enable XMP and modify another settings as required
- Exit your BIOS and be sure you save your modifications or they might not apply
Step by step information on the way to allow XMP
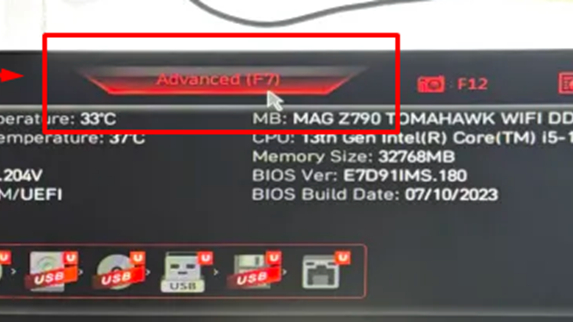
1. Restart your PC or laptop computer and boot into the BIOS
(Image: © Future)
Restart your PC or laptop computer and boot into the BIOS by repeatedly urgent the activation key in your keyboard as it’s switching on. The key shall be primarily based in your motherboard producer however frequent choices embody F1, F12 or Del.
2. Go to the Advanced settings
(Image: © Future)
Once in your BIOS, choose the Advanced choice to see extra settings. You also can press F7 to do that.
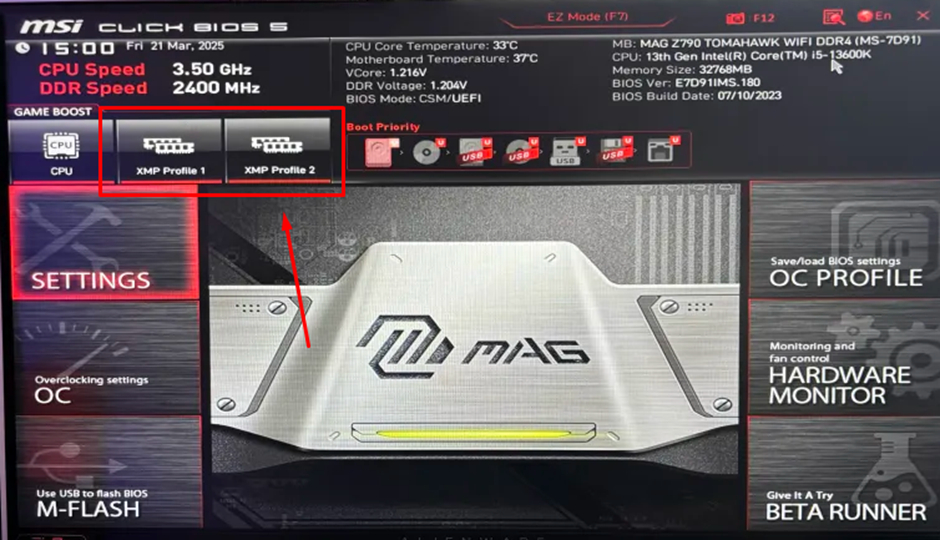
3. Enable XMP
(Image: © Future)
Some BIOS layouts might present you the XMP profile setting entrance and heart. Others might require you to navigate to your Memory settings and you may then discover it there. Turn on XMP by choosing a profile.
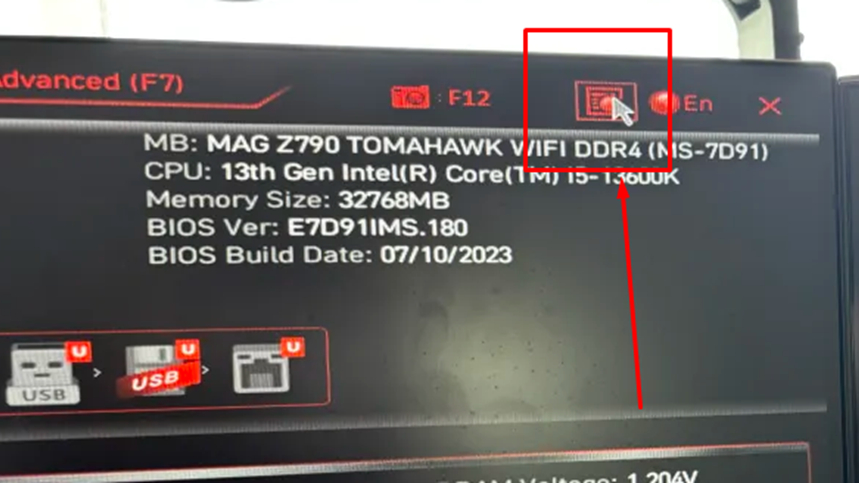
4. Search for XMP choices if you cannot discover them
(Image: © Future)
If you’re nonetheless unable to search out the XMP setting then it’s also possible to strive trying to find it. The search bar is often within the prime proper of the display, however it will rely upon the producer of your motherboard.
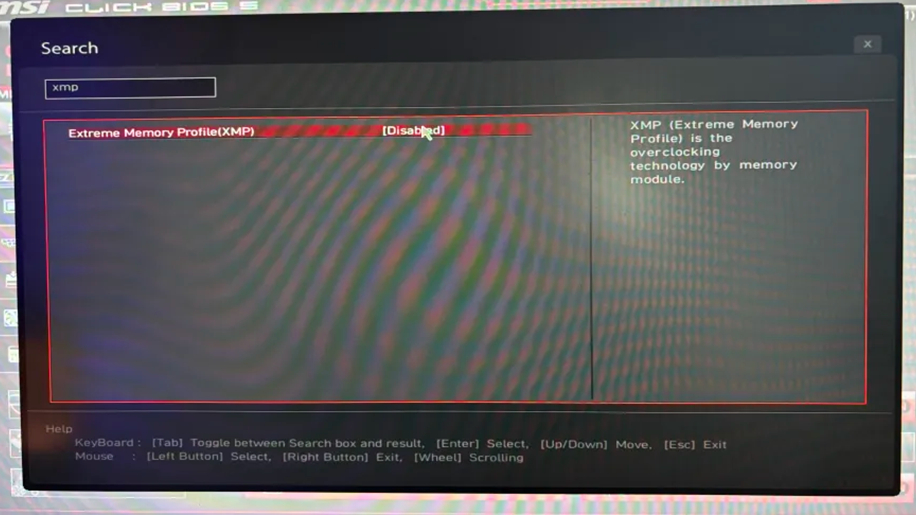
5. Enable the profile
(Image: © Future)
After trying to find the XMP setting, it ought to seem. You can then click on it and activate it. If it nonetheless doesn’t seem then your system is probably not XMP suitable.
6. Exit and save
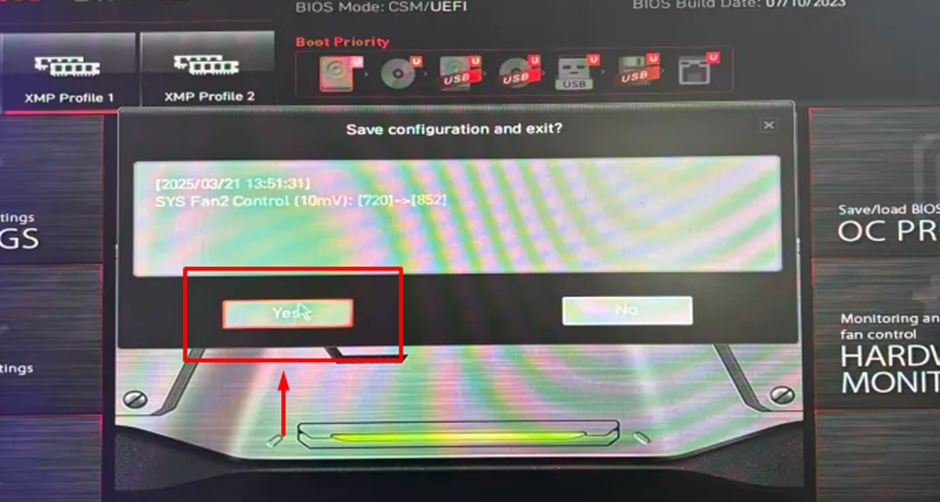
(Image: © Future)
Exit your BIOS and be sure you save the settings so that they apply. Your PC will then restart.
Final ideas on posting on gifting a recreation through Steam
Knowing the way to allow XMP can give you a serious increase when gaming in your PC.
XMP permits for a lot quicker reminiscence, that means you’ll have a greater time multitasking similar to having Discord and a recreation open on the similar time. You additionally would possibly profit from quicker loading occasions in recreation so that you don’t have to sit down without end in loading screens.