If you’ve had an e-mail account for any size of time, you’ll understand how rapidly your inbox can grow to be cluttered and unruly. Trying to find that essential appointment or the most recent demand out of your boss generally is a wrestle whenever you’re overwhelmed with coupons, newsletters, social media updates, and receipts.
Fortunately, that is one space the place Apple Intelligence generally is a actual lifesaver. Apple’s AI system consists of all types of helpful options for iPhones, together with a greater approach to type your emails. Specifically, Apple Intelligence can mechanically type your messages into related classes with out you having to raise a finger.
These embody Primary, Transactions, Updates, and Promotions. Primary is your fundamental inbox, and it’s the place you will discover private messages and time-sensitive emails. Transactions homes confirmations, receipts, and transport alerts, whereas Updates comprises information, newsletters, and social updates. Finally, Promotions shops coupons and messages referring to gross sales.
In the under information, we have damaged down easy methods to navigate Mail categorization in your iPhone, in addition to easy methods to flip off the function for those who’re (understandably) not a fan of Apple’s computerized tidying-up.
Tools and necessities
- Apple’s Mail app
- iOS 18.2 or later
- An Apple Intelligence-compatible iPhone
Quick steps
- In the Transactions, Updates, or Promotions classes, open an e-mail to get a “digest” view of all messages from that sender
- You can change a sender’s class by tapping the Reply button and choosing Categorize Sender
- To disable classes, faucet the … button, then choose List View
How to make use of the digest view
Digest view presents a sender’s emails in a listing, permitting you to browse backwards and discover previous messages from them with out having to make use of the search perform.
1. Pick a class
(Image: © Future)
Tap one of many class icons on the high of the display. This will mechanically shift to the part you’ve gotten chosen.
2. Digest view
When you view an e-mail in any class apart from Primary, Mail will present a “digest” view of messages from this sender.
3. Sender information
The sender seems in a field on the high, with a observe on what number of messages you’ve acquired from them. You can scroll again via previous messages to see extra from the identical sender.
4. View all messages
There’s a small up/down arrow close to the highest of the web page. Tap this to vary from the chosen class to all messages from this sender.
5. Not for Primary mail
Note that this digest view doesn’t seem within the Primary class.
How to vary a sender’s class
Apple Intelligence normally places emails in the correct classes, however for those who discover that it is received one thing flawed, you may manually transfer a message to the proper place.
1. Reply
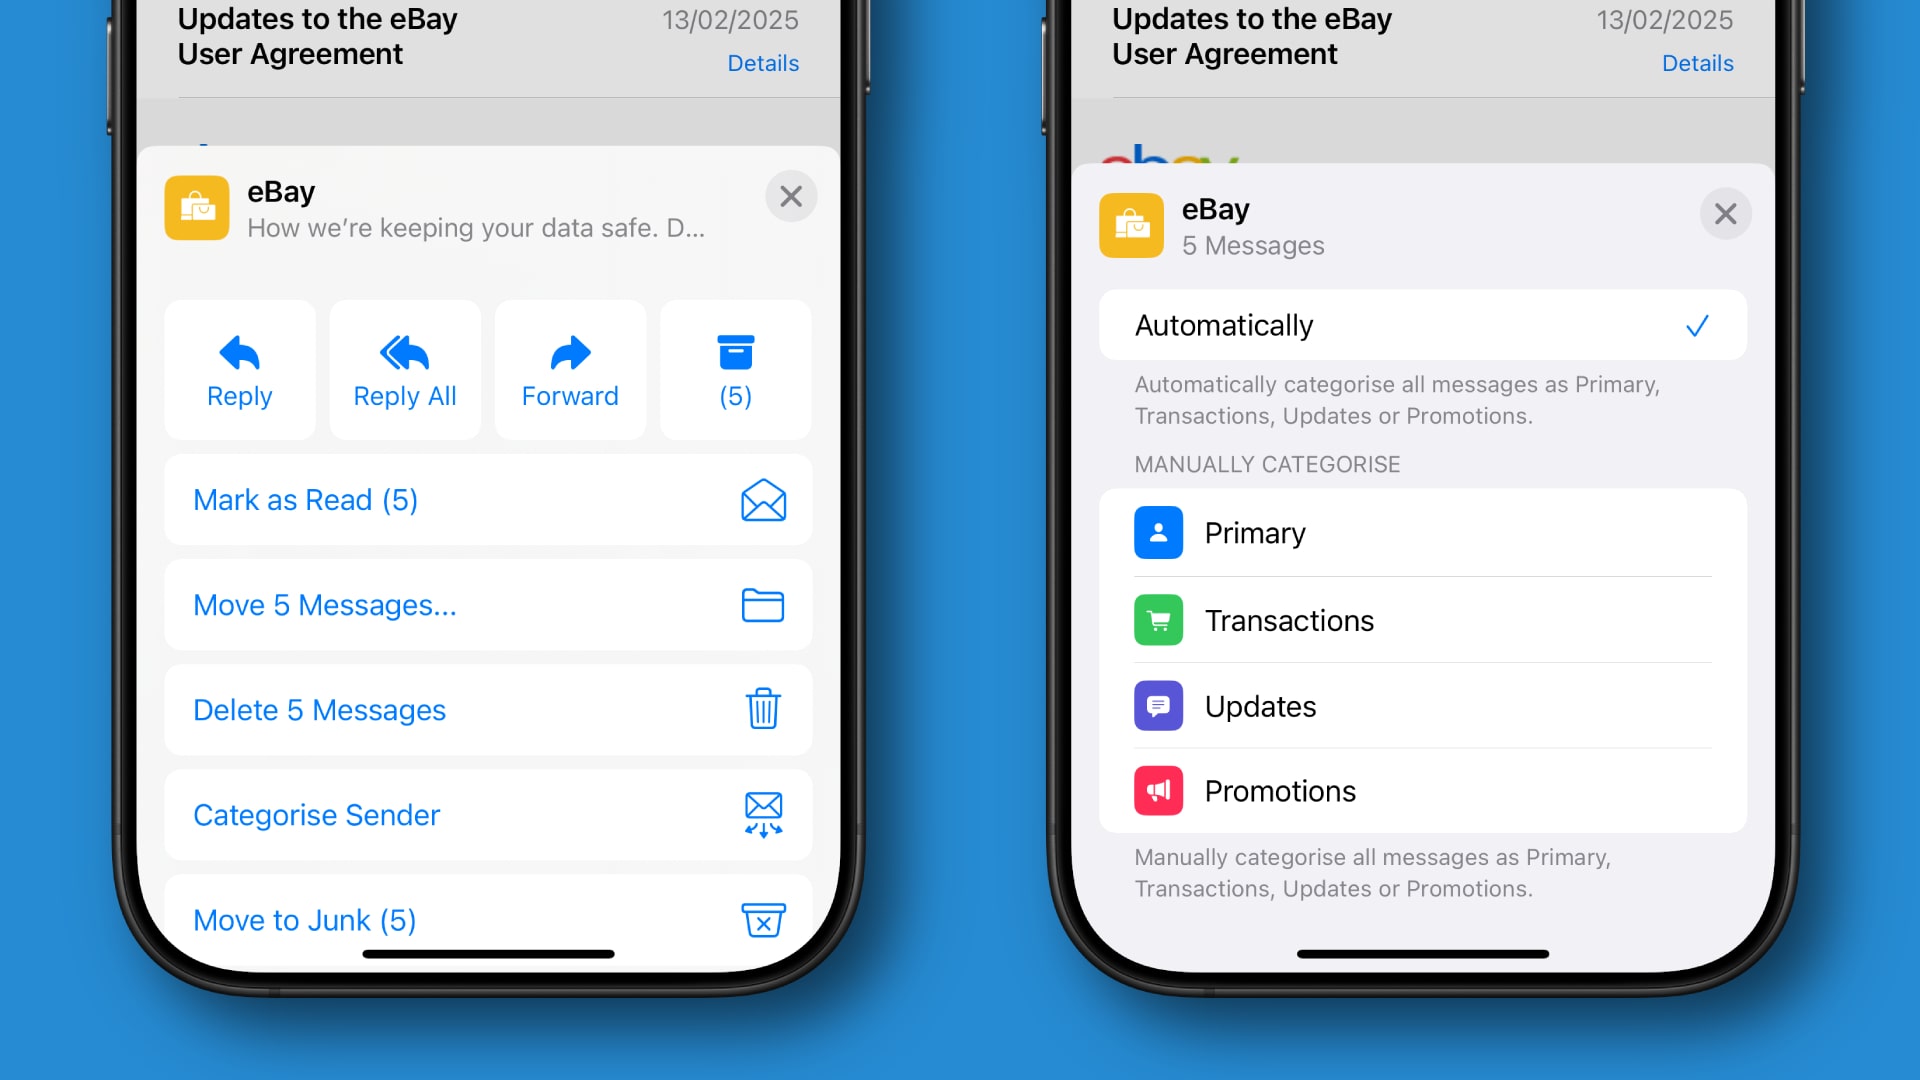
(Image: © Future)
In the Primary class, open a message and faucet the Reply button (it’s a leftward-facing arrow within the backside toolbar).
2. Categorize Sender
From right here, choose Categorize Sender within the record of choices, then faucet a class from the record. Alternatively, as an alternative of tapping a class, you may choose Automatically to let iOS resolve which class to make use of for you.
3. Alternative methodology
Things work just a little in a different way in case you are making an attempt to vary the class of a message within the Transactions, Updates, or Promotions sections. Instead, faucet a message in one among these classes to open it.
4. Finish up
Tap … within the top-right nook, then choose Categorize Sender. Now select a class from the record or decide Automatically to let iOS deal with the categorization in your behalf.
How to disable Mail classes
Categories not your factor? It simply takes a few fast faucets to disable them and get again to a standard inbox view.
1. Disable all classes
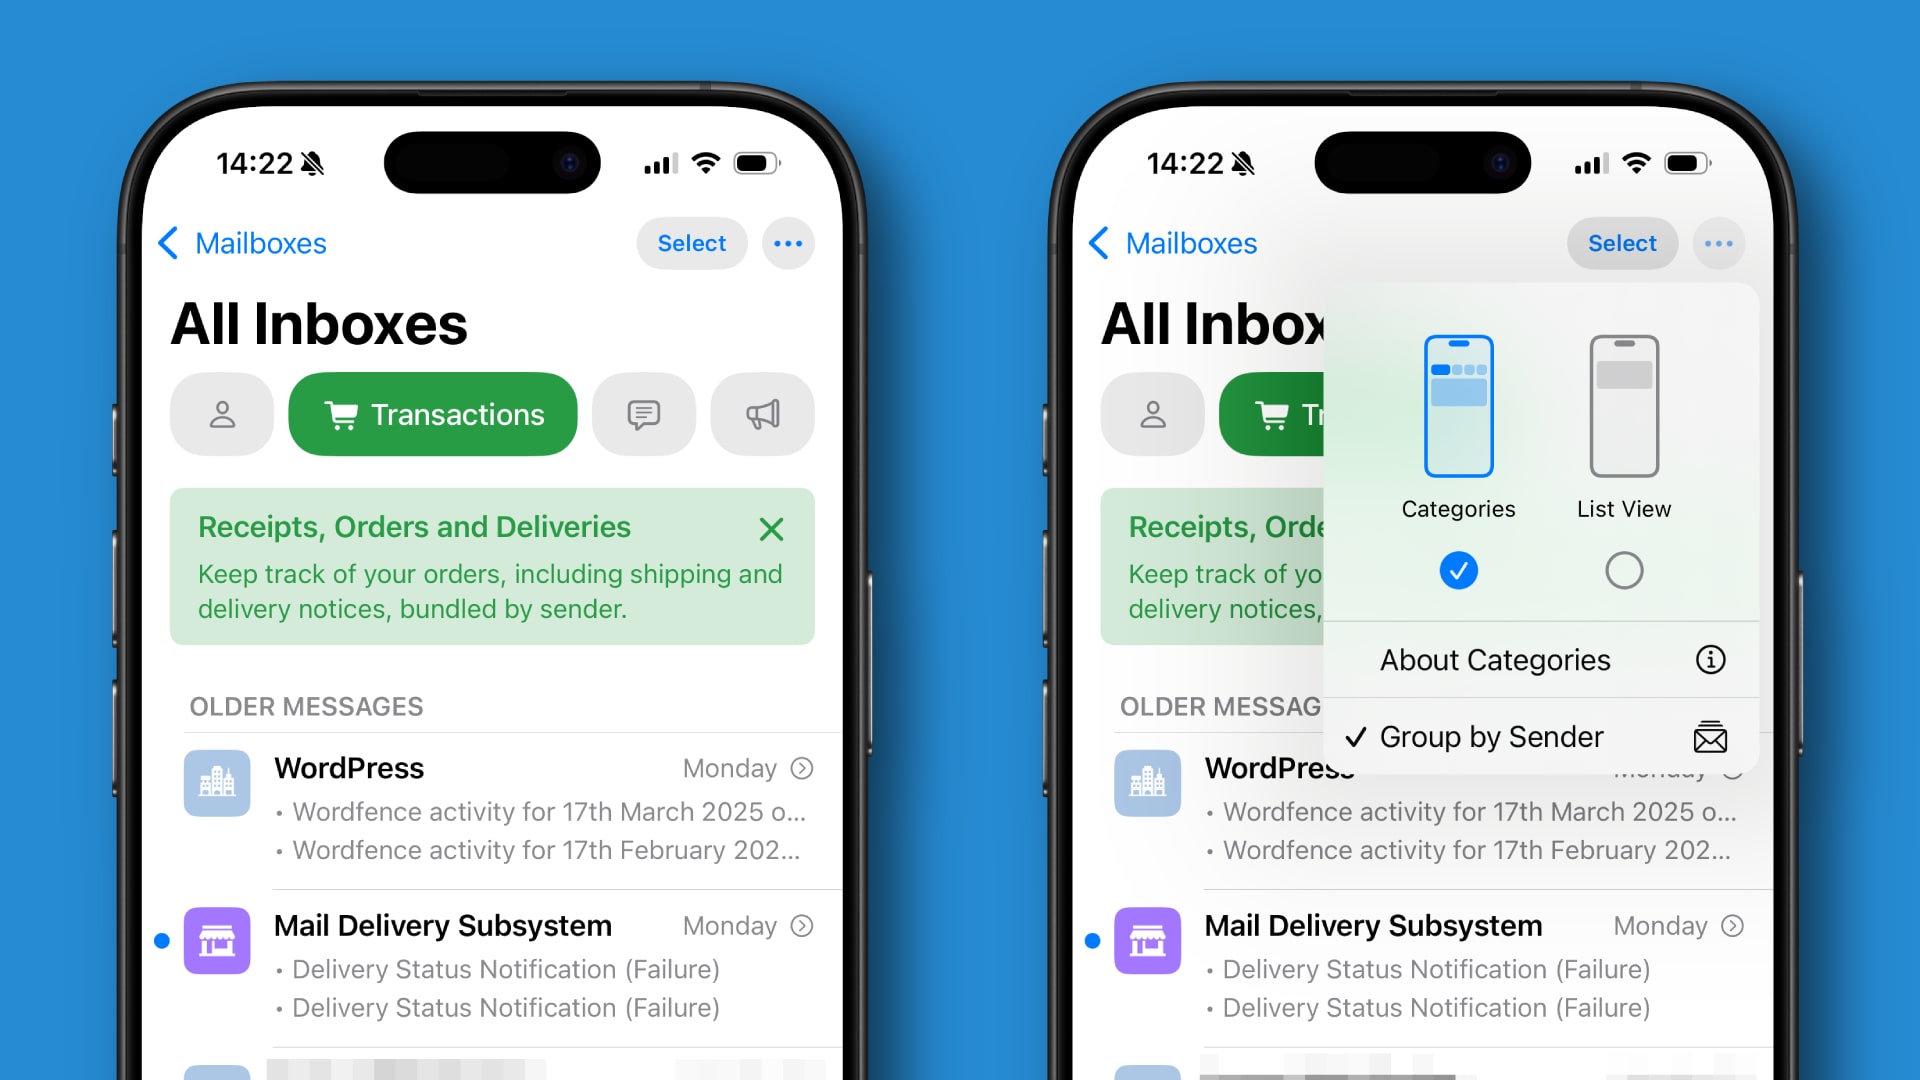
(Image: © Future)
Regardless of which class you might be in, faucet the … button within the top-right nook, then choose List View. This will disable all classes.
2. Restore classes
To restore classes, faucet … once more and select Categories.
3. Show all mail
You can even view all of your mail in an uncategorized view with out having to disable classes. Simply faucet the chosen class on the high of your display. For occasion, in case you are within the Transactions class, faucet Transactions once more. This will reveal a beforehand hidden All Mail class on the right-hand facet of the classes record.