For those that wish to reap the benefits of a couple of display, then a a number of monitor setup is the way in which to go. Many folks, myself included, discover having a number of displays boosts productiveness. However, the setup course of is usually a bit finicky. So to assist, we’ll be protecting how one can handle a number of displays in Windows 11 with a step-by-step tutorial under.
There are many settings you’ll have the ability to alter when managing a number of displays in Windows 11. This consists of decision settings for every display, orientation for those who’ve determined to make use of your monitor vertically, or altering the place of your screens for a seamless expertise.
Once you’ve arrange your displays as soon as, your PC will bear in mind these settings and also you gained’t want to return again and handle a number of displays in Windows once more until you wish to change one thing.
Tools and necessities
- PC or laptop computer
- The displays you wish to handle (already plugged into your PC)
- Windows (this tutorial applies to each 10 and 11)
Steps for how one can handle a number of displays in Windows 11
- Right-click in your empty desktop and choose Display settings
- Press the Multiple shows possibility and a menu ought to seem
- Hit the Identify button to search out out which monitor corresponds with which display
- Select the display you wish to alter and alter your settings as required
Step by step information on how one can handle a number of displays in Windows 11
1. Open Display settings
(Image: © Future)
First, right-click in your empty desktop after which click on the Display settings possibility when it seems.
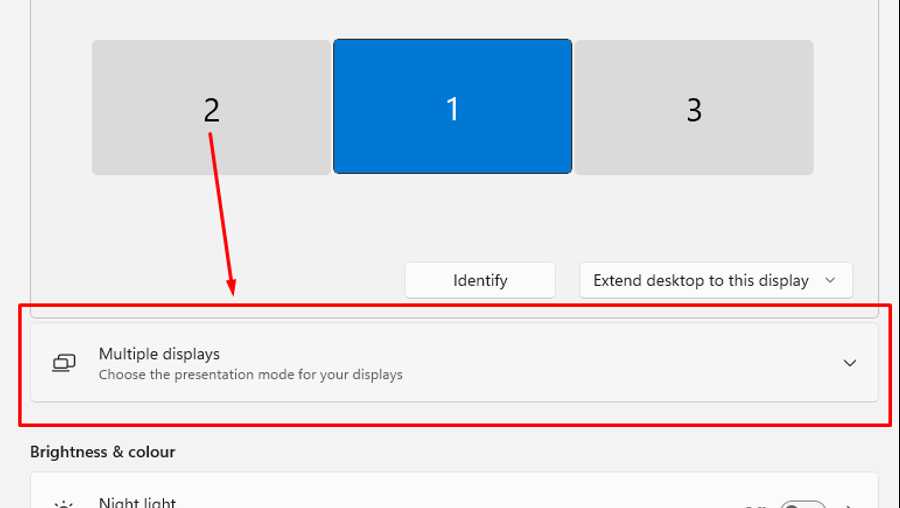
2. Access settings for a number of displays
(Image: © Future)
Your show settings ought to open up,. In the menu that seems, hit the Multiple shows possibility to indicate a menu which is able to mean you can alter your settings.
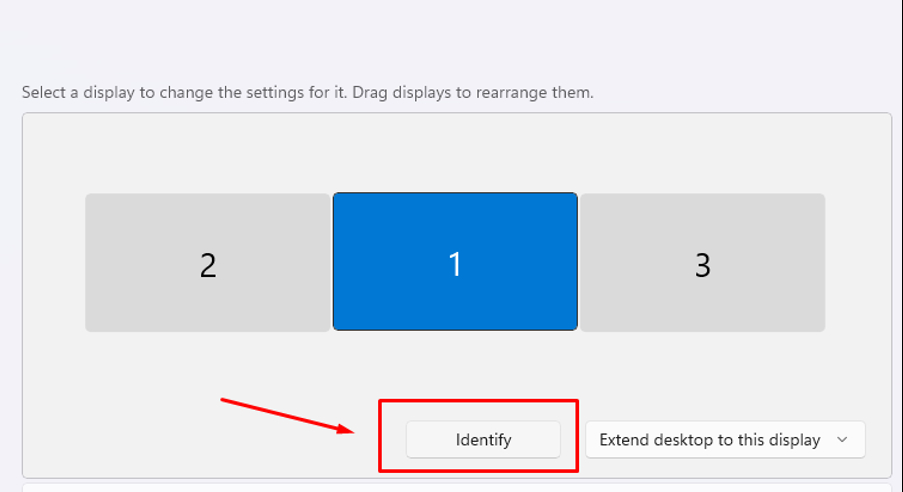
3. Identify your displays
(Image: © Future)
Hit the Identify button, which is slightly below the icons of your screens, and this may show numbers on every monitor that correspond with the screens proven within the settings window (as proven within the screenshot above). Keep observe of which is which so you recognize what to regulate.
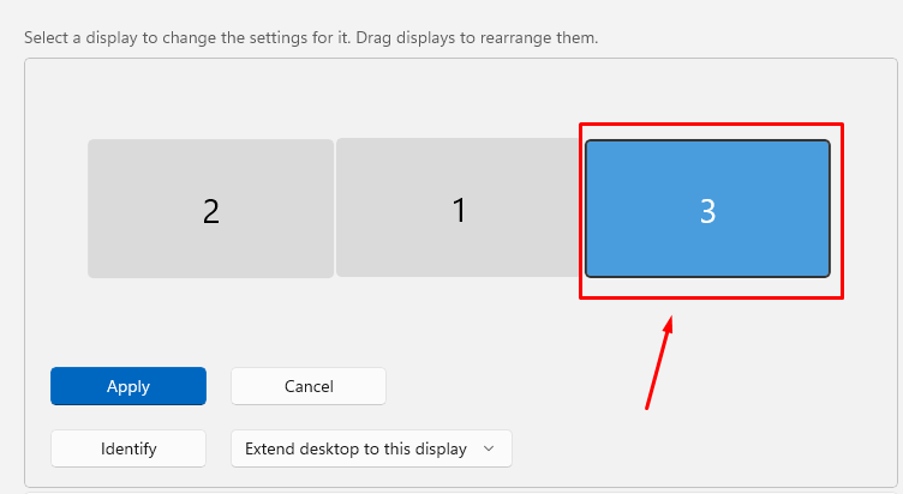
4. Select the display you wish to handle
(Image: © Future)
Select the display you wish to alter by urgent or clicking on it. You can drag inside the grey field to regulate the positioning if wanted.
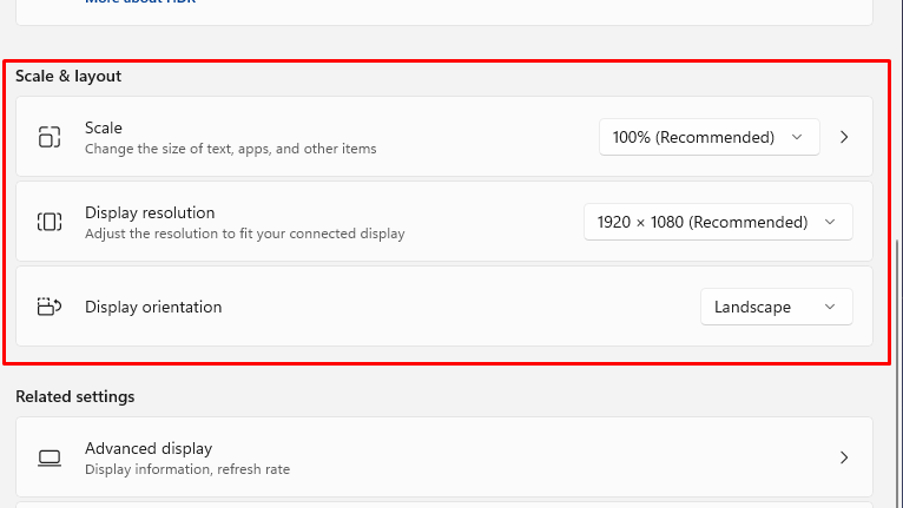
5. Adjust the display
(Image: © Future)
With the display you wish to alter chosen, you’ll be able to scroll down within the settings to search out data on the size, decision and orientation. Adjust these as required till you’re joyful.
You can even hit the Advanced show possibility slightly below to vary the refresh fee.
6. Apply your adjustments
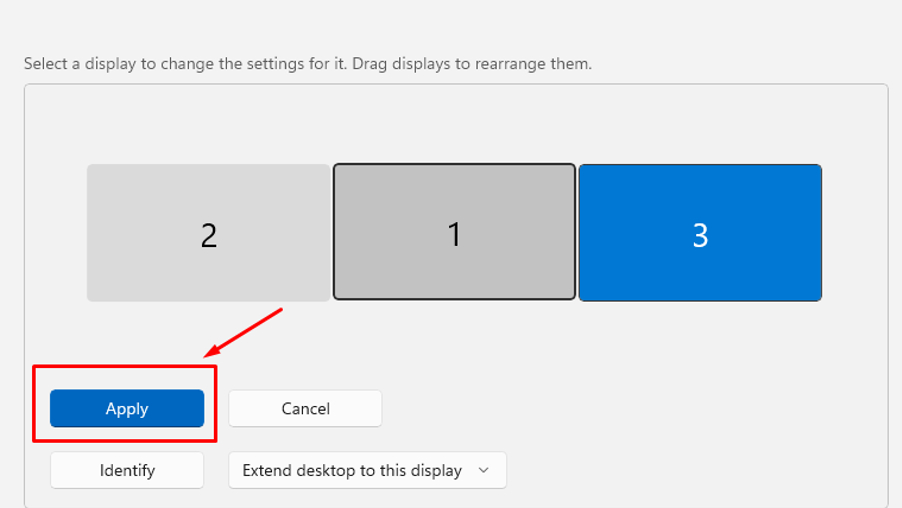
(Image: © Future)
Once you’re performed adjusting, scroll again as much as the highest of the settings and ensure you hit the Apply button to maintain the settings you’ve simply modified.
Final ideas on managing a number of displays in Windows 11
For those that are hoping to utilize a number of screens, then adjusting settings to make sure your entire displays work collectively seamlessly is important.
Be certain to regulate all the settings as you require and for those who’re undecided what to vary them to, Windows 11 helpfully highlights which choices it recommends primarily based in your monitor so that you’re not utterly in the dead of night.
As said above, after finishing this setup as soon as, your system will bear in mind your displays and maintain the settings the identical.