As knowledgeable photographer who makes use of a number of the finest cameras, I by no means thought I’d ever say one thing like this – smartphones are wonderful instruments for pictures. There loads of apps that may assist you to plan shoots, discover areas and share your work, and most of all you may have a high-quality digicam in your pocket, with you always. We’ve even curated a finest cameraphone information that can assist you choose the fitting one.
If you are a severe photographer like me but typically end up out and about with out your mirrorless digicam, it is your trusty smartphone that has to select up the slack. I nonetheless imagine my Samsung Galaxy S23 Ultra isn’t anyplace close to nearly as good as my skilled digicam equipment, however by capturing in uncooked picture format – sure, most flagship smartphones can seize in uncooked – and processing images in Adobe Lightroom Mobile, it is doable to attain skilled picture high quality, like I used to be capable of lately (see beneath).
Raw format lets you make adjustments to paint and publicity in a method which you could’t with the default JPEG / HEIF format, particularly with a strong cellular editor corresponding to Adobe Lightroom Mobile. Many smartphone can seize in uncooked format, normally in a Pro mode.
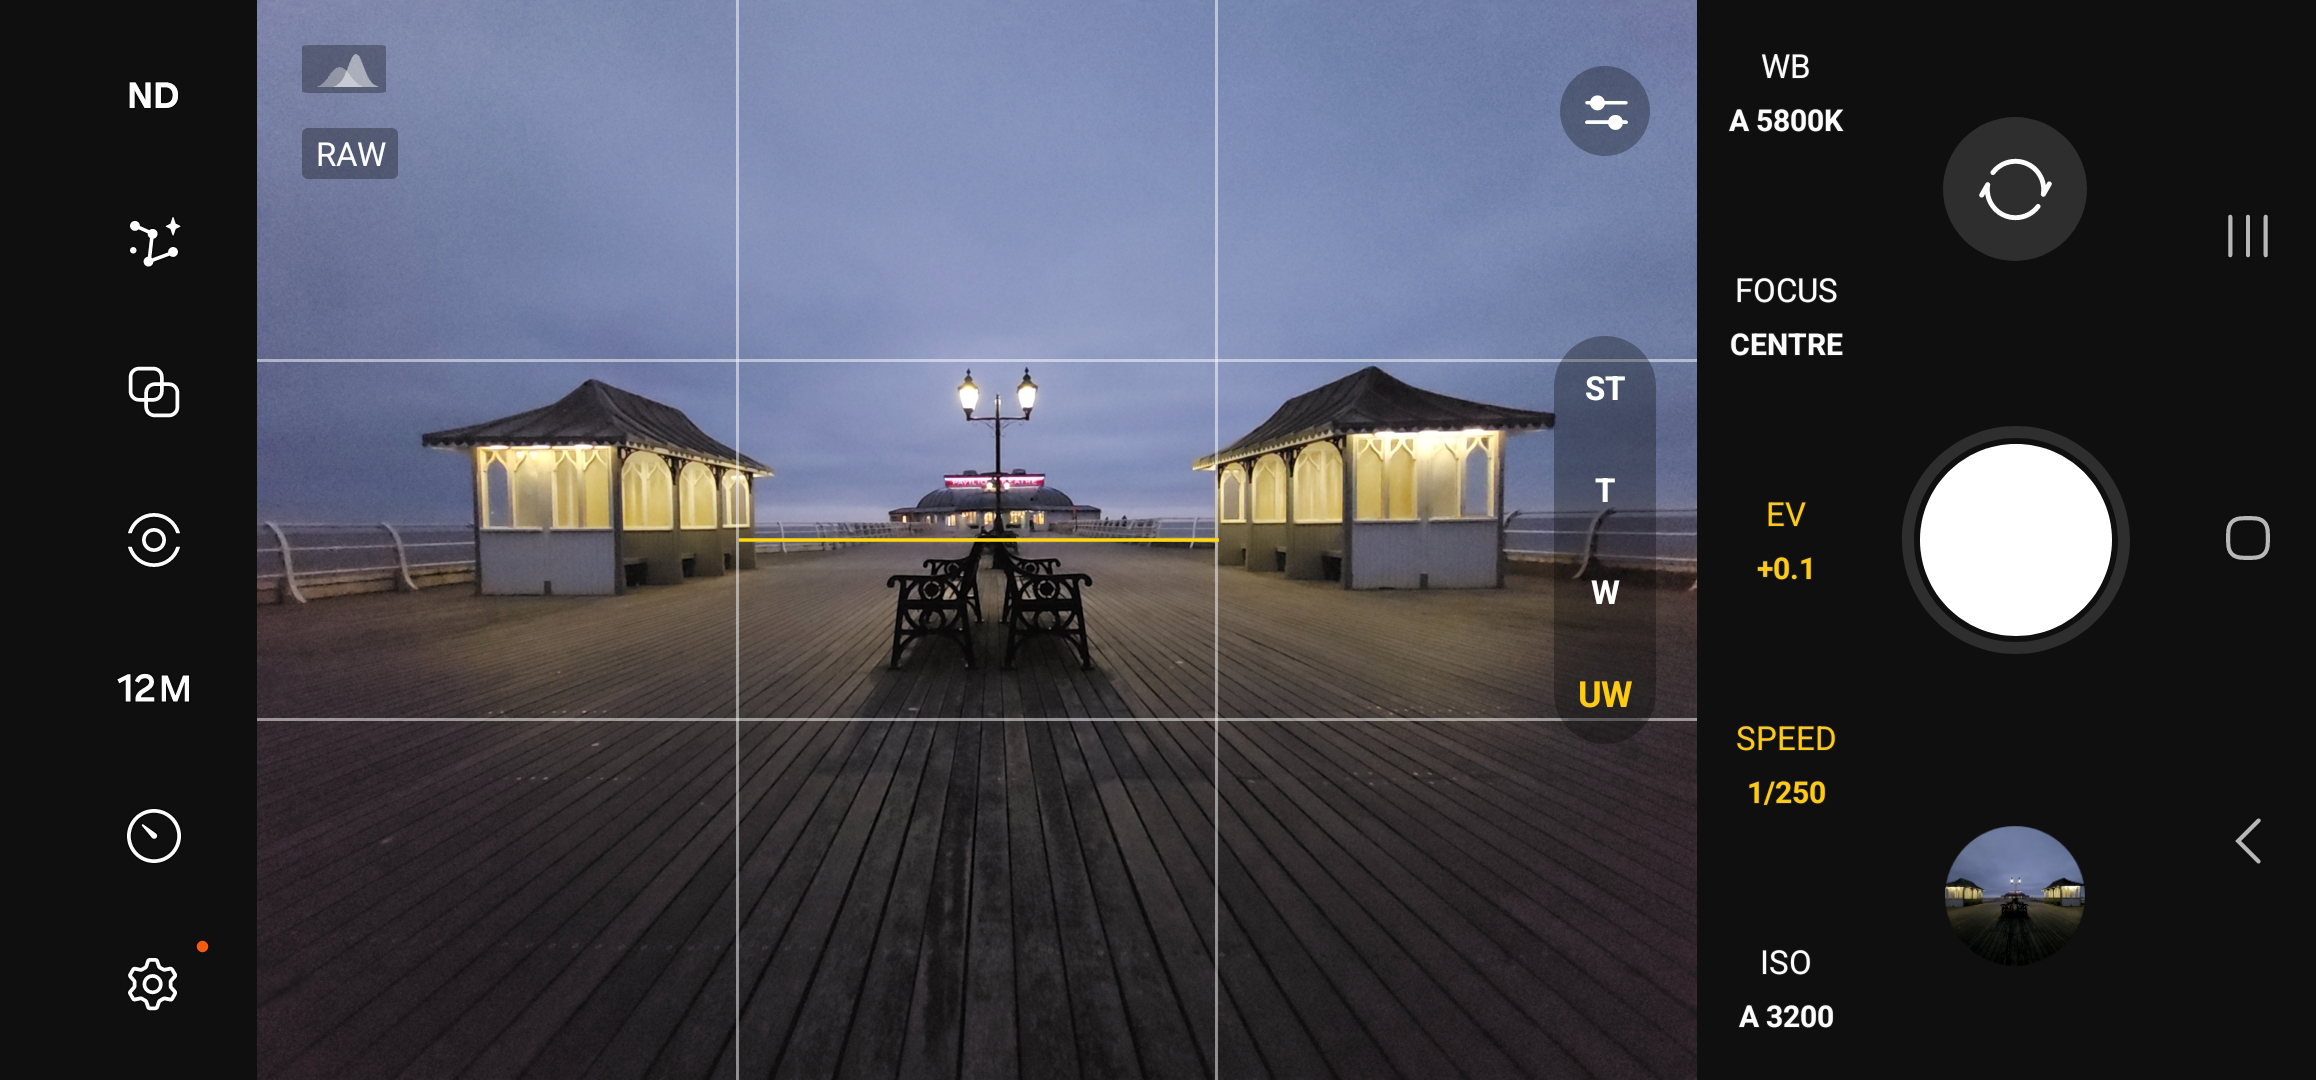
As a Samsung Galaxy 23 Ultra proprietor, I may seize on this format utilizing the Expert Raw app, which must be downloaded from the Galaxy Store. Expert Raw gives handbook, semi-automatic and computerized management of the digicam settings relying on choice. I normally shoot in handbook, however generally use Auto ISO and Auto White Balance in low mild circumstances with blended mild sources.
Expert Raw can seize 12MP and 50MP 16-bit uncooked information in DNG format, however the caveat right here is that at 12MP you may shoot in UW (ultra-wide), W (huge), T (telephoto) and ST (tremendous telephoto) whereas 50MP is simply obtainable in W (huge). 12MP gives a print measurement of simply over A4 and loads of decision for on-line use, plus it additionally permits you to shoot within the cellphone’s astrophotography and a number of publicity modes.
Shooting in your cellphone’s digicam app Pro mode
What you want
– A smartphone with a Pro mode and uncooked seize
– An app that may course of uncooked information, corresponding to Adobe Lightroom
– Potentially a assist to regular your cellphone
– Some edits require Adobe’s paid subscription Photography plan
Shooting in Expert Raw isn’t any completely different than capturing with the Galaxy Ultra’s commonplace digicam app in Pro mode. Most smartphones could have an equal Pro mode. You can depart the entire digicam settings in auto, a mix of auto and handbook or set every part to handbook. Since the aperture in smartphone cameras is mounted, you received’t have to fret about this. Most apps additionally permit you to view a dwell histogram to assist publicity should you discover this convenient.
All you want is your smartphone with uncooked seize and for this instance, Adobe Lightroom Mobile (there are highly effective options too). If you’d prefer to shoot lengthy exposures which might enhance low mild picture high quality and get inventive results, you will want to repair your cellphone to a assist, corresponding to a tripod. For most individuals, capturing handheld is the way in which to go as a result of by the point you are including extra equipment like a tripod, it’s possible you’ll as effectively be carrying a full digicam equipment. However, should you solely shoot with a cellphone, a cellphone tripod mount and an ultra-lightweight journey tripod might be a worthwhile funding.
Editing in Lightroom Mobile
Image 1 of 2
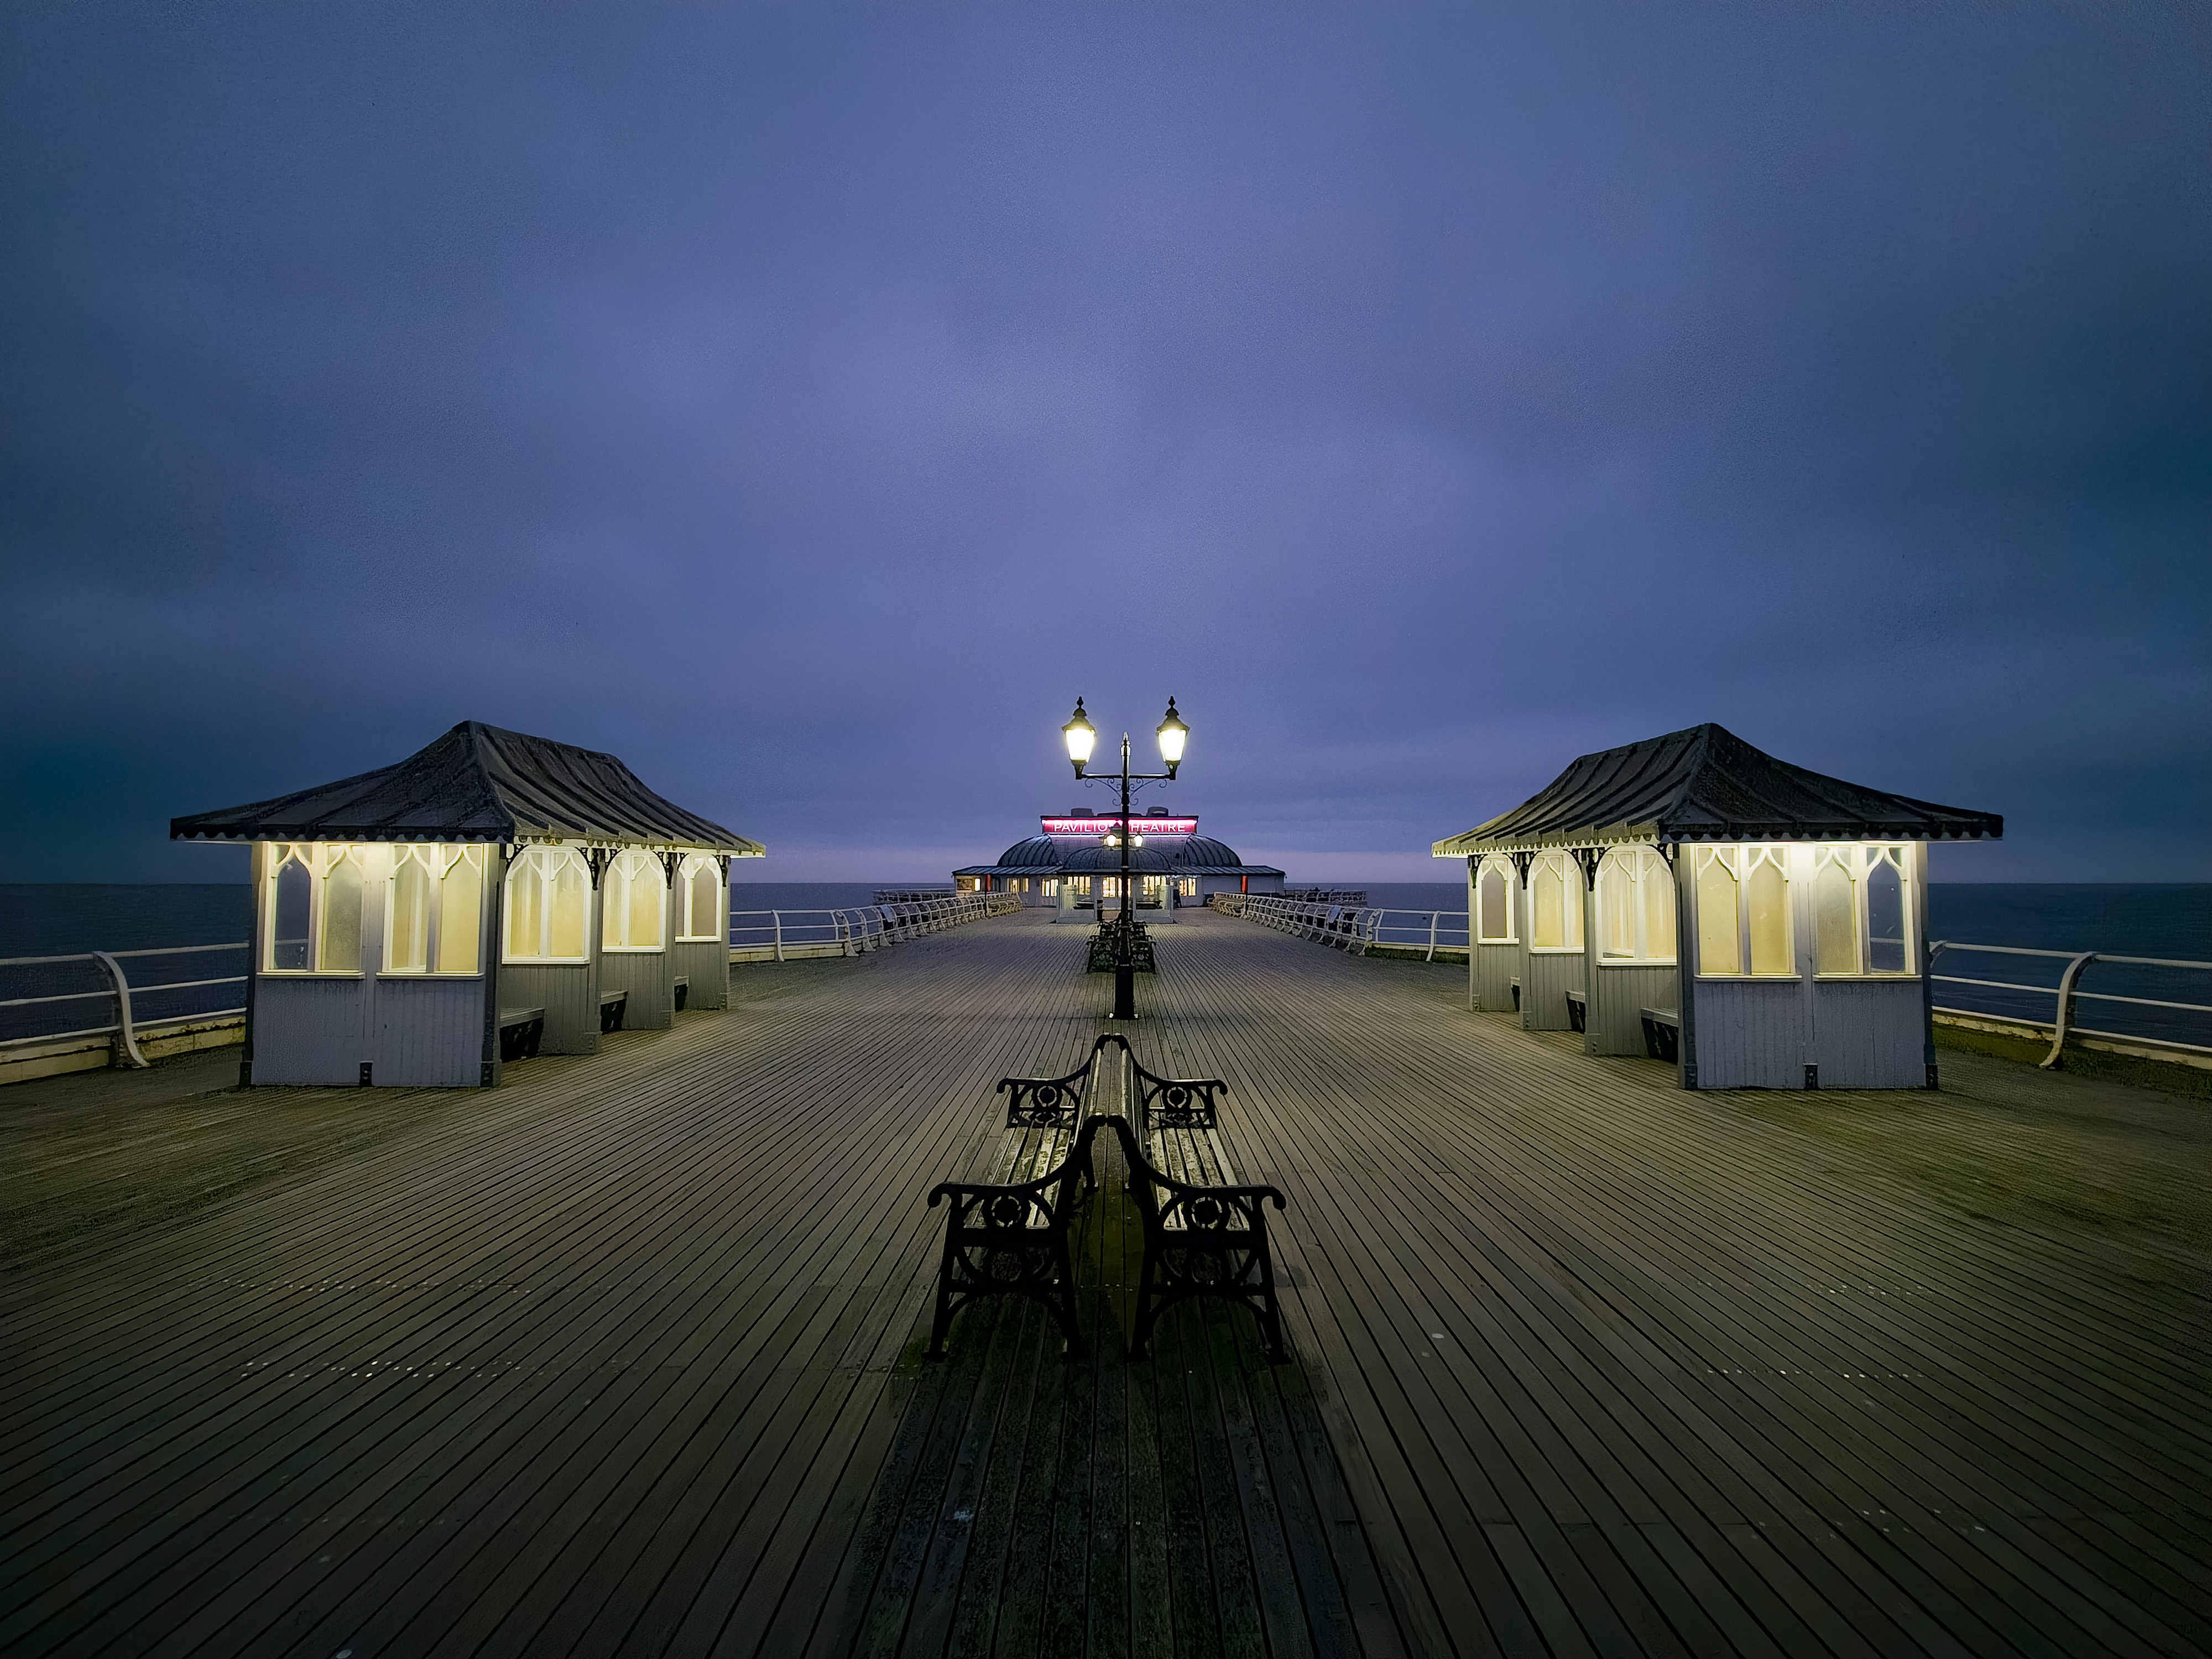
The closing picture right here was edited in Lightroom Mobile on my Samsung Galaxy S23 Ultra, however the screengrabs beneath have been taken from an Android pill to supply bigger panorama format grabs which can be simpler to view right here. The identical settings have been copied from my cellphone to the pill to make sure the outcomes are similar.
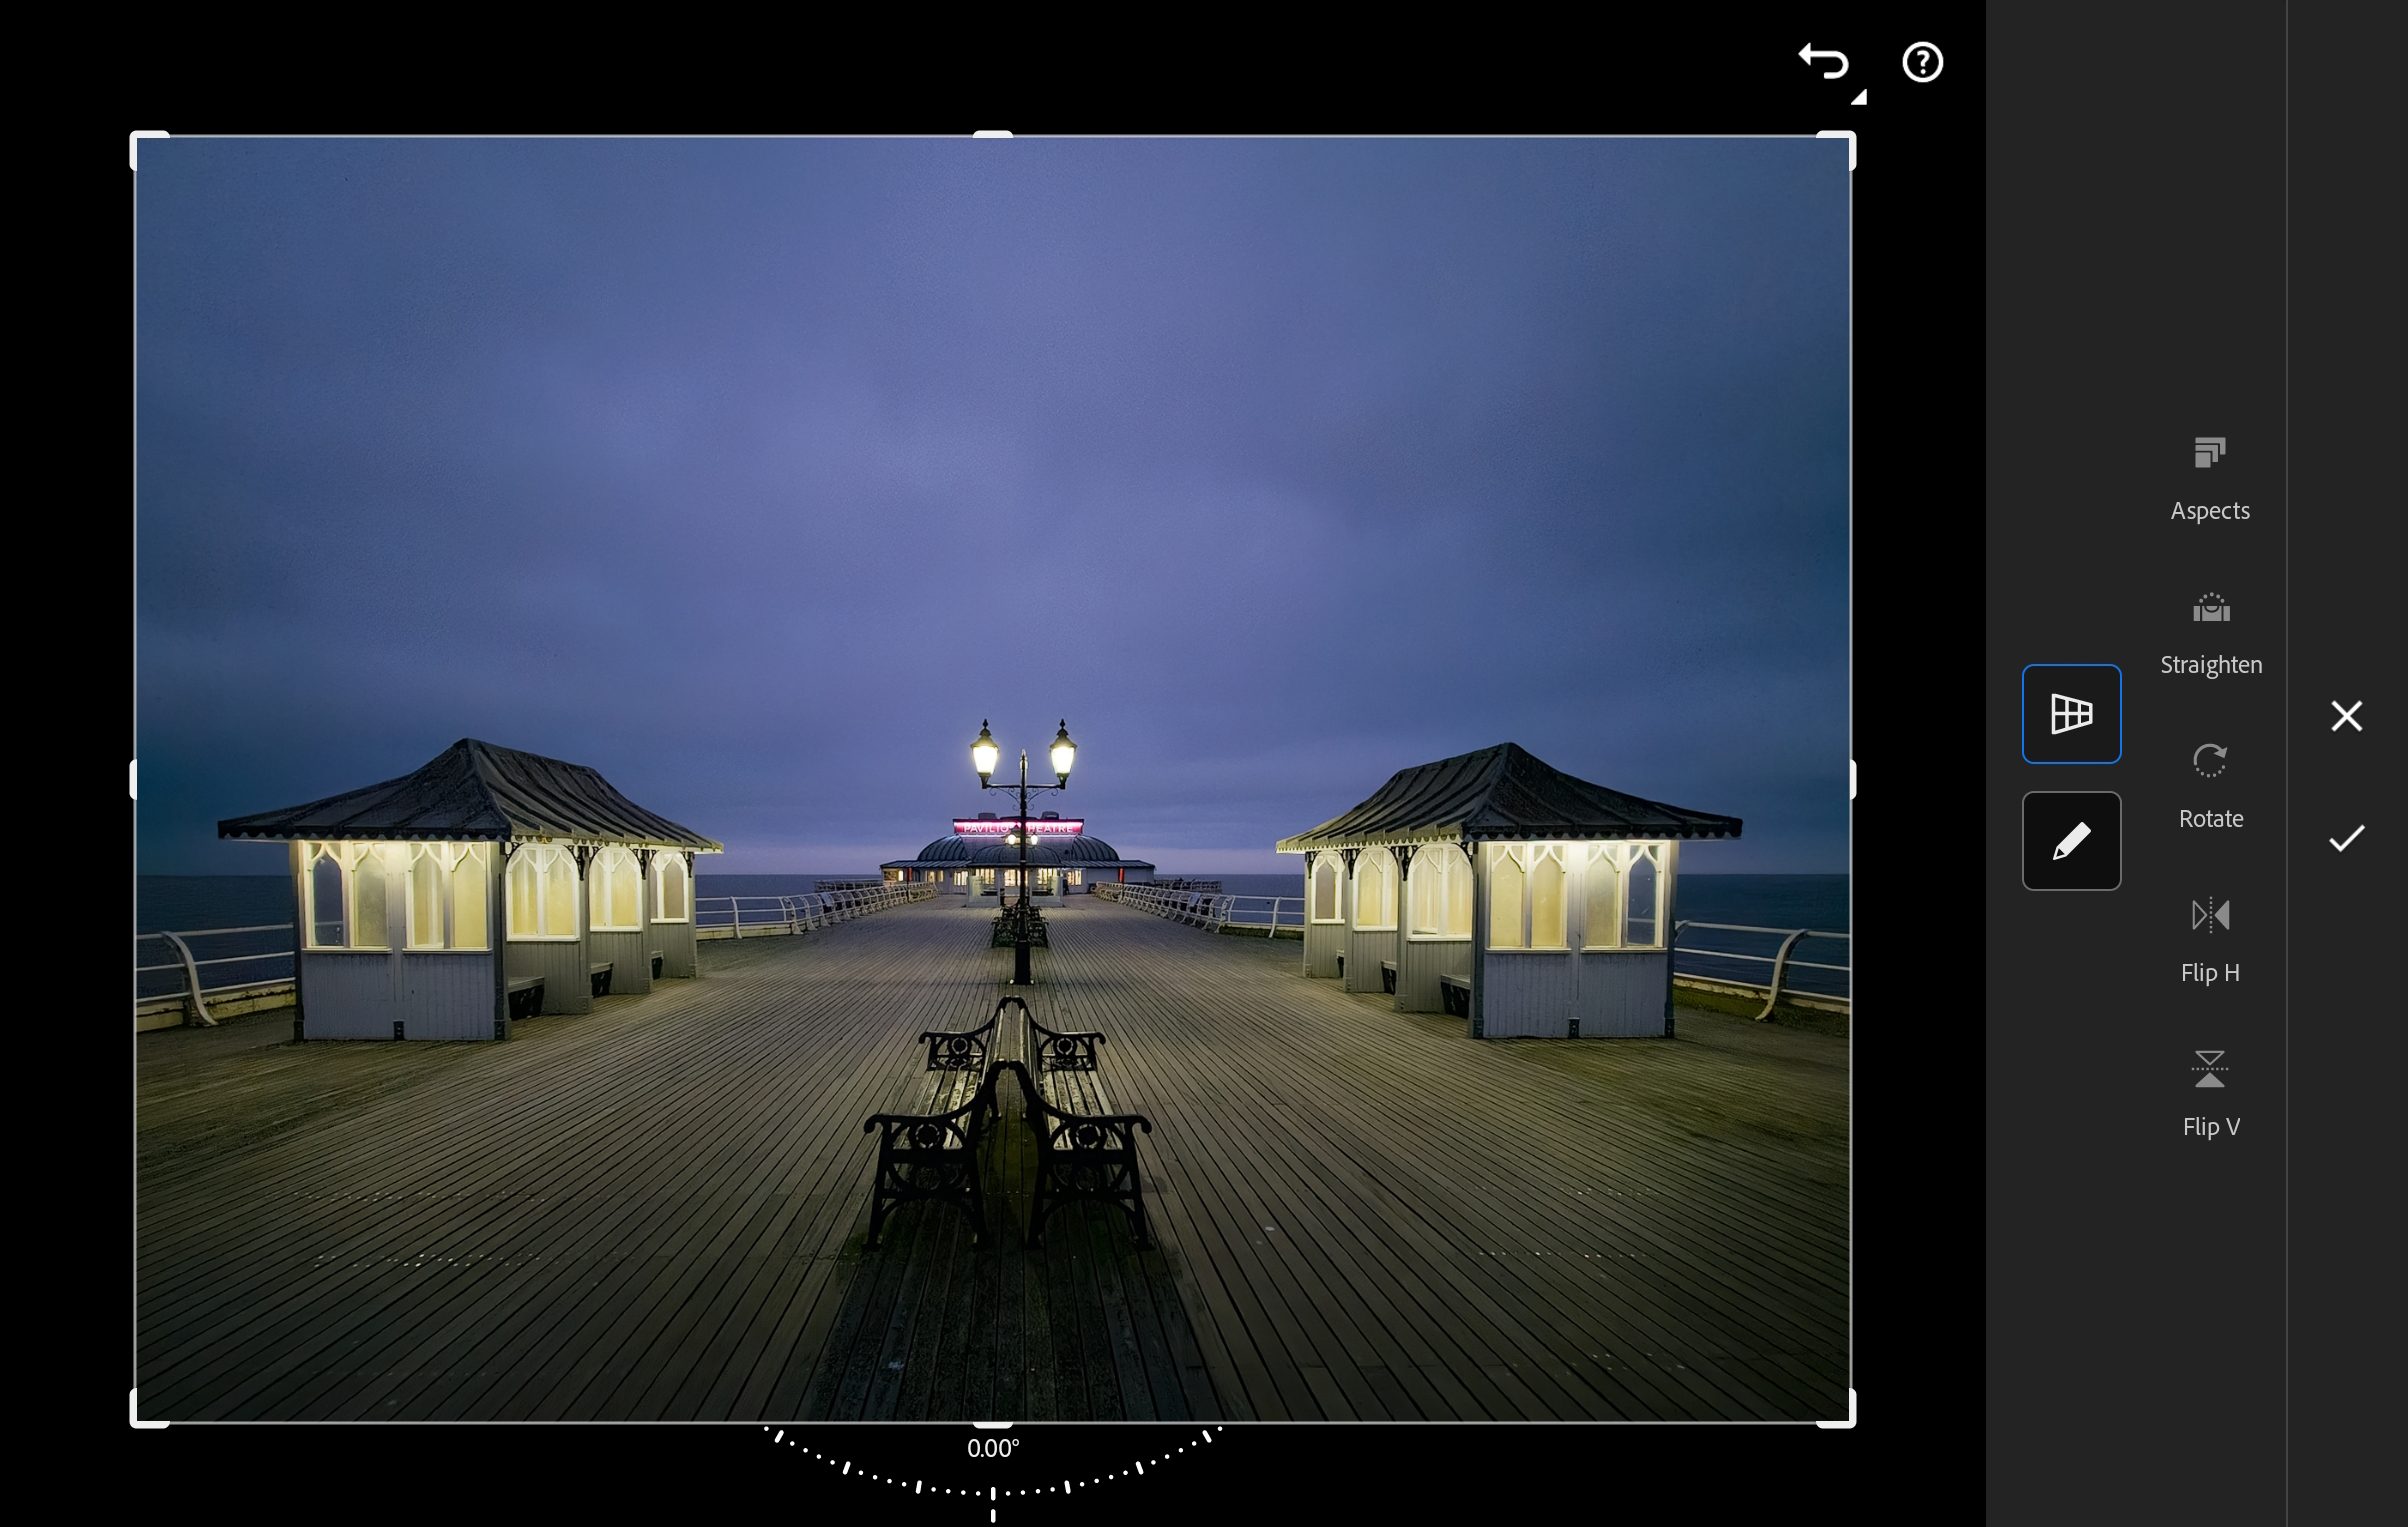
1. Removing perspective distortion
Some photographs will must be cropped barely whereas others, like this one, would require perspective correction. This is achieved just by clicking on the highlighted button to appropriate vertical and/or horizontal distortion.
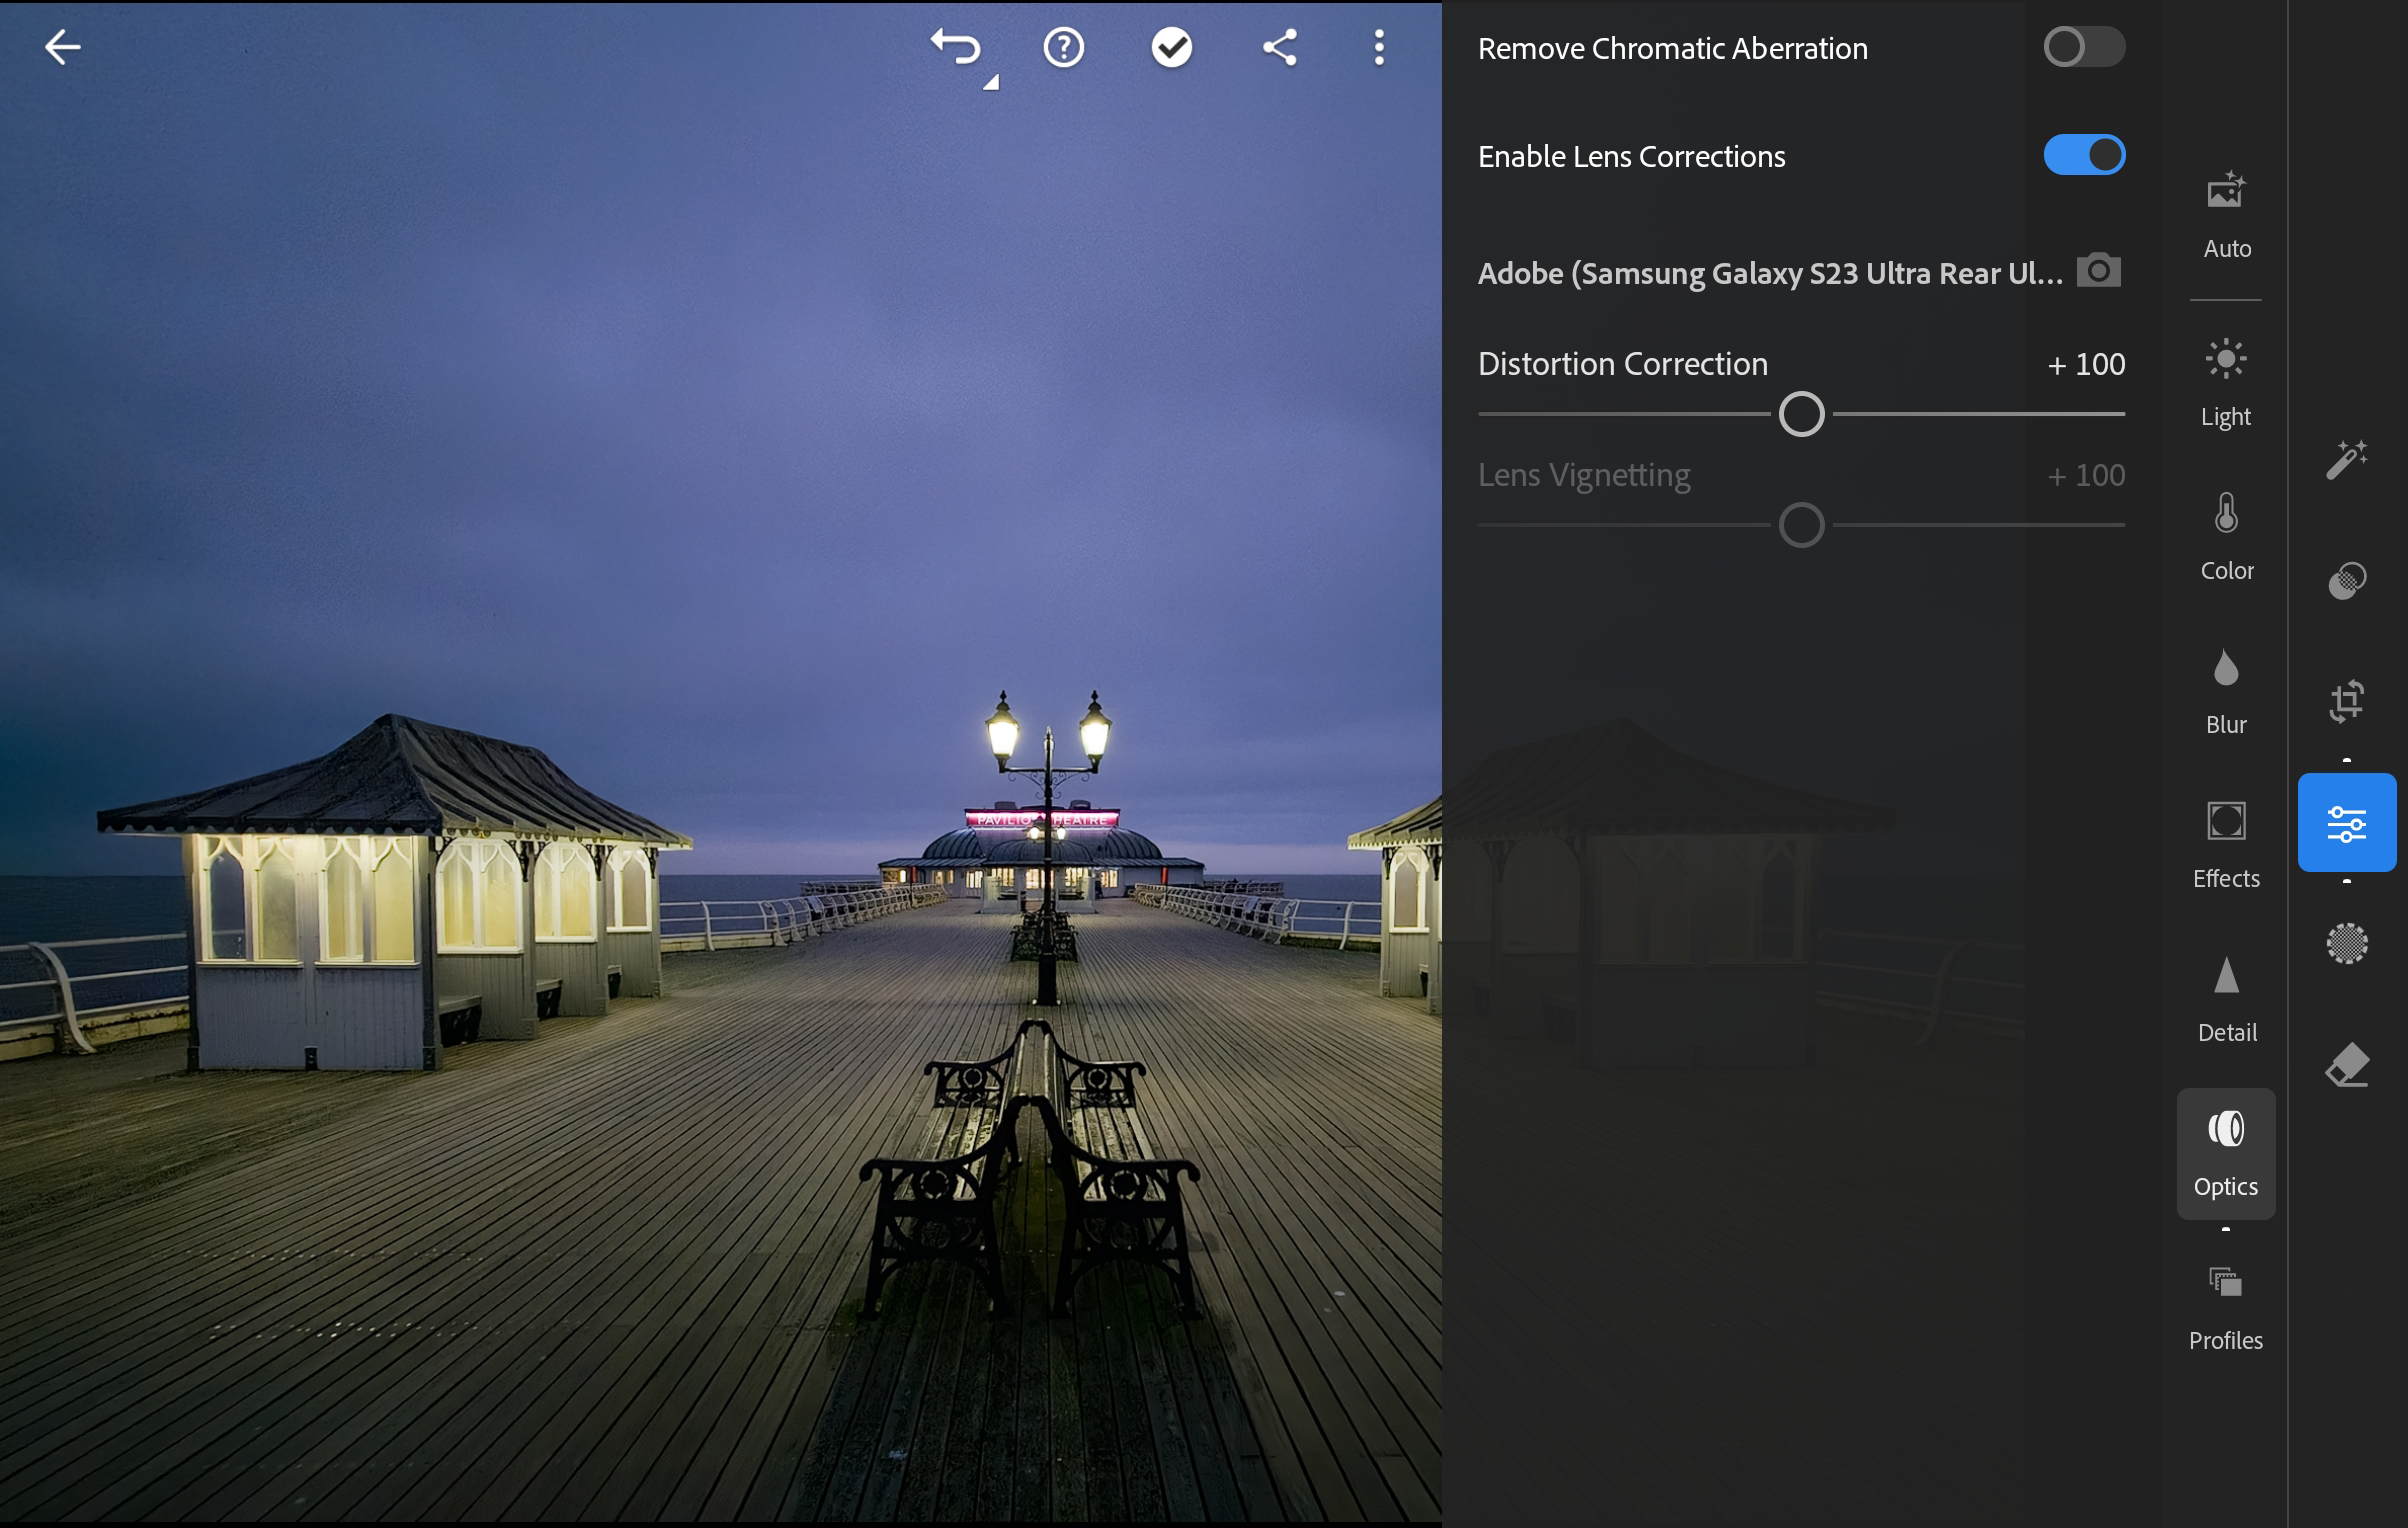
2. Applying Lens Corrections
Lightroom Mobile consists of lens profiles for some telephones, so head to Optics inside the Adjustments tab and click on on Enable Lens Corrections. This may be adjusted additional utilizing the Distortion Control slider if crucial; a grid seems to help.
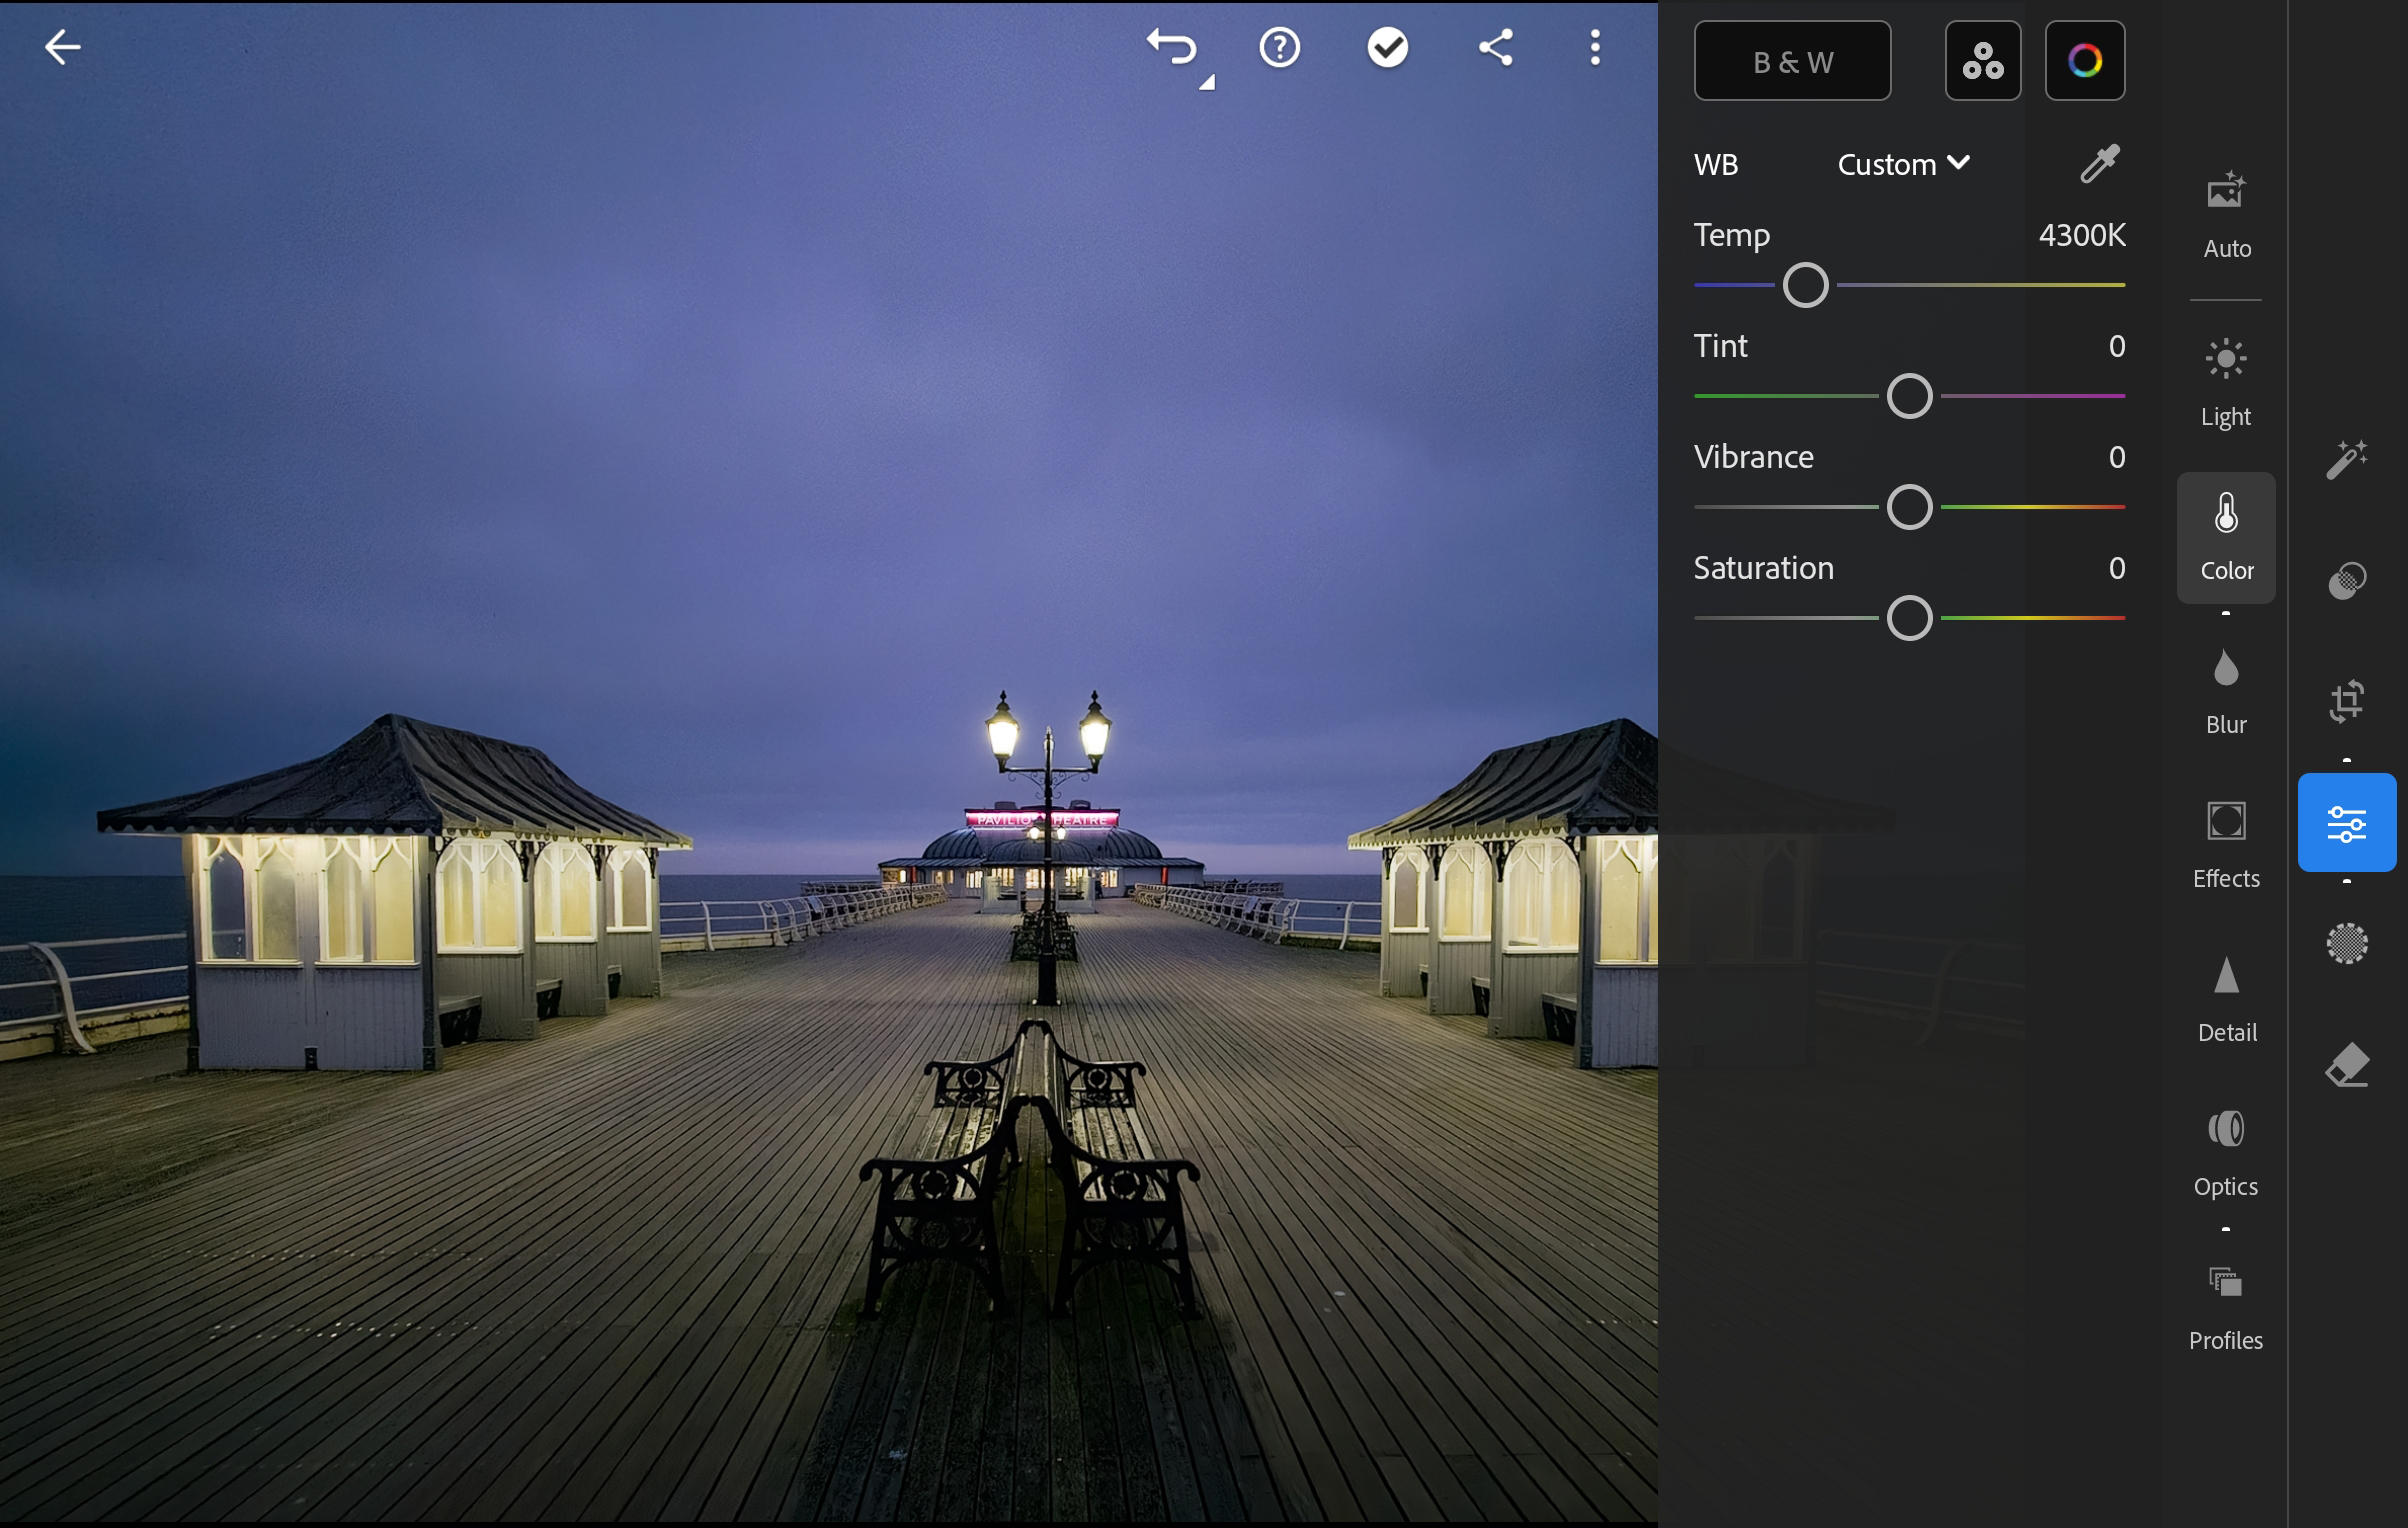
3. Correcting White Balance
Click on the Color choice inside the Adjustments tab and you’ll both use the White Balance profiles or alter The Temp and Tint sliders manually. For this shot, setting the Temp to 4300 and Tint to 0 produced the very best end result.
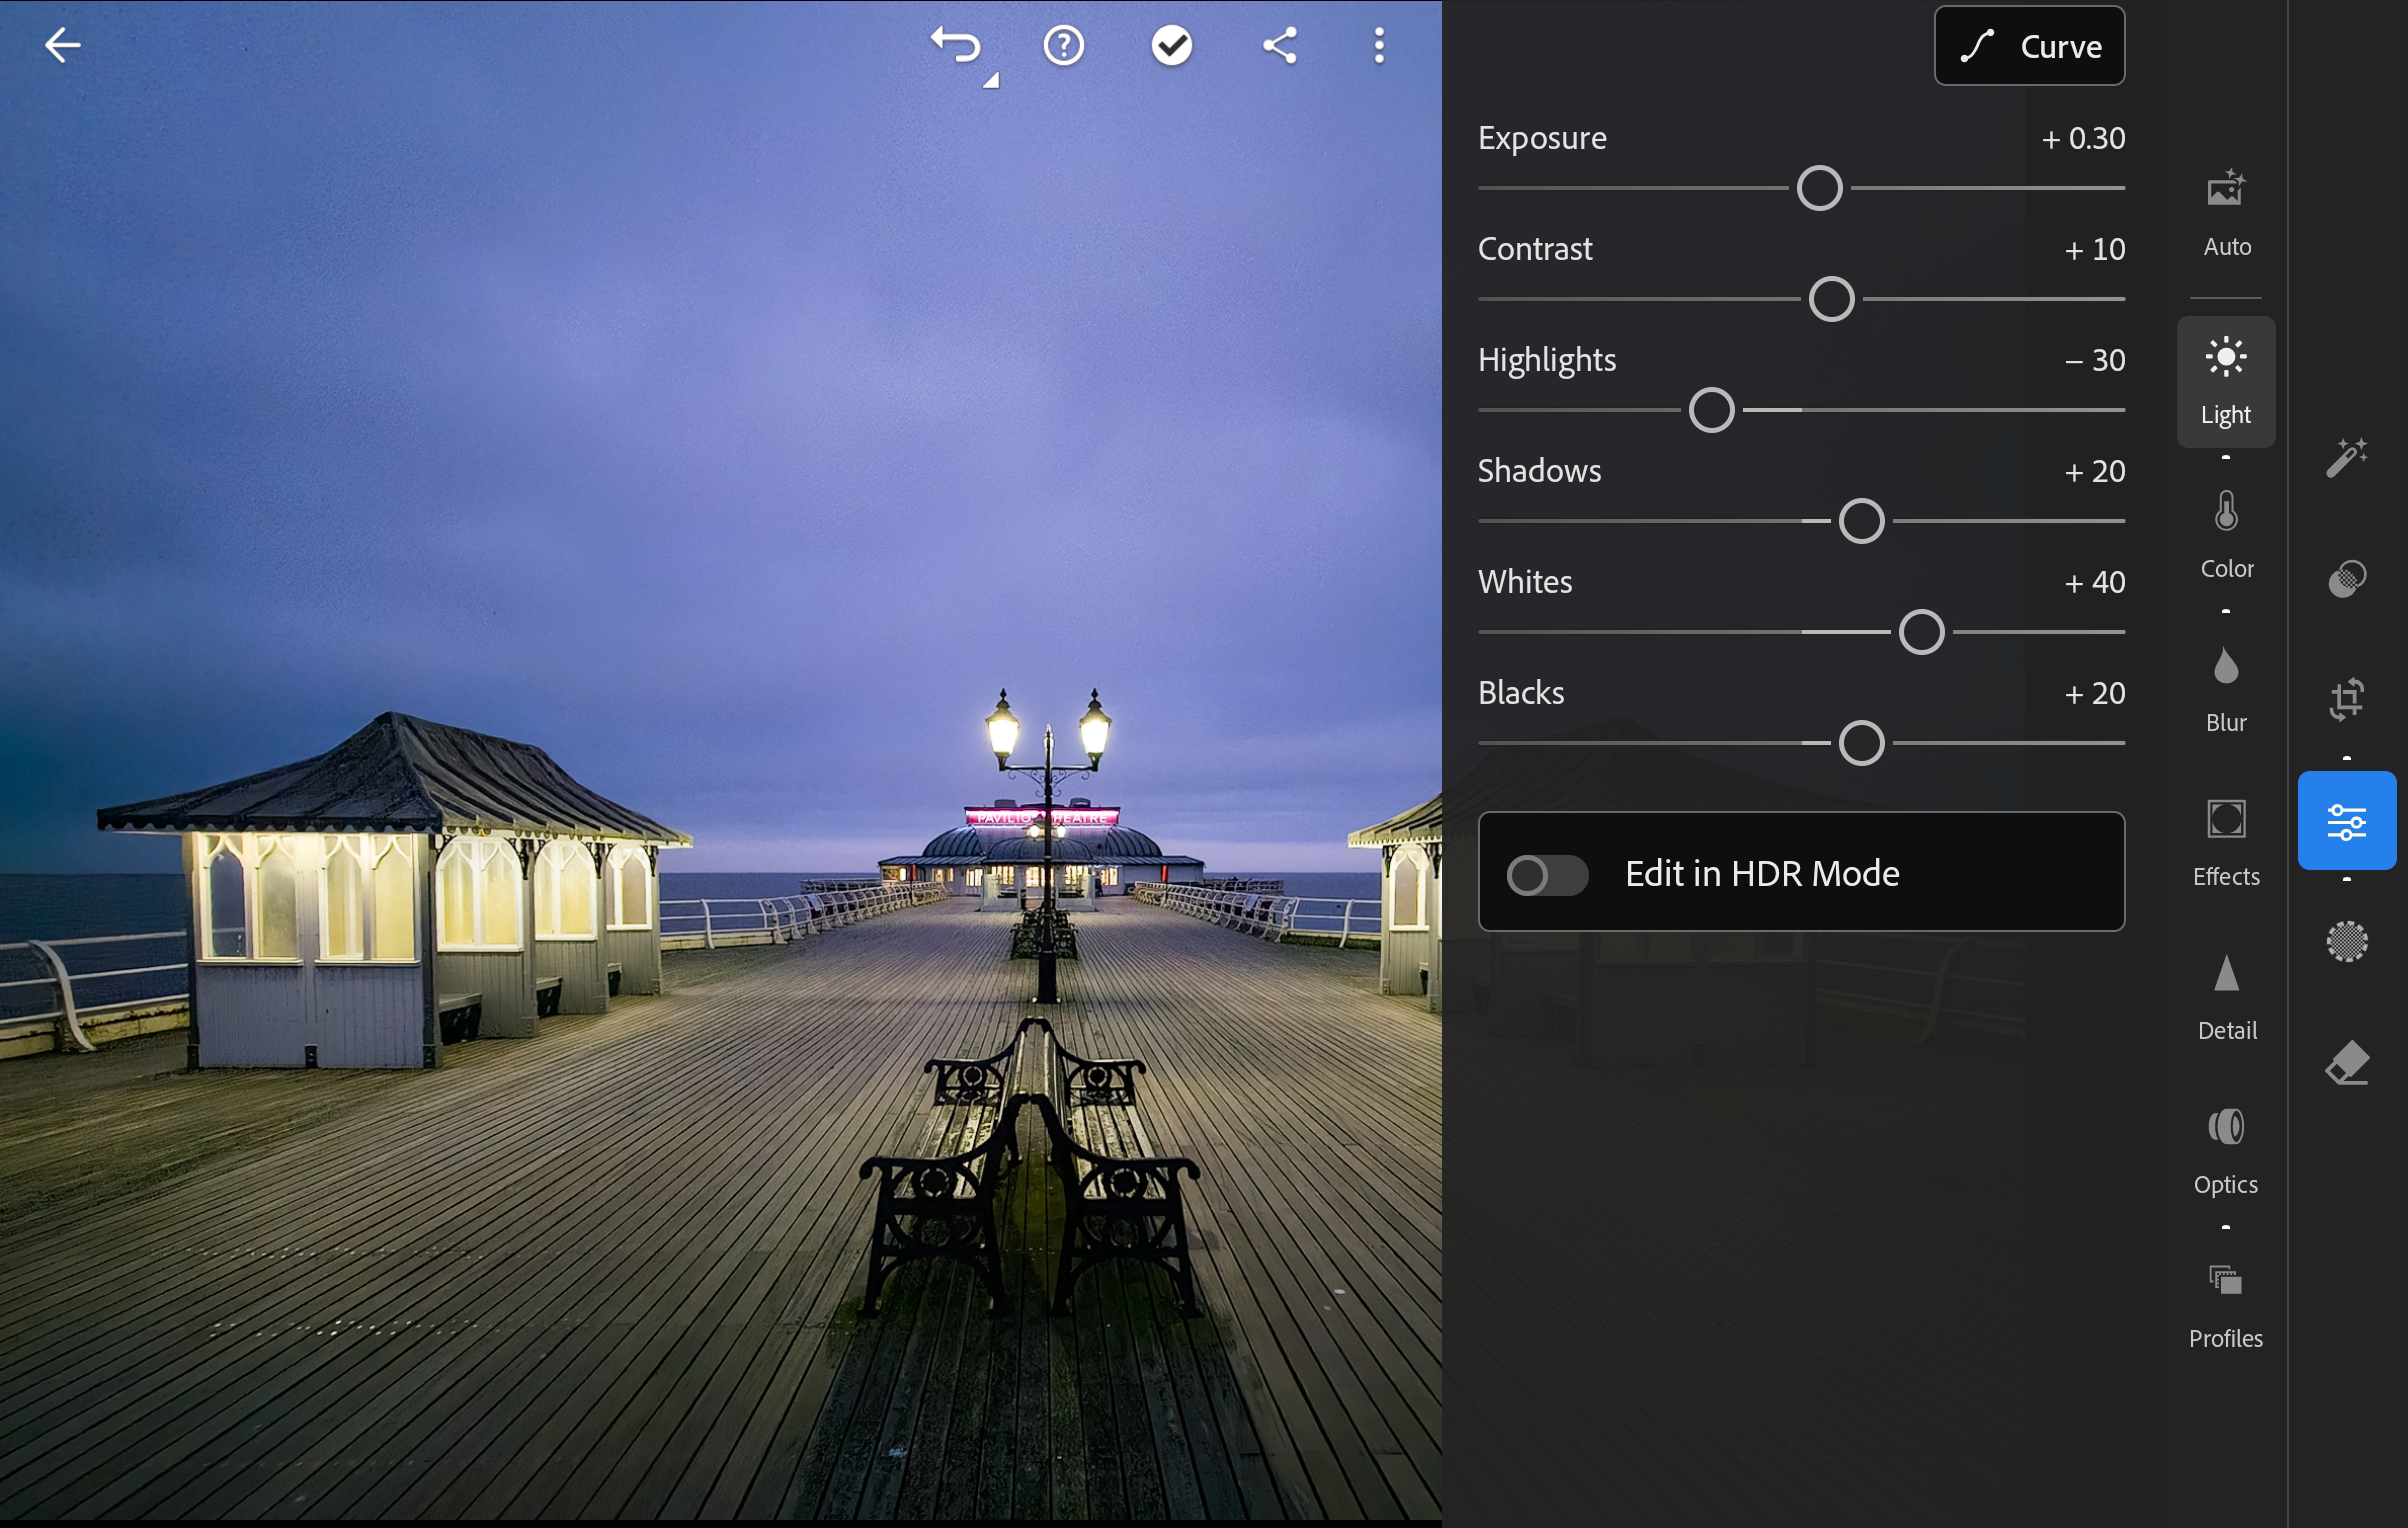
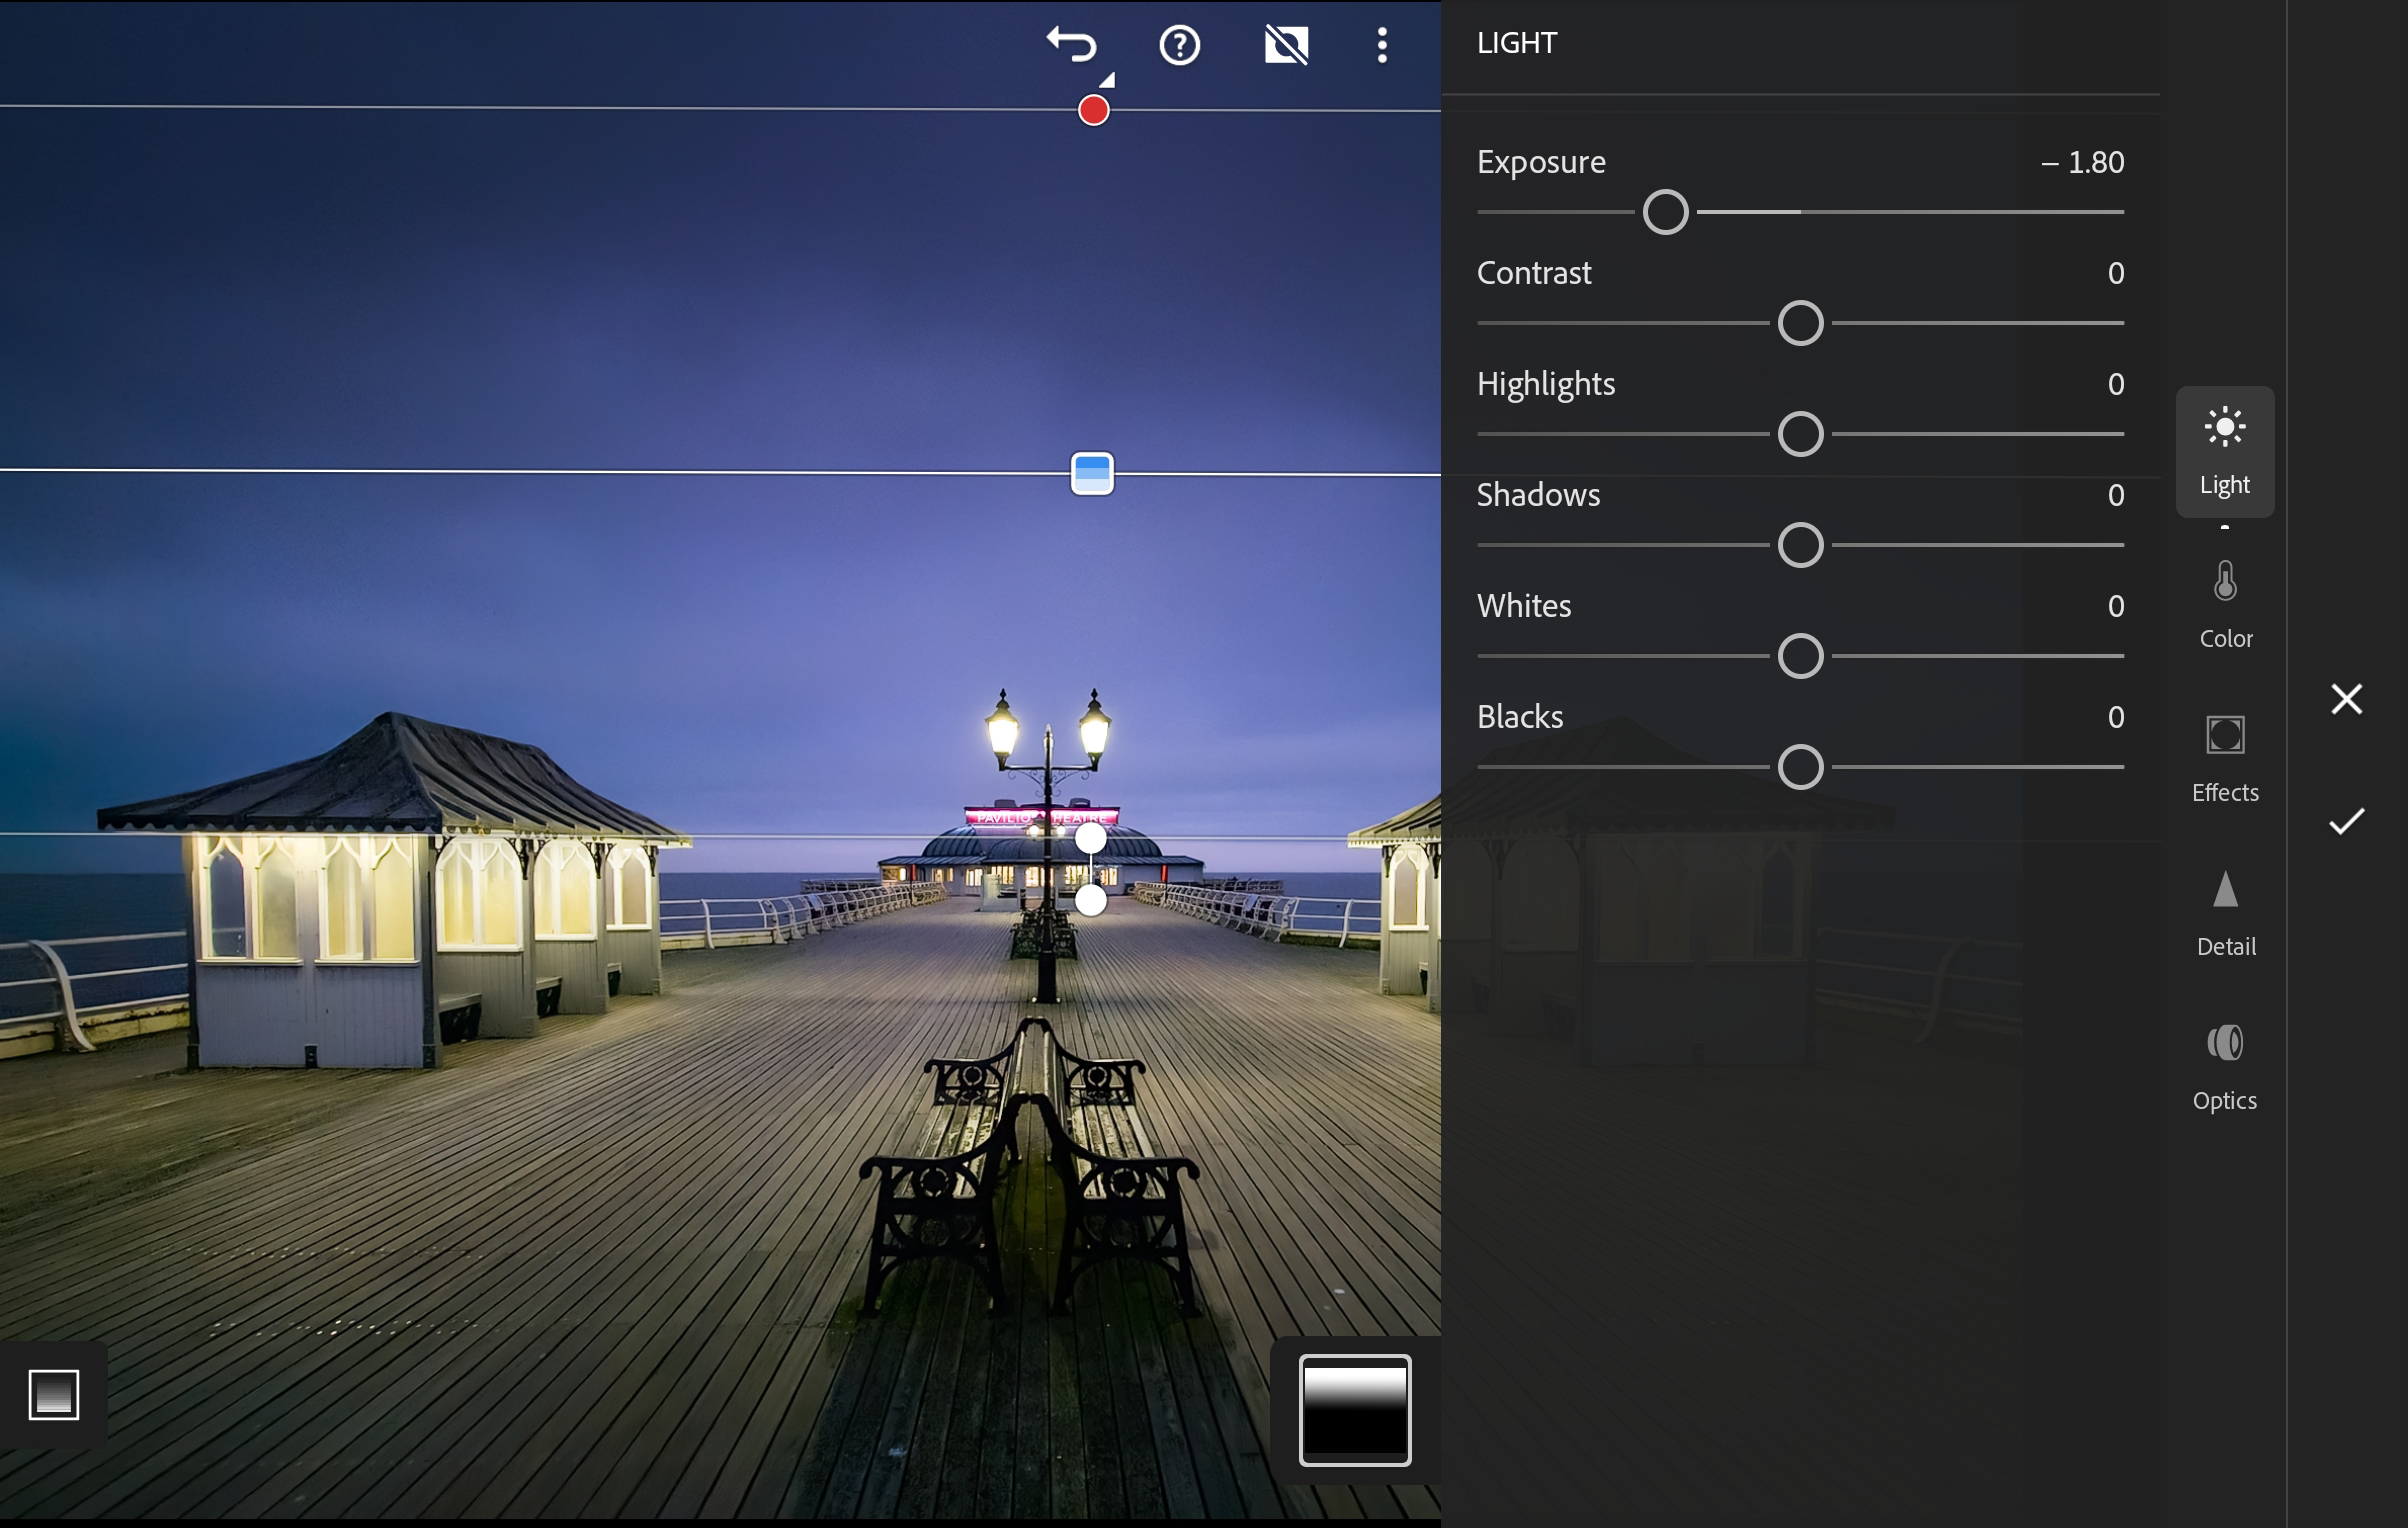
4. Adjusting the tones
Click on the Light choice within the Adjustments tab and make any changes as required to Exposure, Contrast, Highlights, Whites and Blacks. The Tone Curve is finest for including distinction however it is a excessive distinction scene so the Contrast slider was merely set to 10 to keep away from dropping element, particularly the highlights.
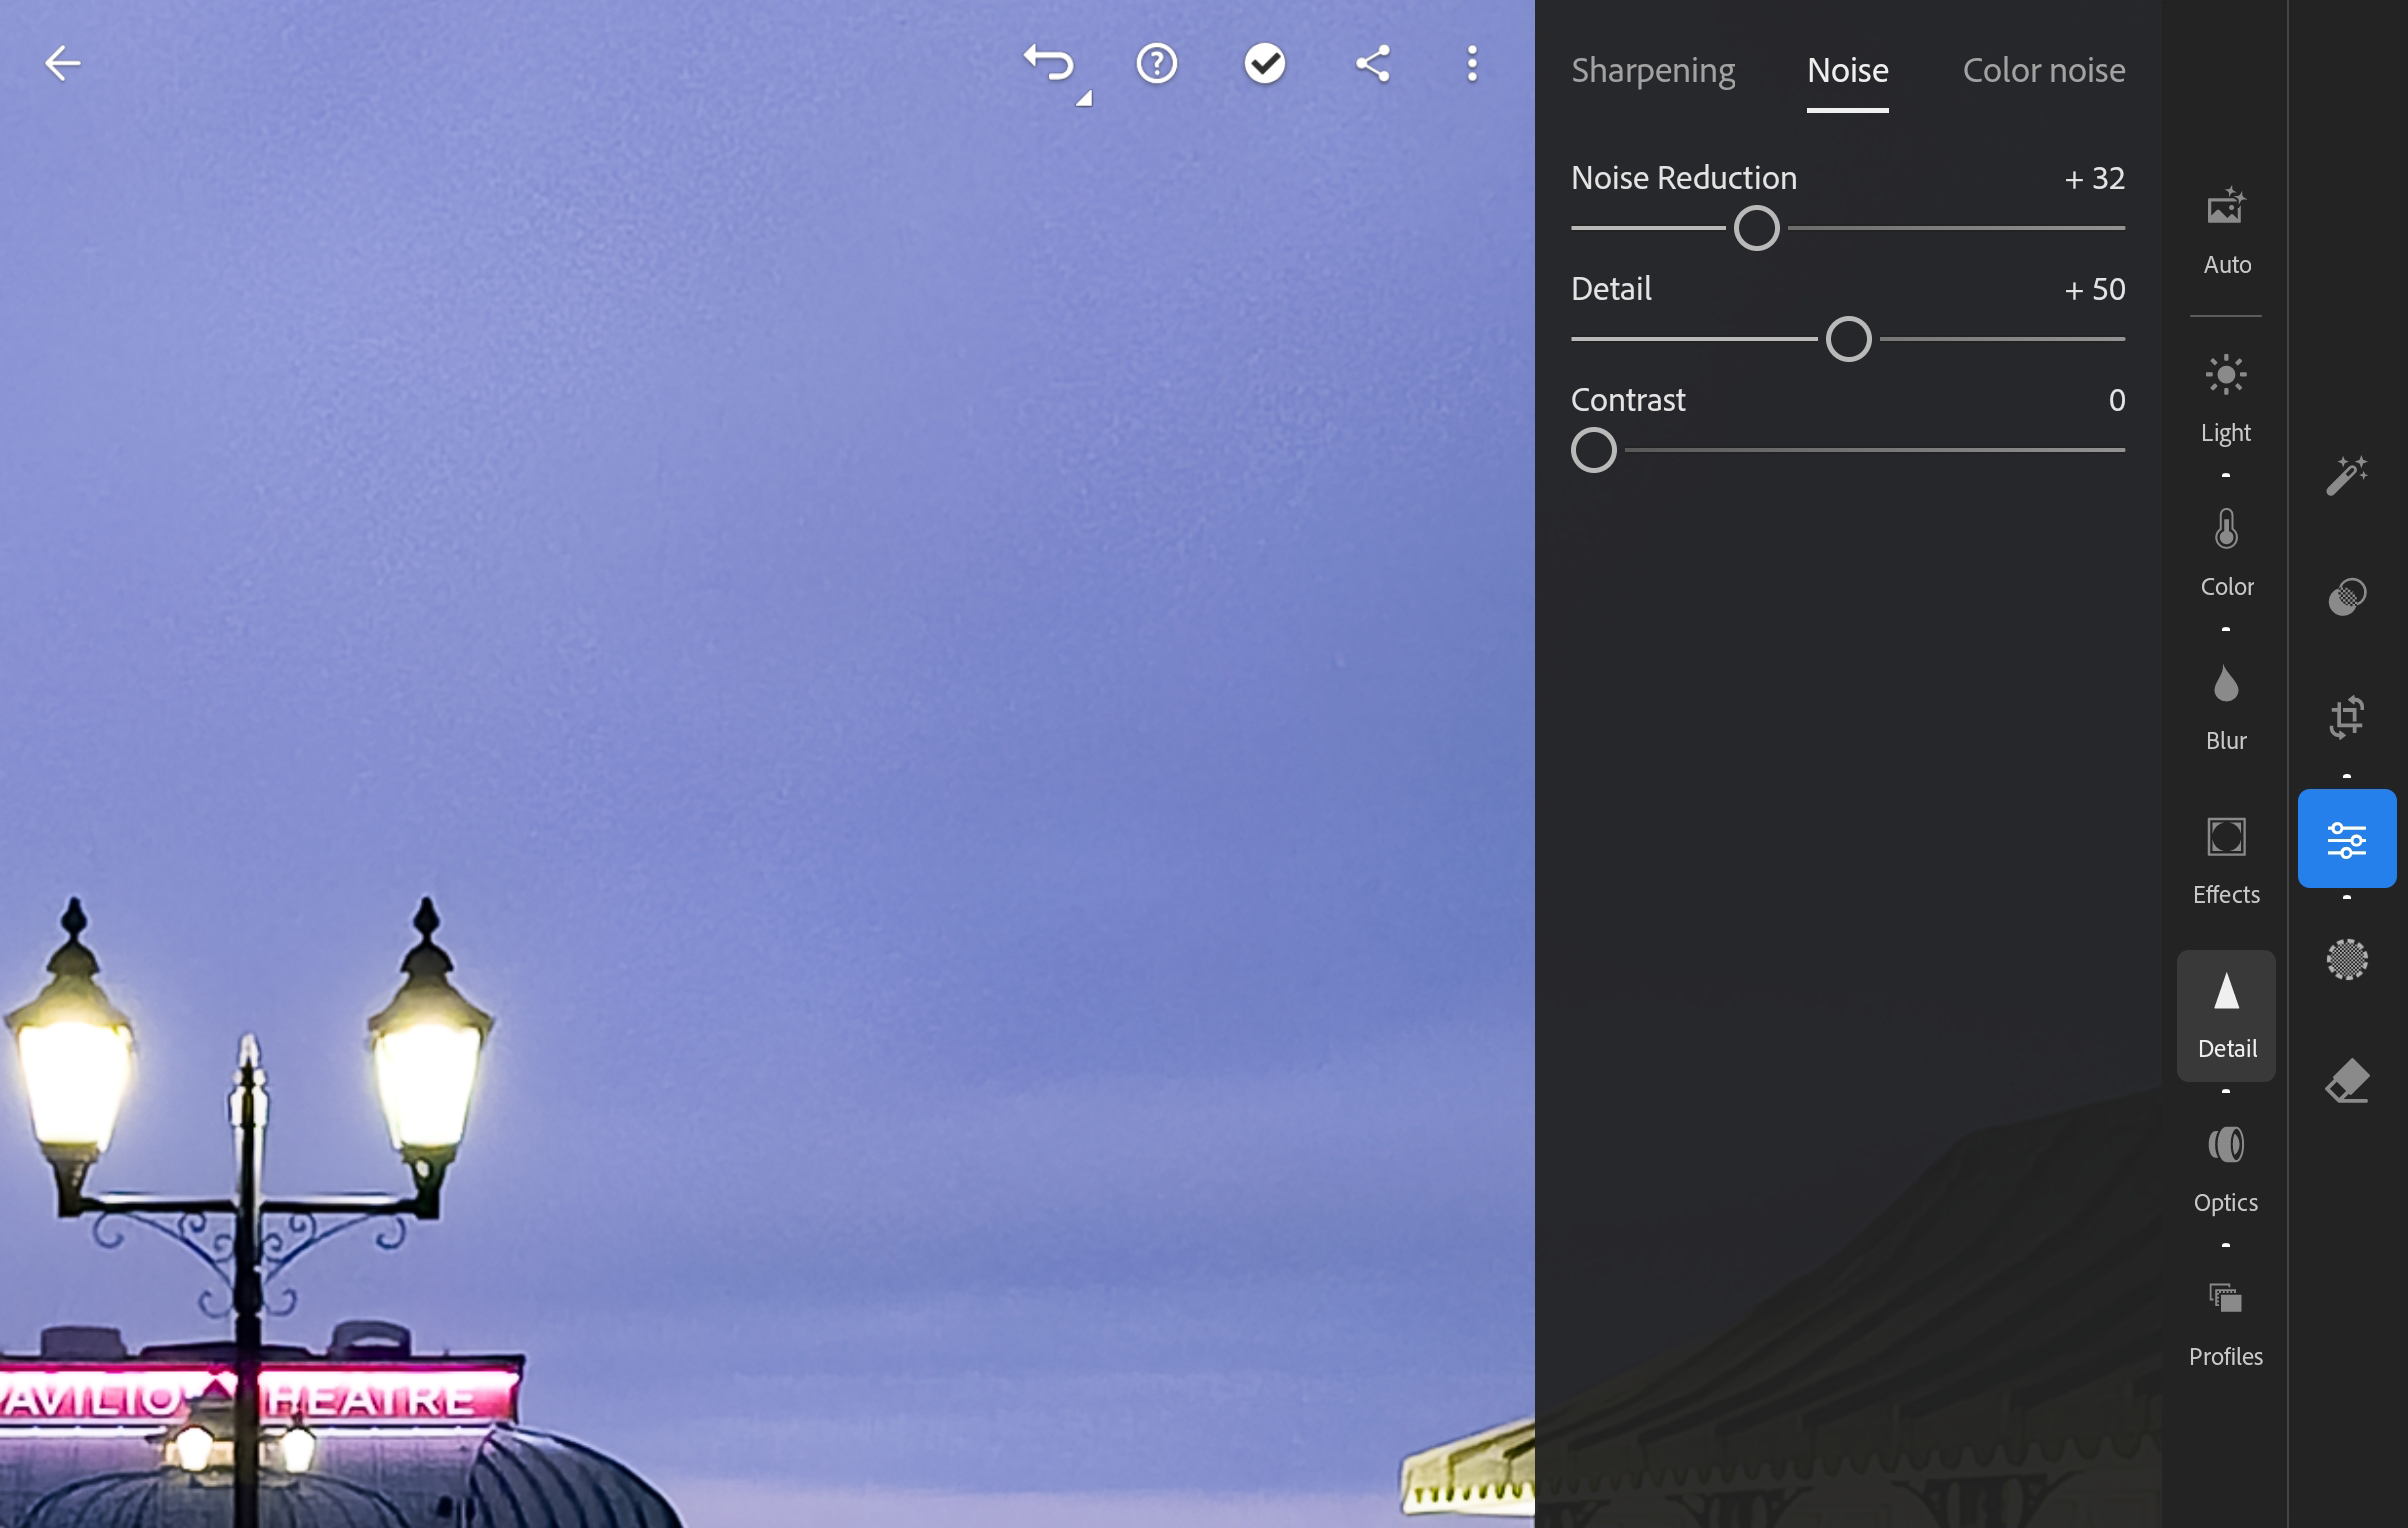
5. Applying noise discount
This shot was taken at ISO 3200, so there’s some luminosity noise current. To cope with this grainy kind of noise, click on on the Noise choice inside Detail and enhance the Noise Reduction slider. Color noise is handled by a default computerized setting.
To use the Masks, you will want an Adobe Photography Plan subscription and be signed in. Once subscribed, click on on the Mask icon after which the Create new Mask icon to pick out a Mask kind. Here, a Linear Gradient was utilized to the sky, then Light was chosen to cut back Exposure.
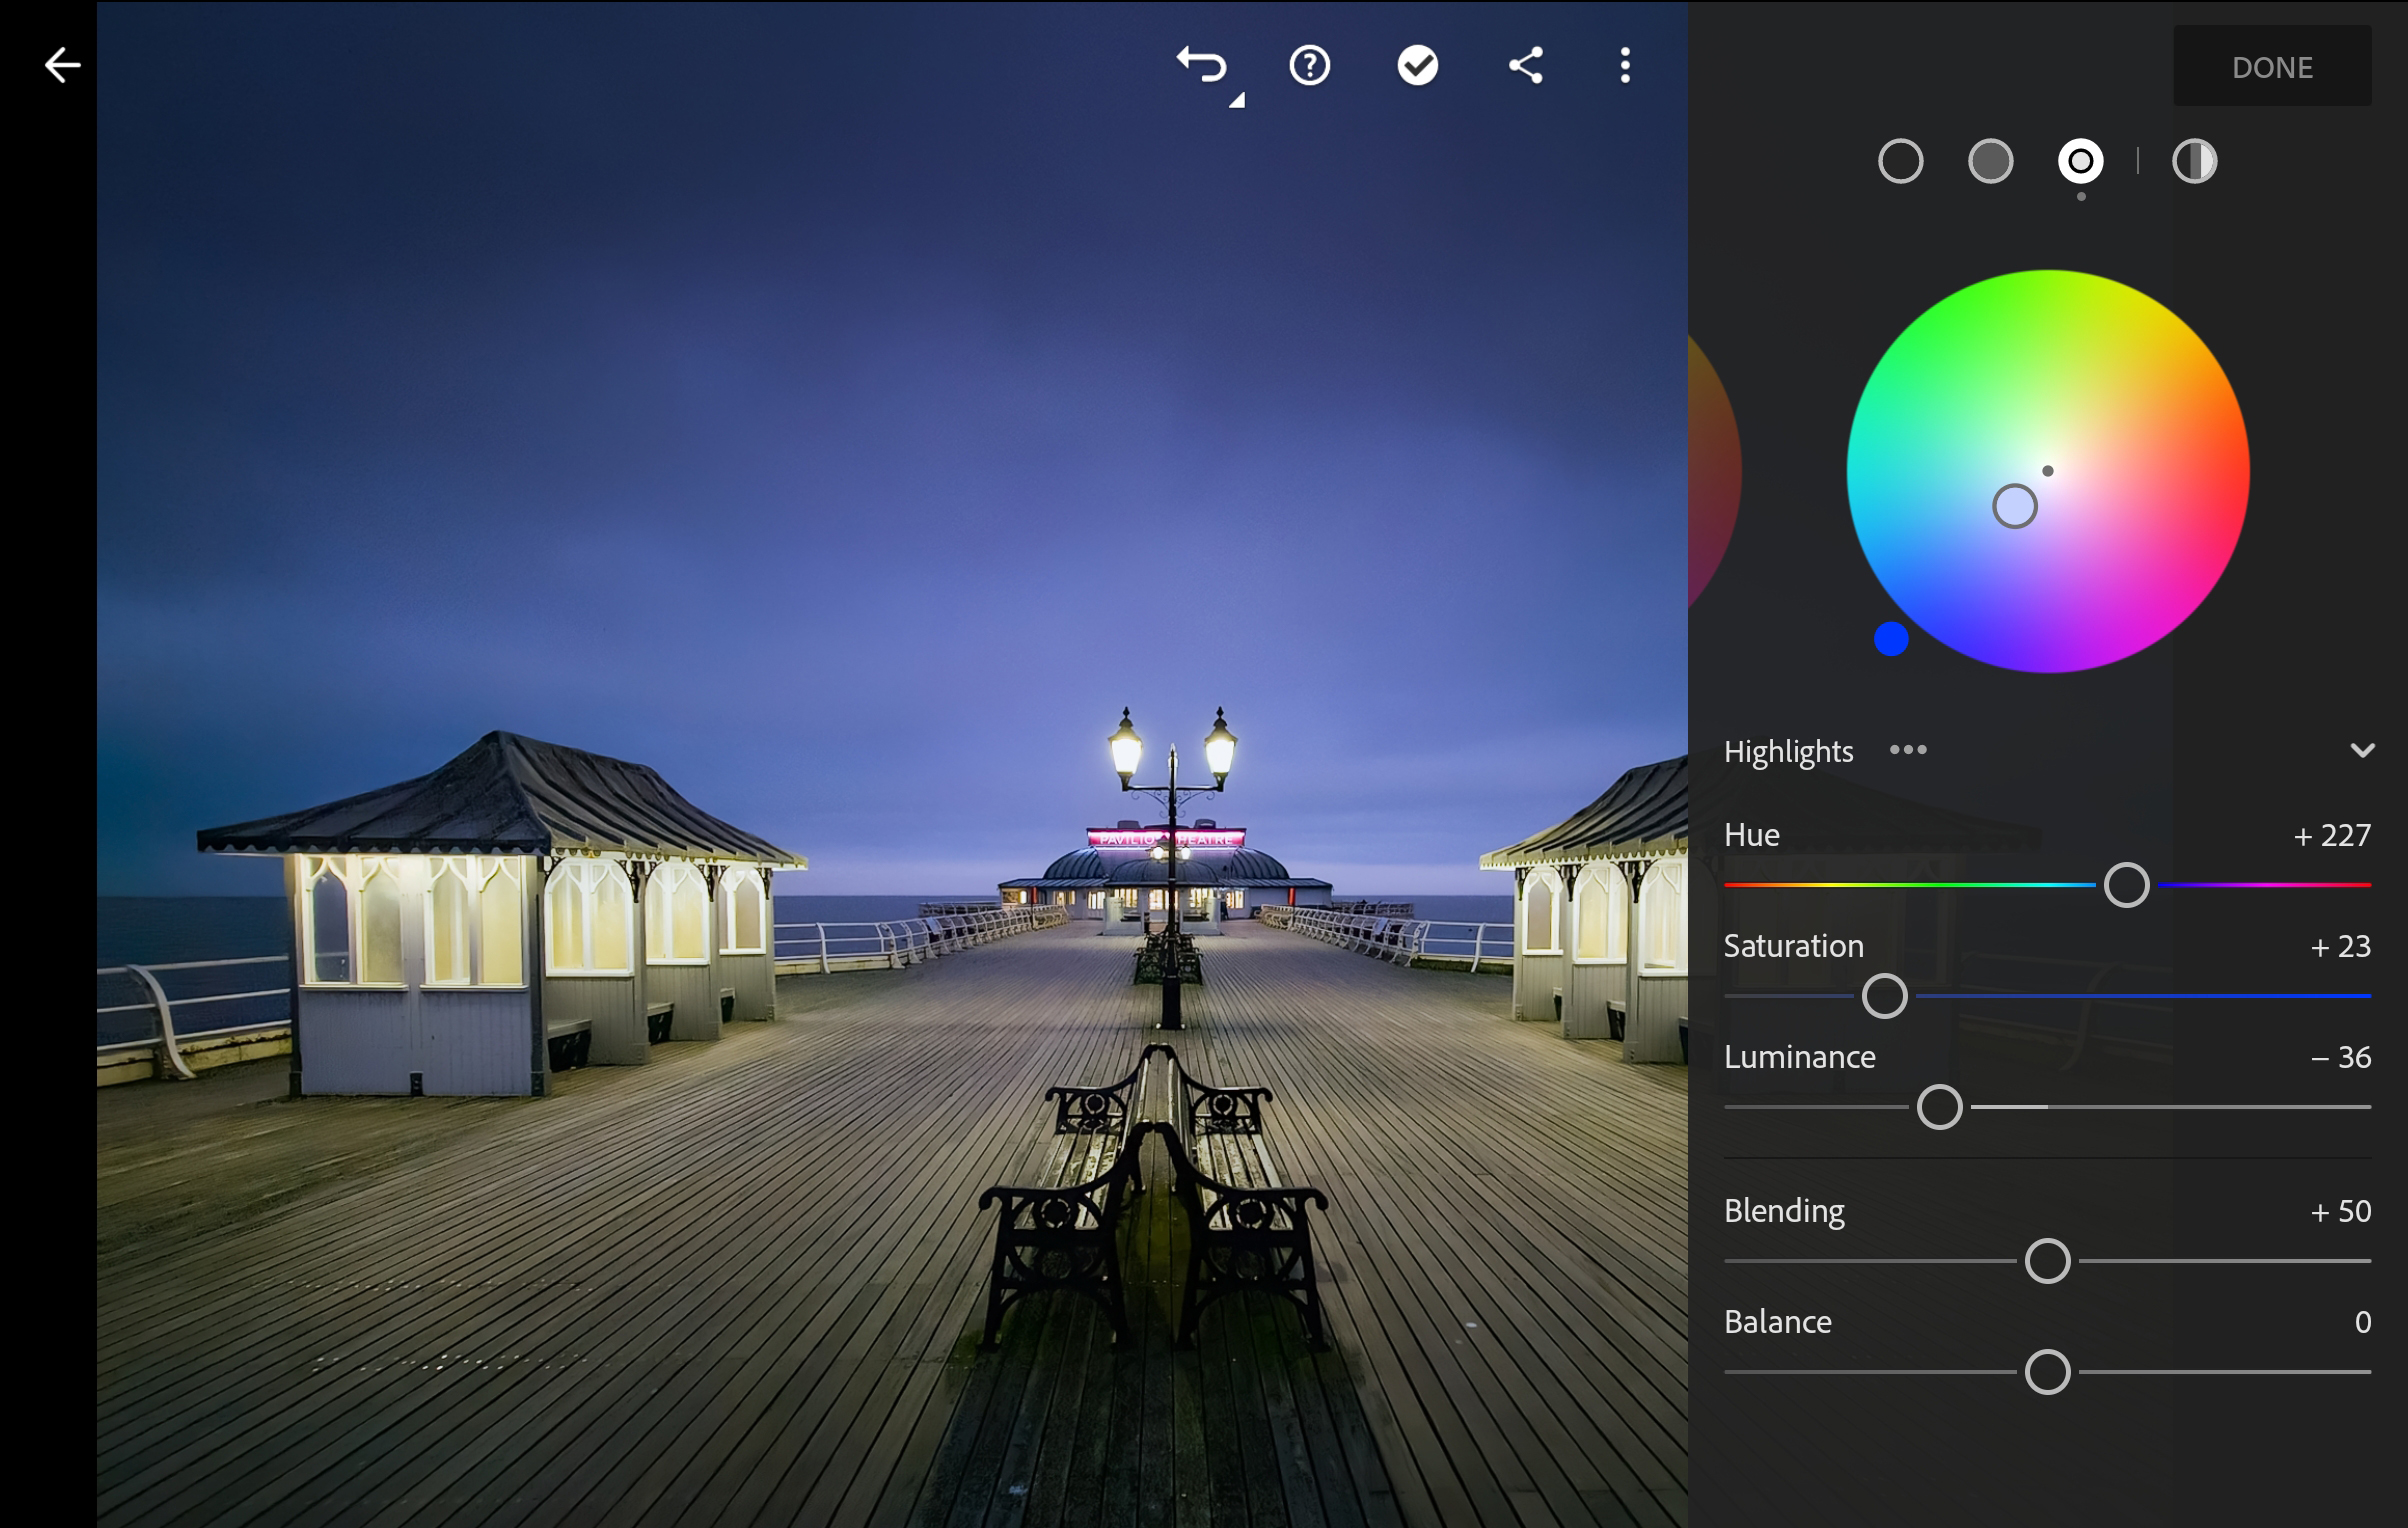
7. Trying Color Grading
Color Grading is a good way so as to add inventive colour results to images and the controls may be discovered inside Color. For this shot, Blue was utilized to simply the Highlights, extra for a refined and focused colour correction than a inventive impact.
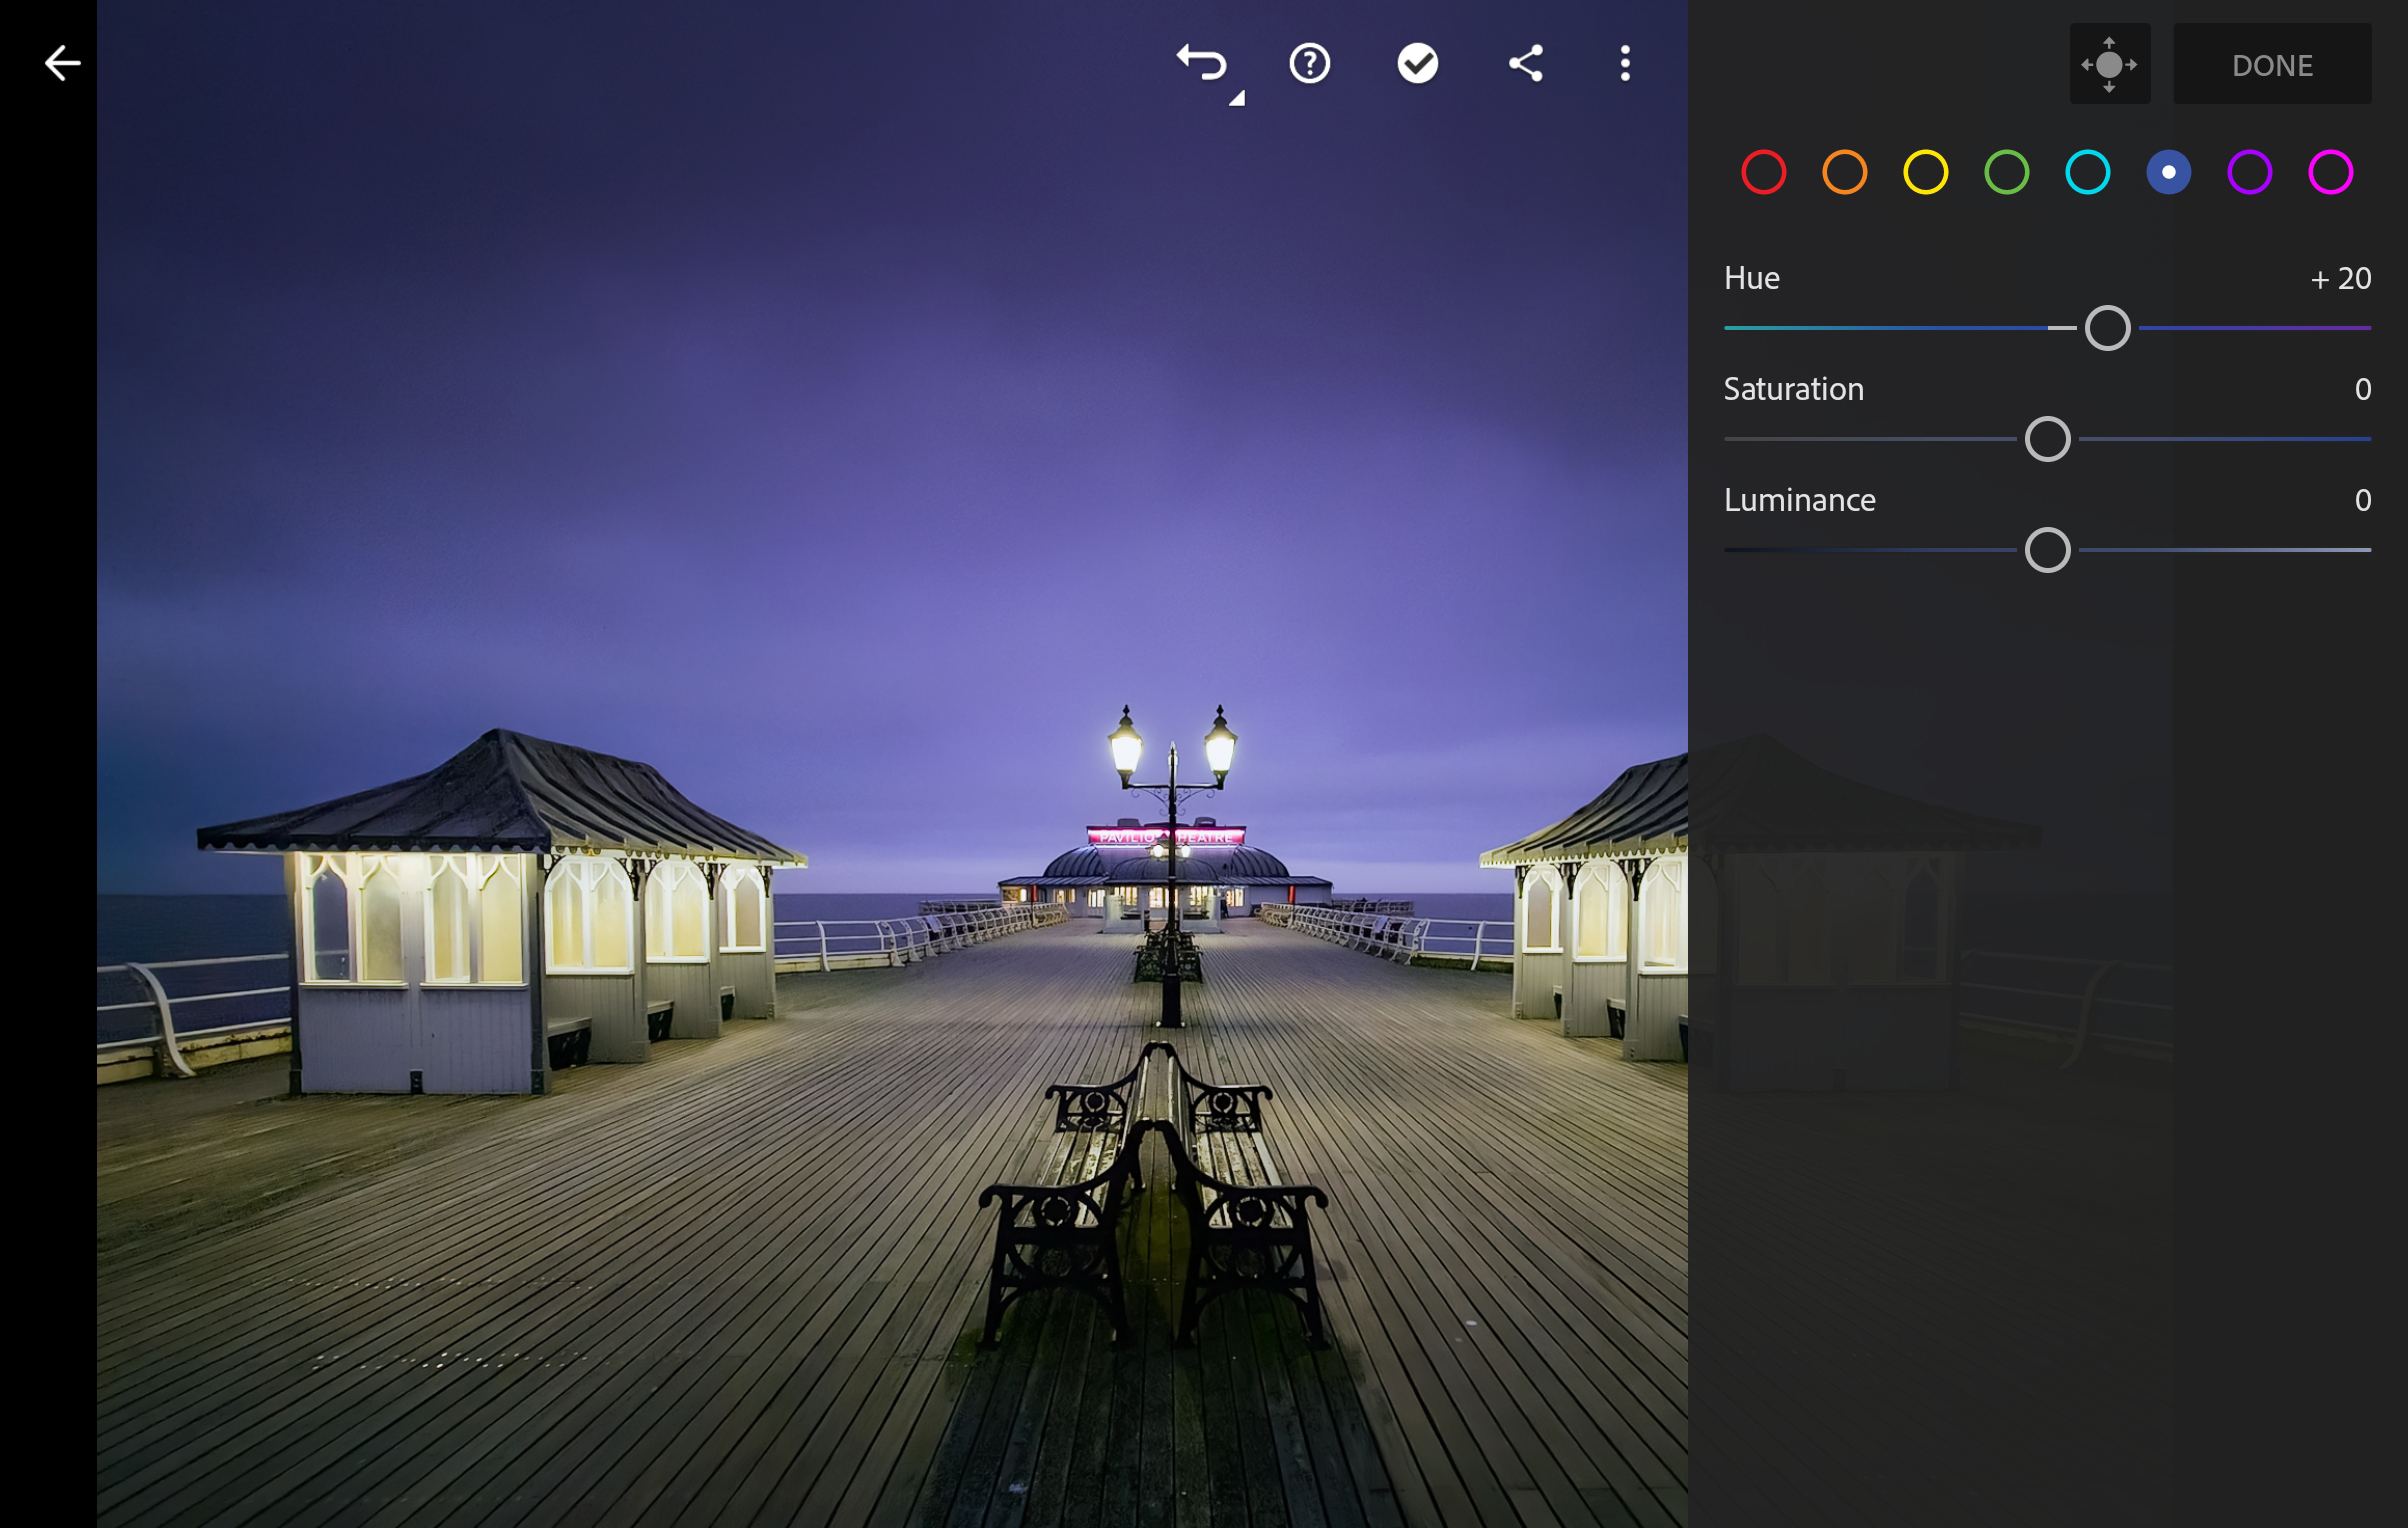
8. Tweaking HSL
The Hue, Saturation and Luminosity, additionally discovered inside Color, are a good way to manage the way in which completely different colour channels seem. For this shot, the Blue Channel was made extra purple to match the sky on the time of capturing.
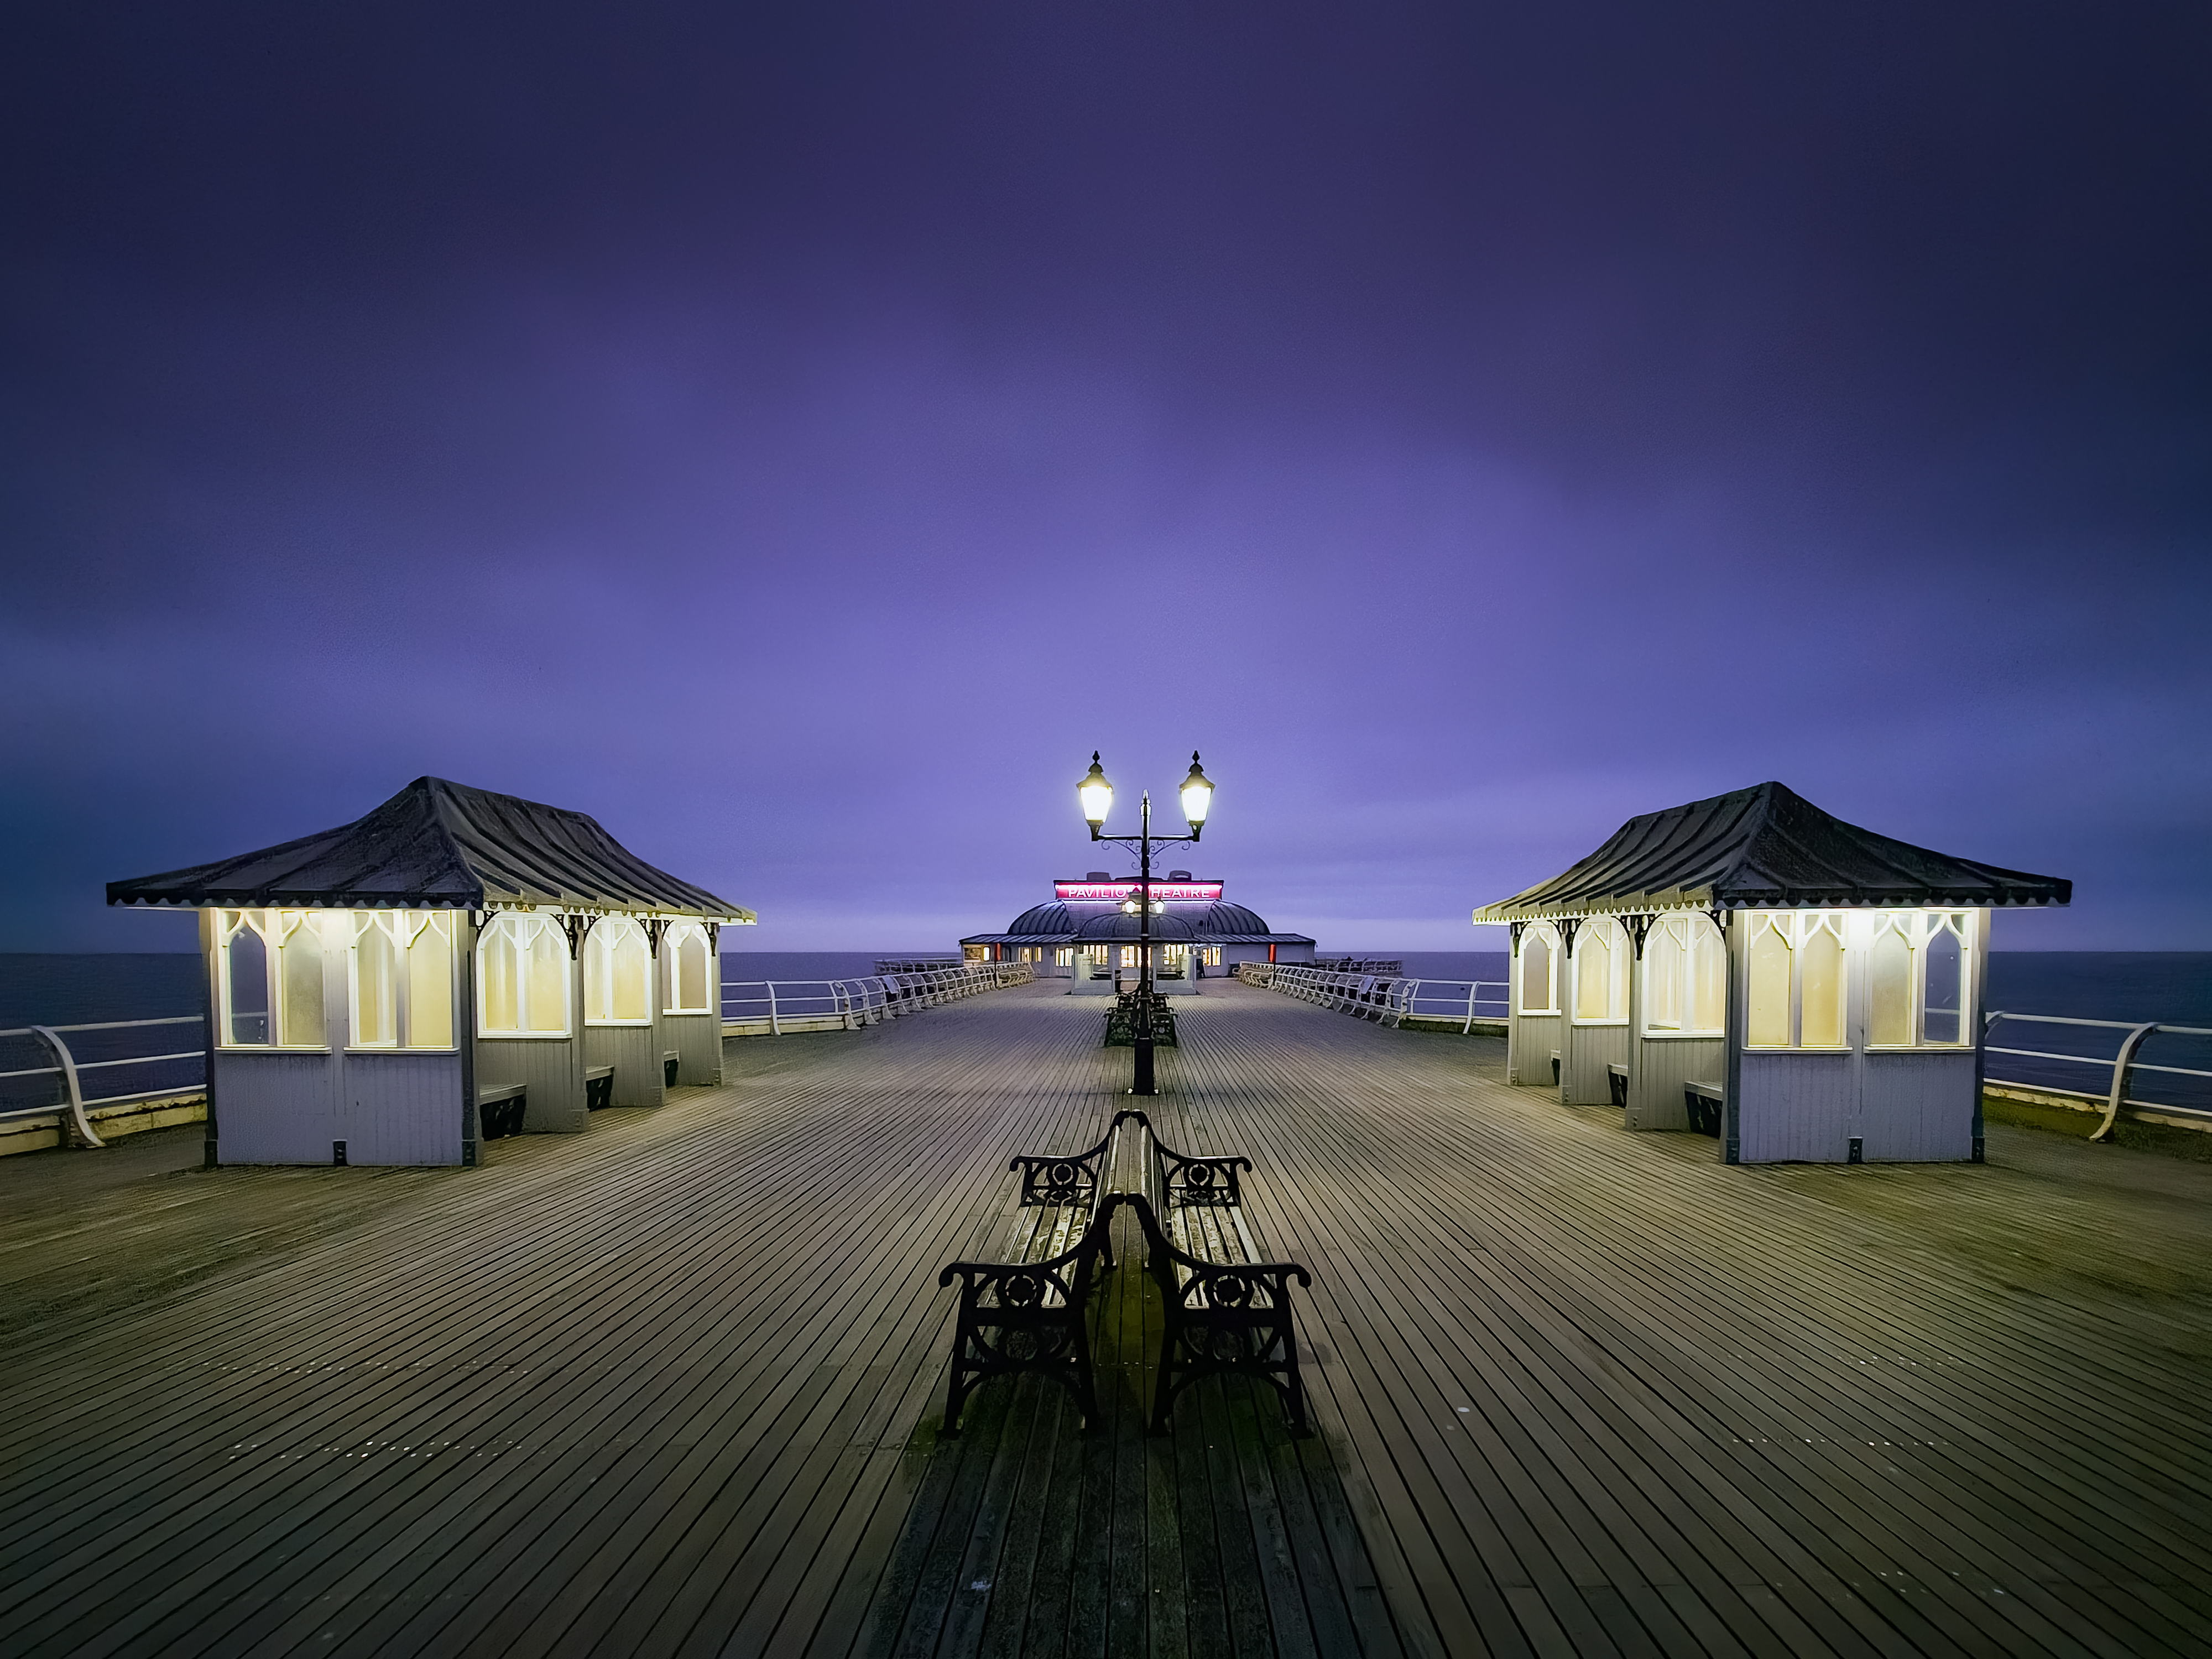
And there you may have it, these have been the entire Lightroom Mobile modifying steps I took from the unique unedited uncooked file from my Galaxy 23 Ultra, to the tip end result that you just see.
Let us know when you have any questions on capturing and modifying images in your cellphone within the feedback beneath.