If you are trying to begin a web site, WordPress is a content material administration system (CMS) that permits you to construct a web site or weblog from scratch, or enhance an current web site. It is free and open supply software program launched underneath the GPL.
WordPress is utilized by tens of millions of individuals world wide, together with many massive organizations, akin to The Guardian, Forbes, and The New York Times. Despite the abundance of name new web site builders and content material administration techniques, WordPress stays the most well-liked selection for site owners.
So, how do you get began with WordPress? The first step is to put in the platform in your hosting account.
This information will present you set up WordPress utilizing totally different strategies.
How to put in WordPress with Hostinger
First, head over to Hostinger and choose the hosting plan that is best for you. Once you have chosen your plan, create an account by coming into your e-mail handle and selecting a robust password. Then, choose your most well-liked fee methodology and full the checkout course of.
Next, you’ll want to put in WordPress. Log into your hPanel dashboard and scroll right down to the ‘Website’ part. Then, click on on the ‘Auto Installer’ icon and choose WordPress from the listing of scripts.
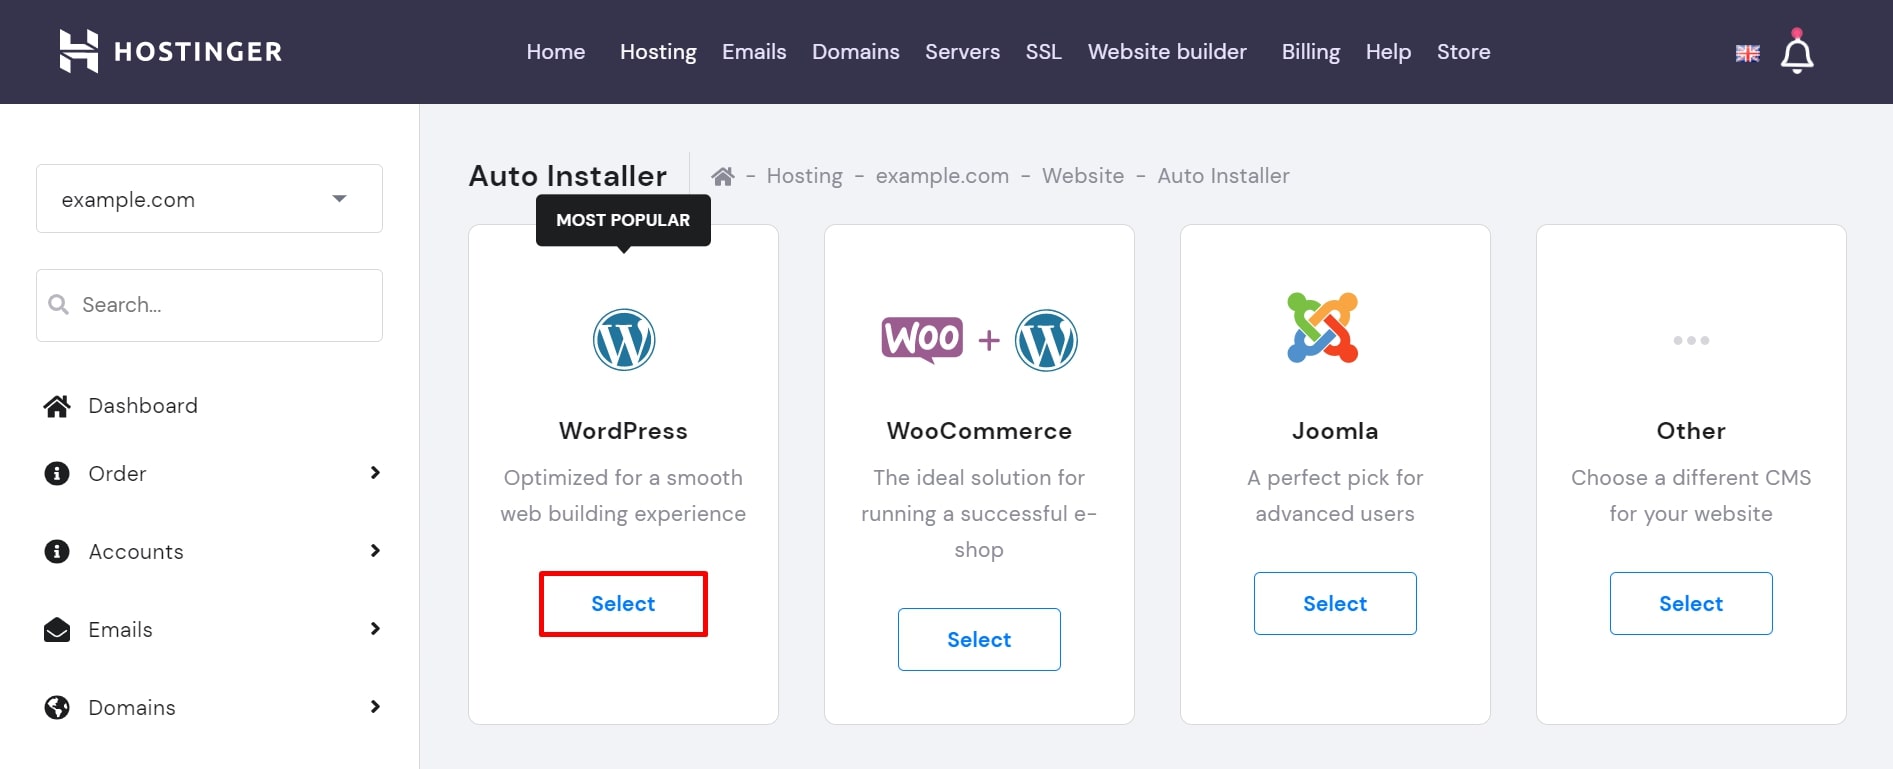
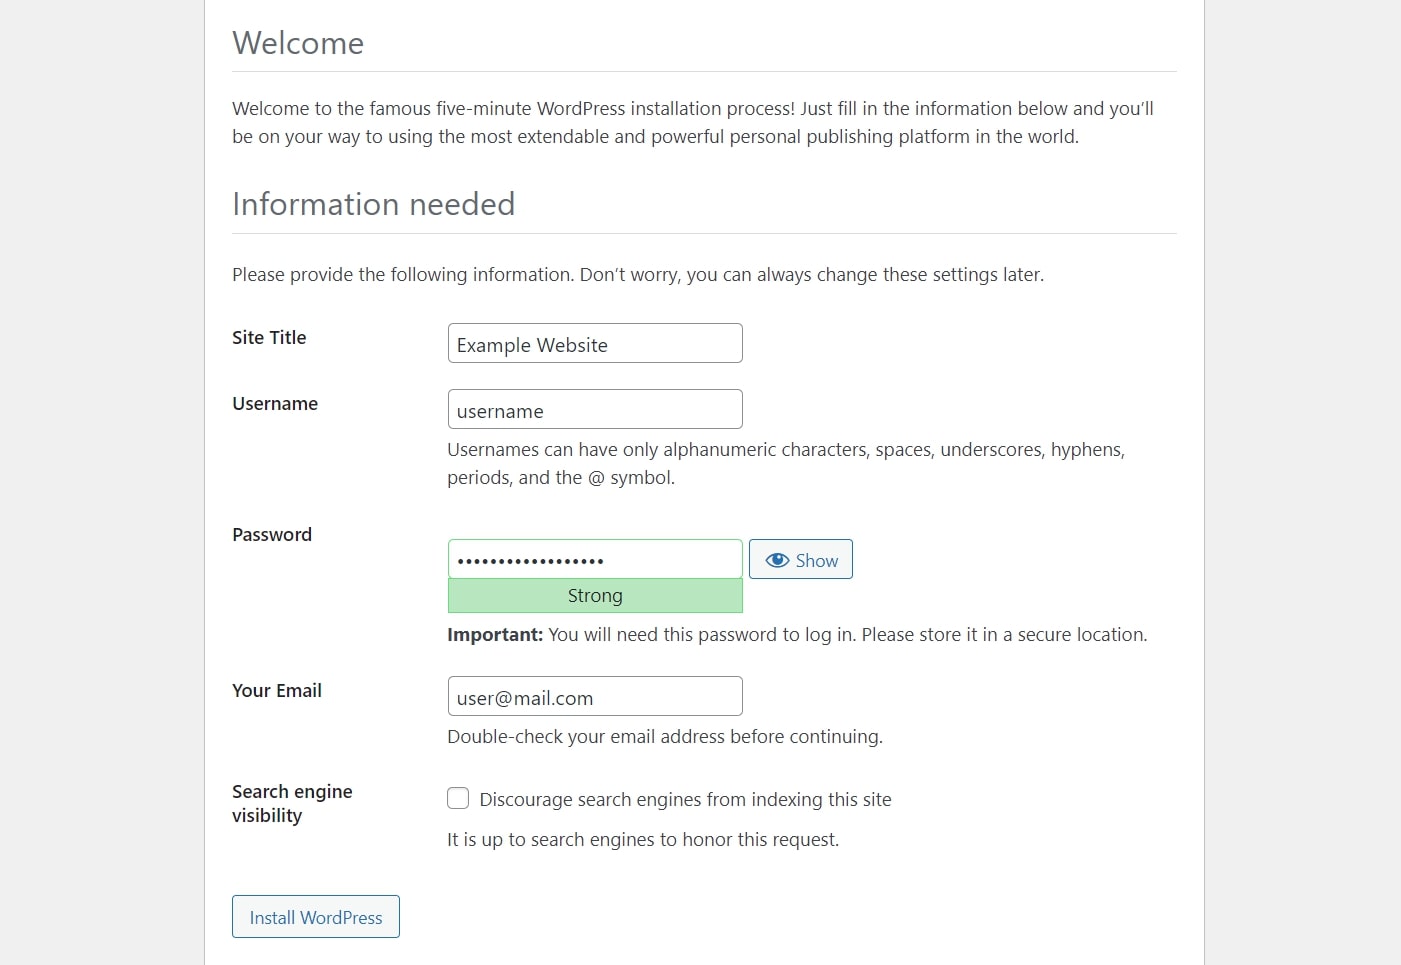
On the following web page, enter your area identify, select a username and password on your WordPress account, and choose a language on your web site. Finally, click on ‘Install’ and wait a couple of seconds for the method to finish.
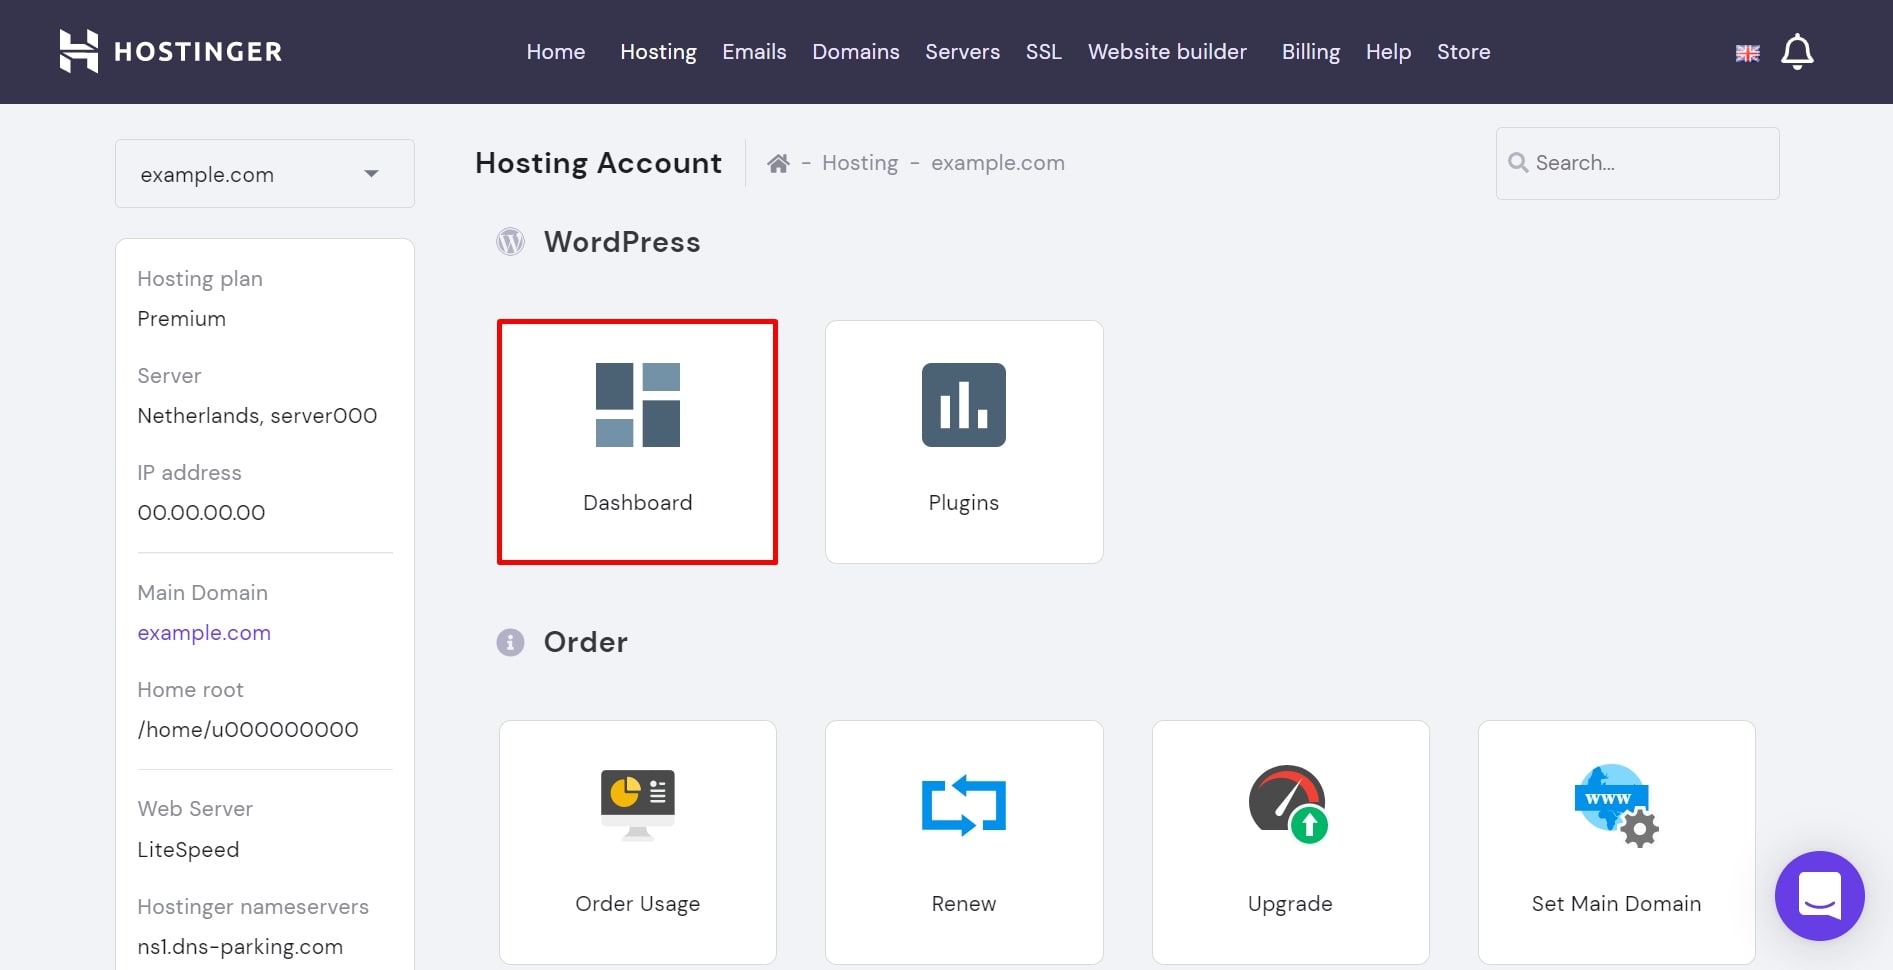
By now, the WordPress dashboard ought to present up on the display screen. Depending on the internet hosting plan, you may even see some pre-installed plugins, akin to LiteSpeed Cache to spice up efficiency.
To log into your web site’s admin panel, merely add ‘/wp-admin’ to the top of your area identify (e.g., instance.com/wp-admin) and enter your chosen username and password. From right here, you can begin customizing your web site to match your distinctive fashion and persona.
How to put in WordPress with Bluehost
Bluehost is a US-based firm with strong WordPress web site internet hosting plans. It has a market stuffed with customized themes and plugins for its shoppers, making it simple to search out any extension you would possibly want. The subscriptions begin from $3.95/month.
Here’s set up WordPress with Bluehost:
First, join a Bluehost account. You can select from a number of totally different plans, however we advocate the Basic plan for many customers.
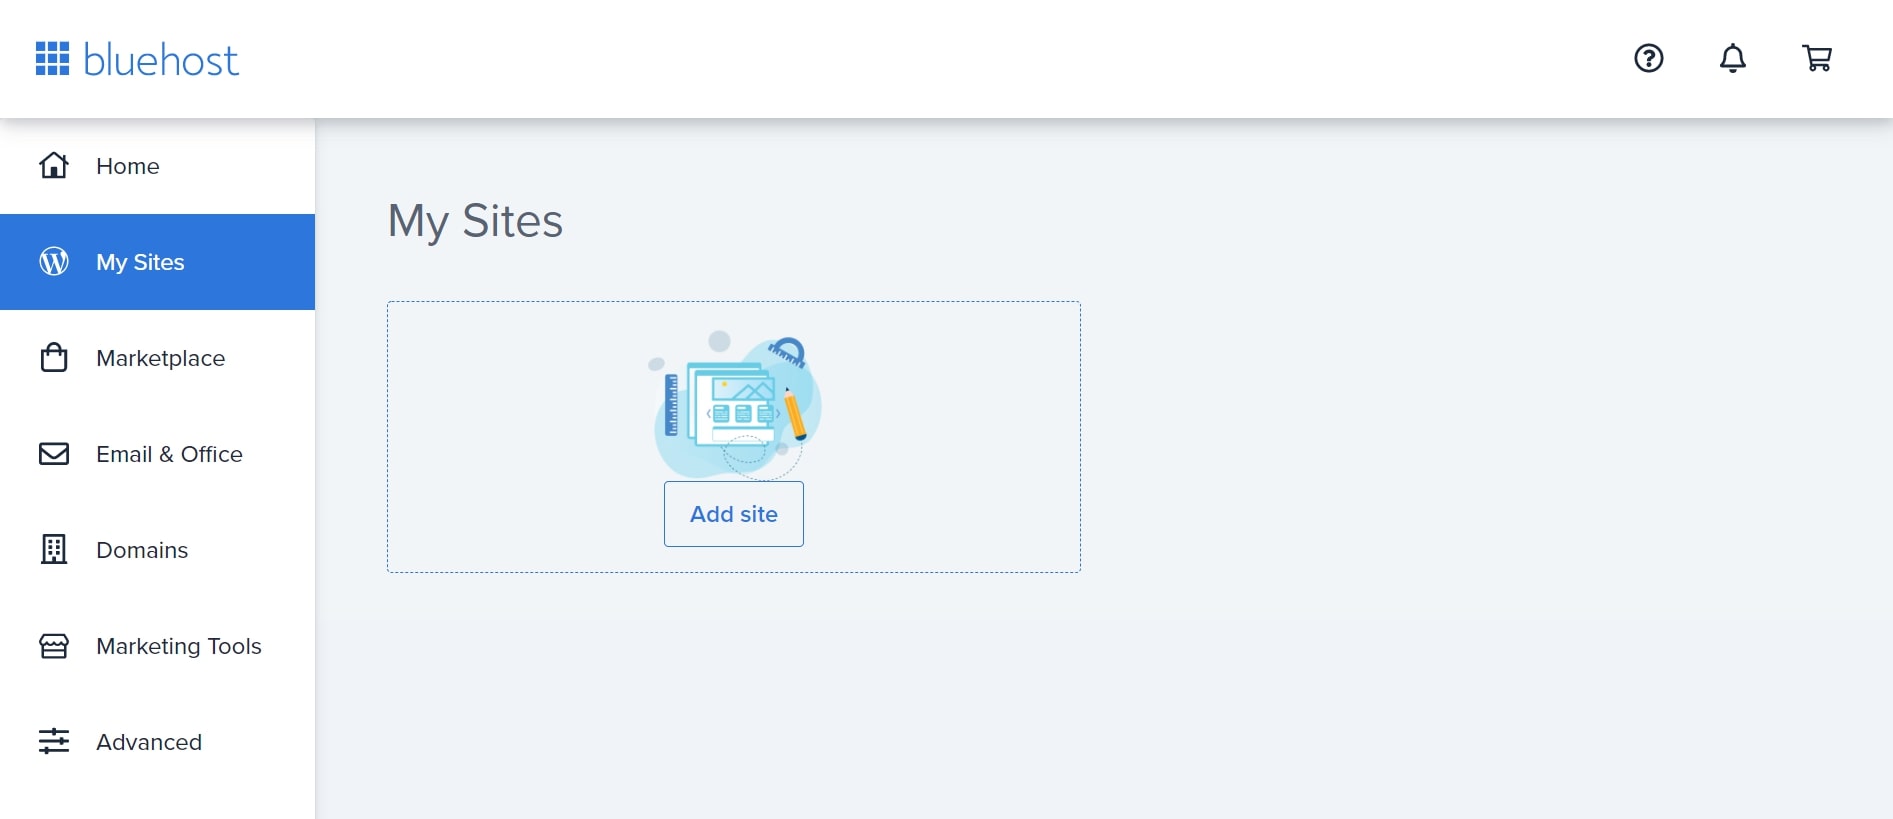
Once you have signed up for an account, log in to your Bluehost management panel and click on on the “web site part”. Next click on on the “Install WordPress” icon.
On the following display screen, choose the area identify the place you wish to set up WordPress and click on “Check Domain”.
Now that you’ve got chosen your area, it is time to decide on a theme on your WordPress web site. Bluehost gives a couple of free themes, or you possibly can select from the various themes accessible within the WordPress theme listing.
Once you have chosen a theme, it is time to begin including content material to your WordPress web site. You can create new pages and posts, add photographs and movies, and extra. Be positive to take a look at the Bluehost Knowledge Base for extra info on utilizing WordPress.

Click Login to WordPress to check in to the dashboard. Alternatively, return to the My Sites tab from Bluerock and think about the location you’ve created.
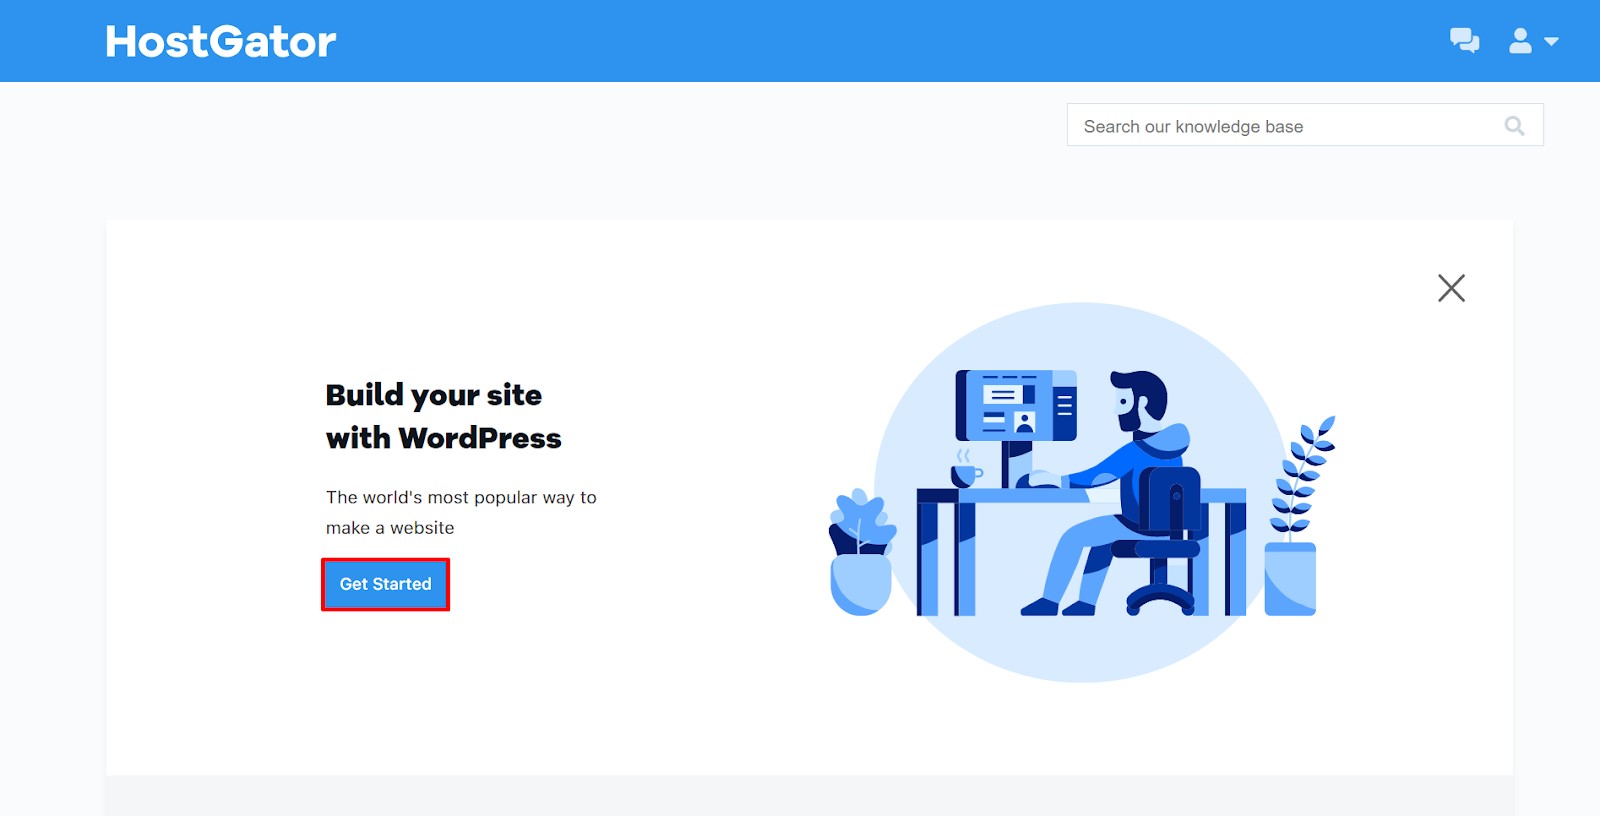
How to put in WordPress with HostGator
HostGator is without doubt one of the most budget-friendly internet hosts available on the market. The most reasonably priced plan prices $2.75/month and features a free area identify, unmetered bandwidth, limitless disk area, and Google Ads credit for launching a web-based enterprise.
To set up WordPress with HostGator, merely go to their web site and fill out your info within the signup part. Once you could have accomplished and submitted your info, you’ll obtain an e-mail from HostGator along with your login credentials.
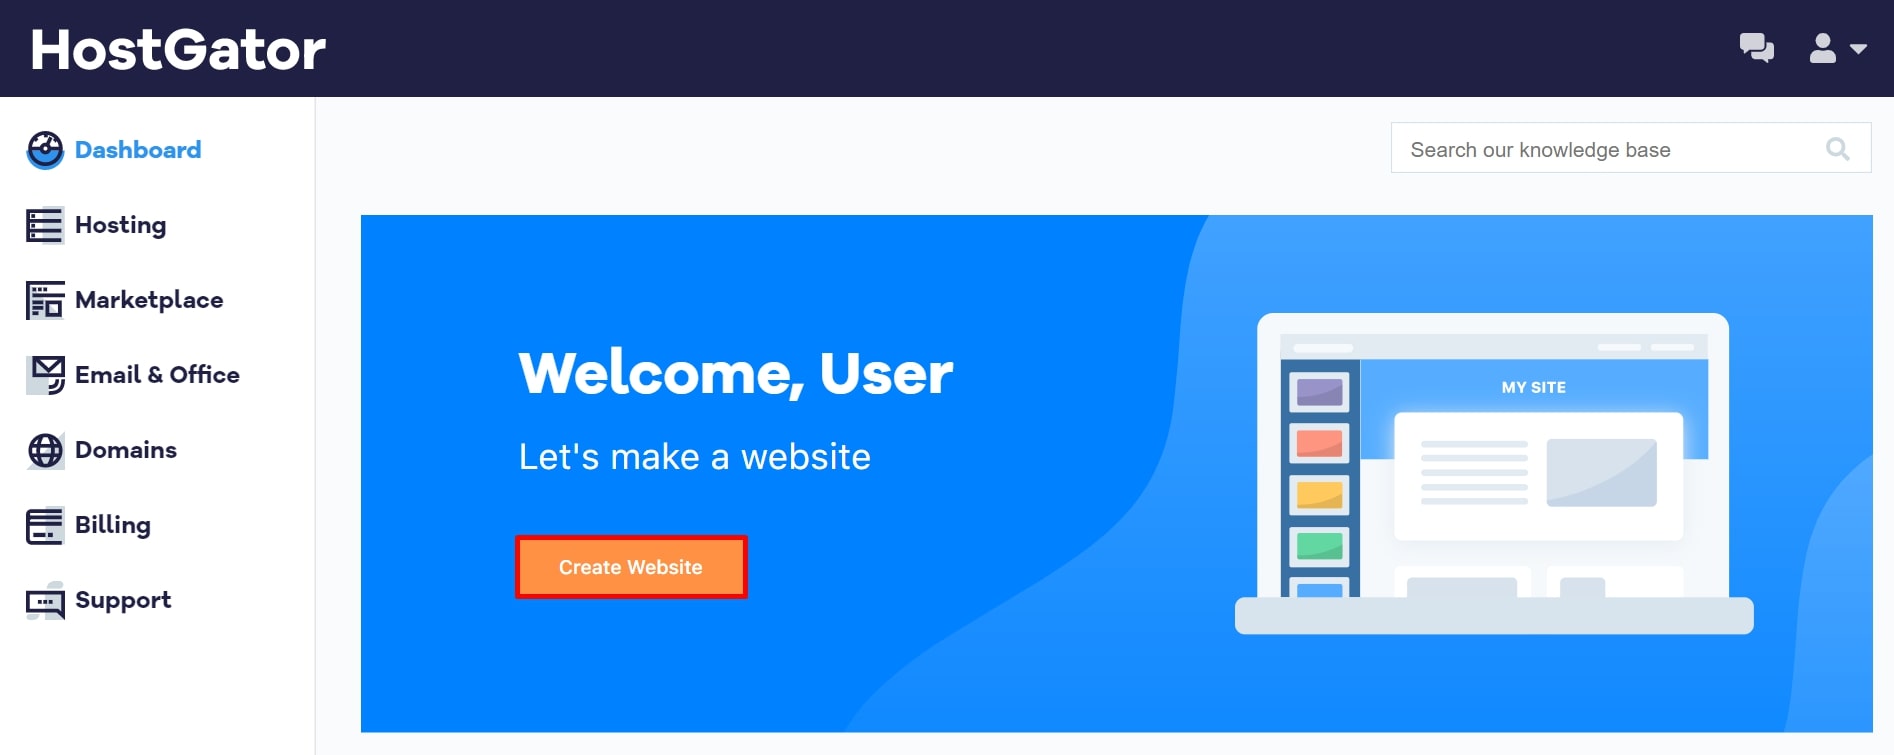
Now that you’ve got your login credentials, you possibly can start the method of putting in WordPress. First, you have to to log into your HostGator account and navigate to the “My Accounts” web page. From there, click on on the “WordPress Installer” hyperlink underneath the “Advanced Features” part.
On the following web page, you may be requested to pick which area you wish to set up WordPress on. After making your choice, click on on the “Check Domain” button.
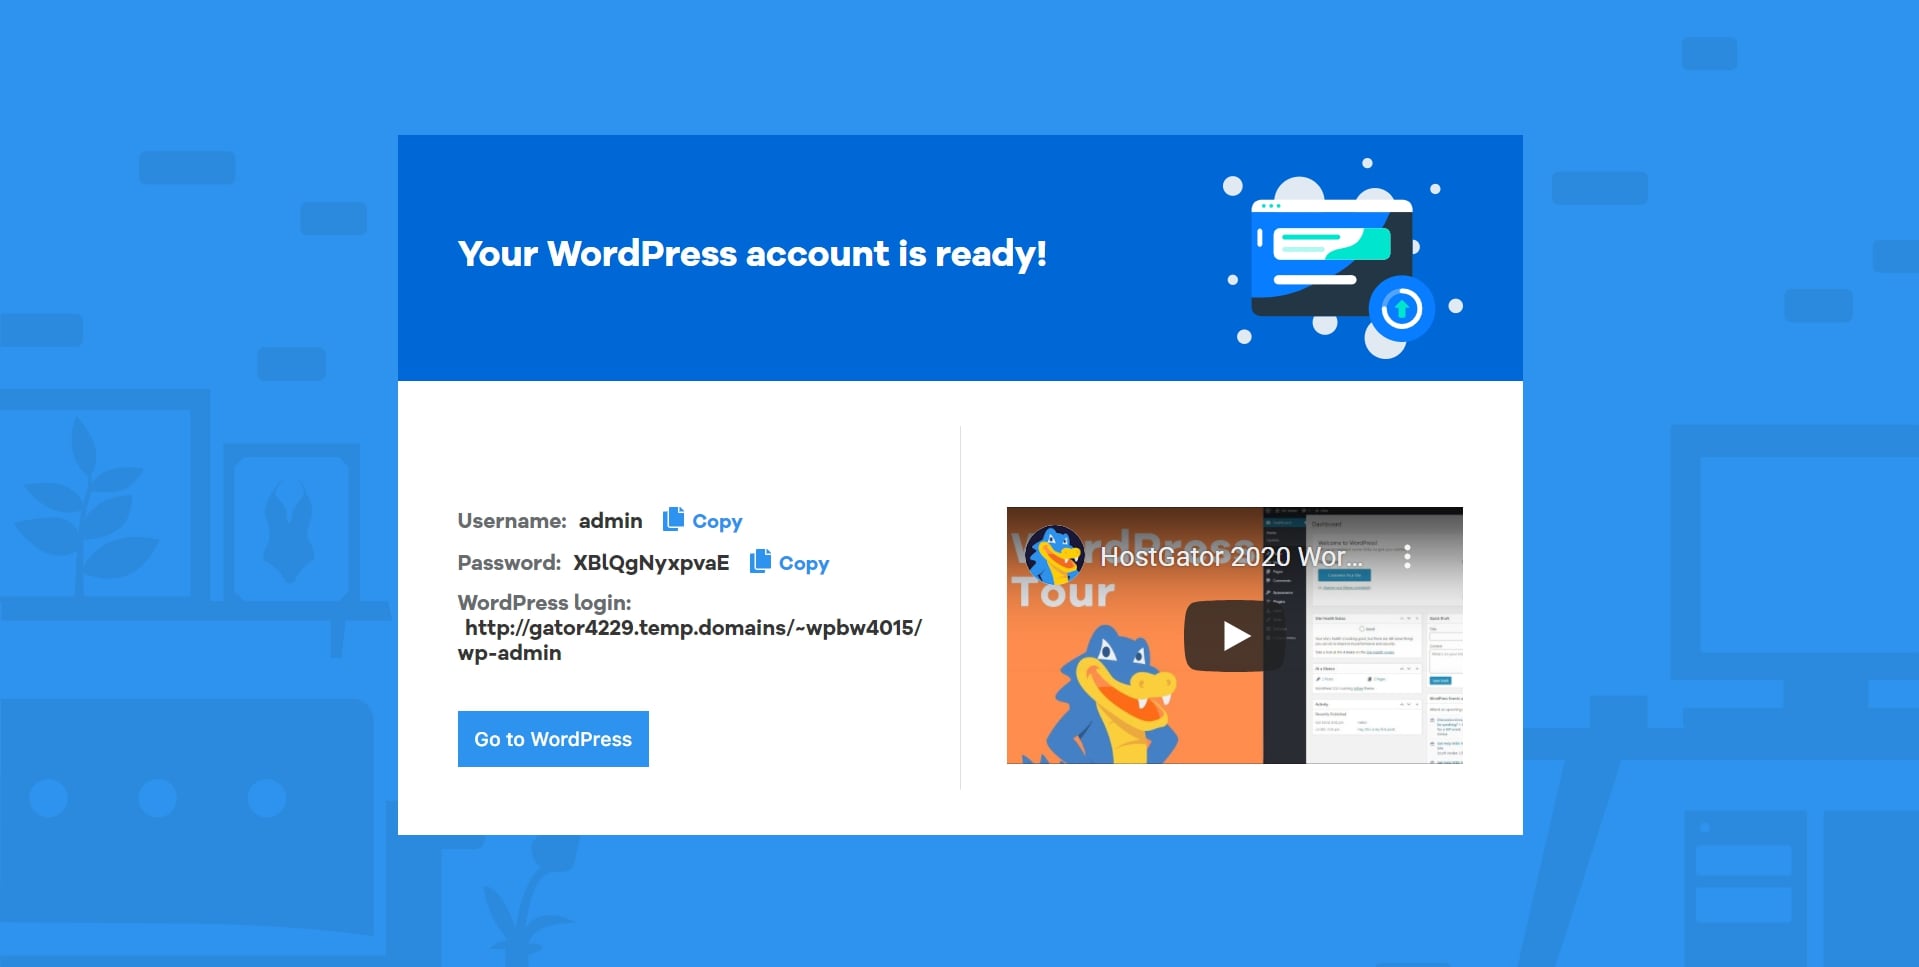
Once your area has been checked, you may be taken to the following web page the place it is possible for you to to decide on your WordPress settings. Be positive to fill out the entire required fields after which click on on the “Install WordPress” button.
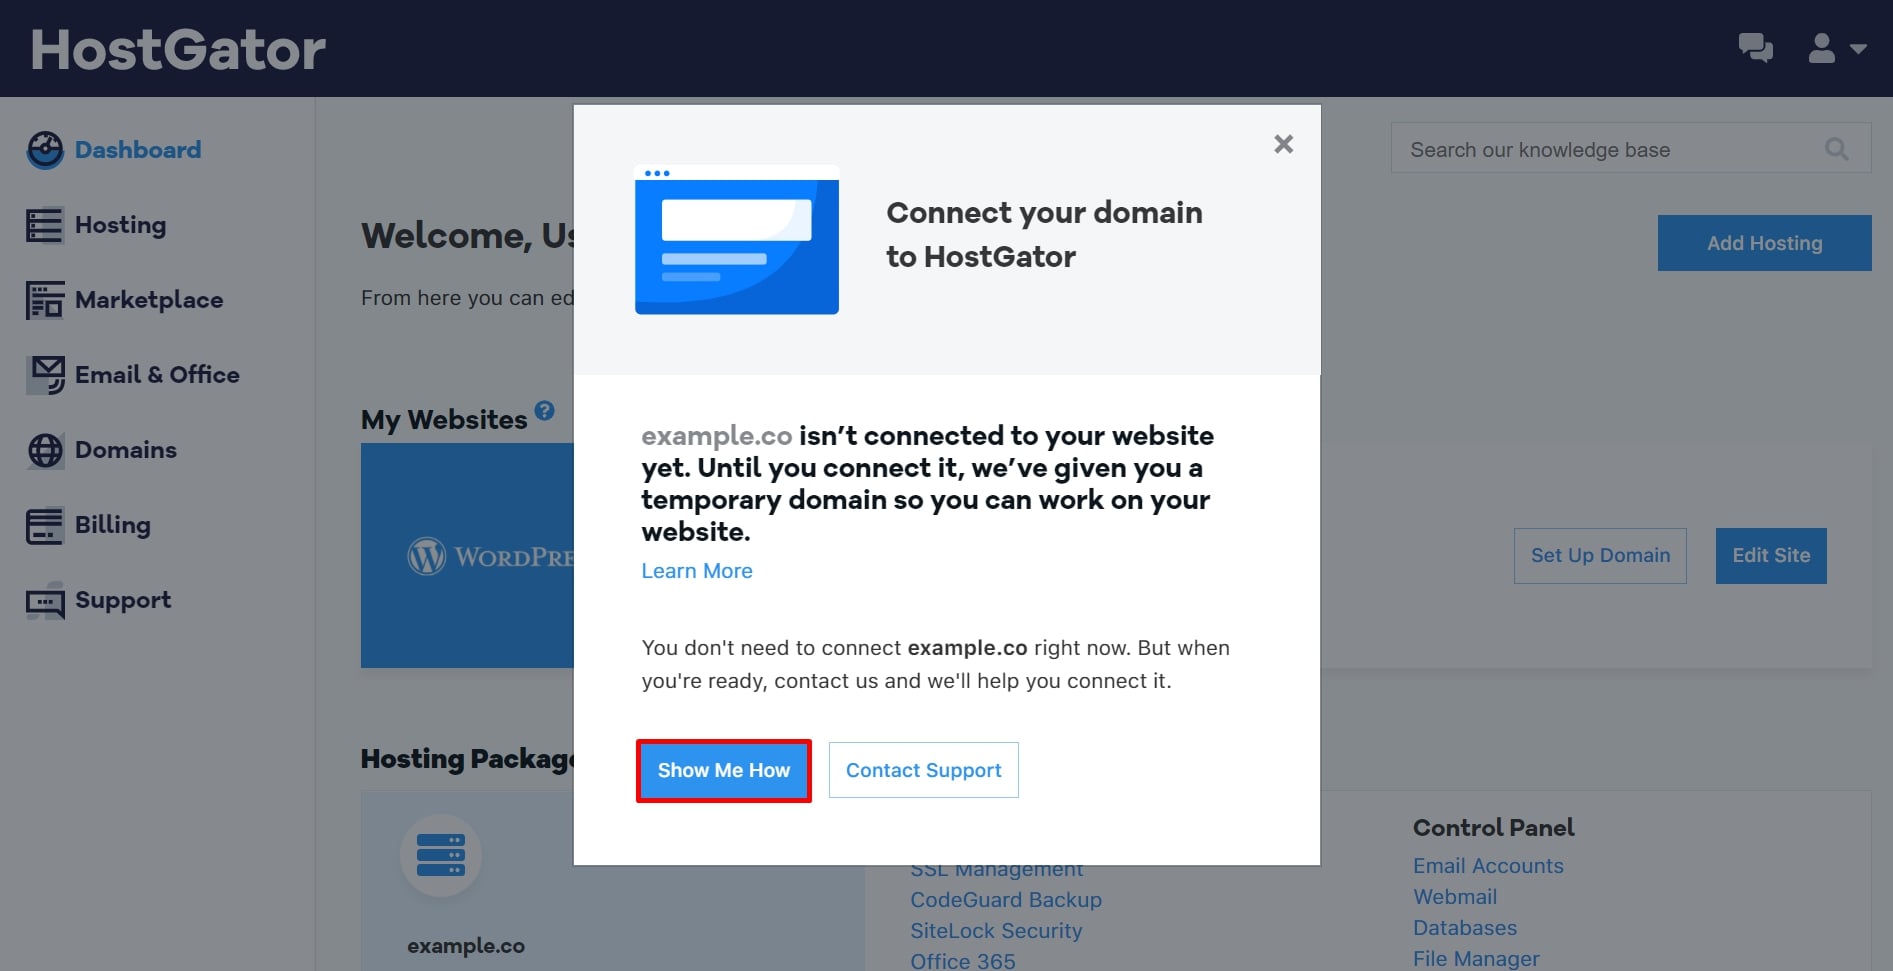
- Those who purchase the area on one other supplier should change their present nameservers with the one supplied by HostGator, proven on the backside of the web page. Copy this info, log in to your area registrant account, and paste it into the DNS settings.
- Return to this web page and press Verify Connection. Wait between 24 and 72 hours for the DNS propagation to finish.

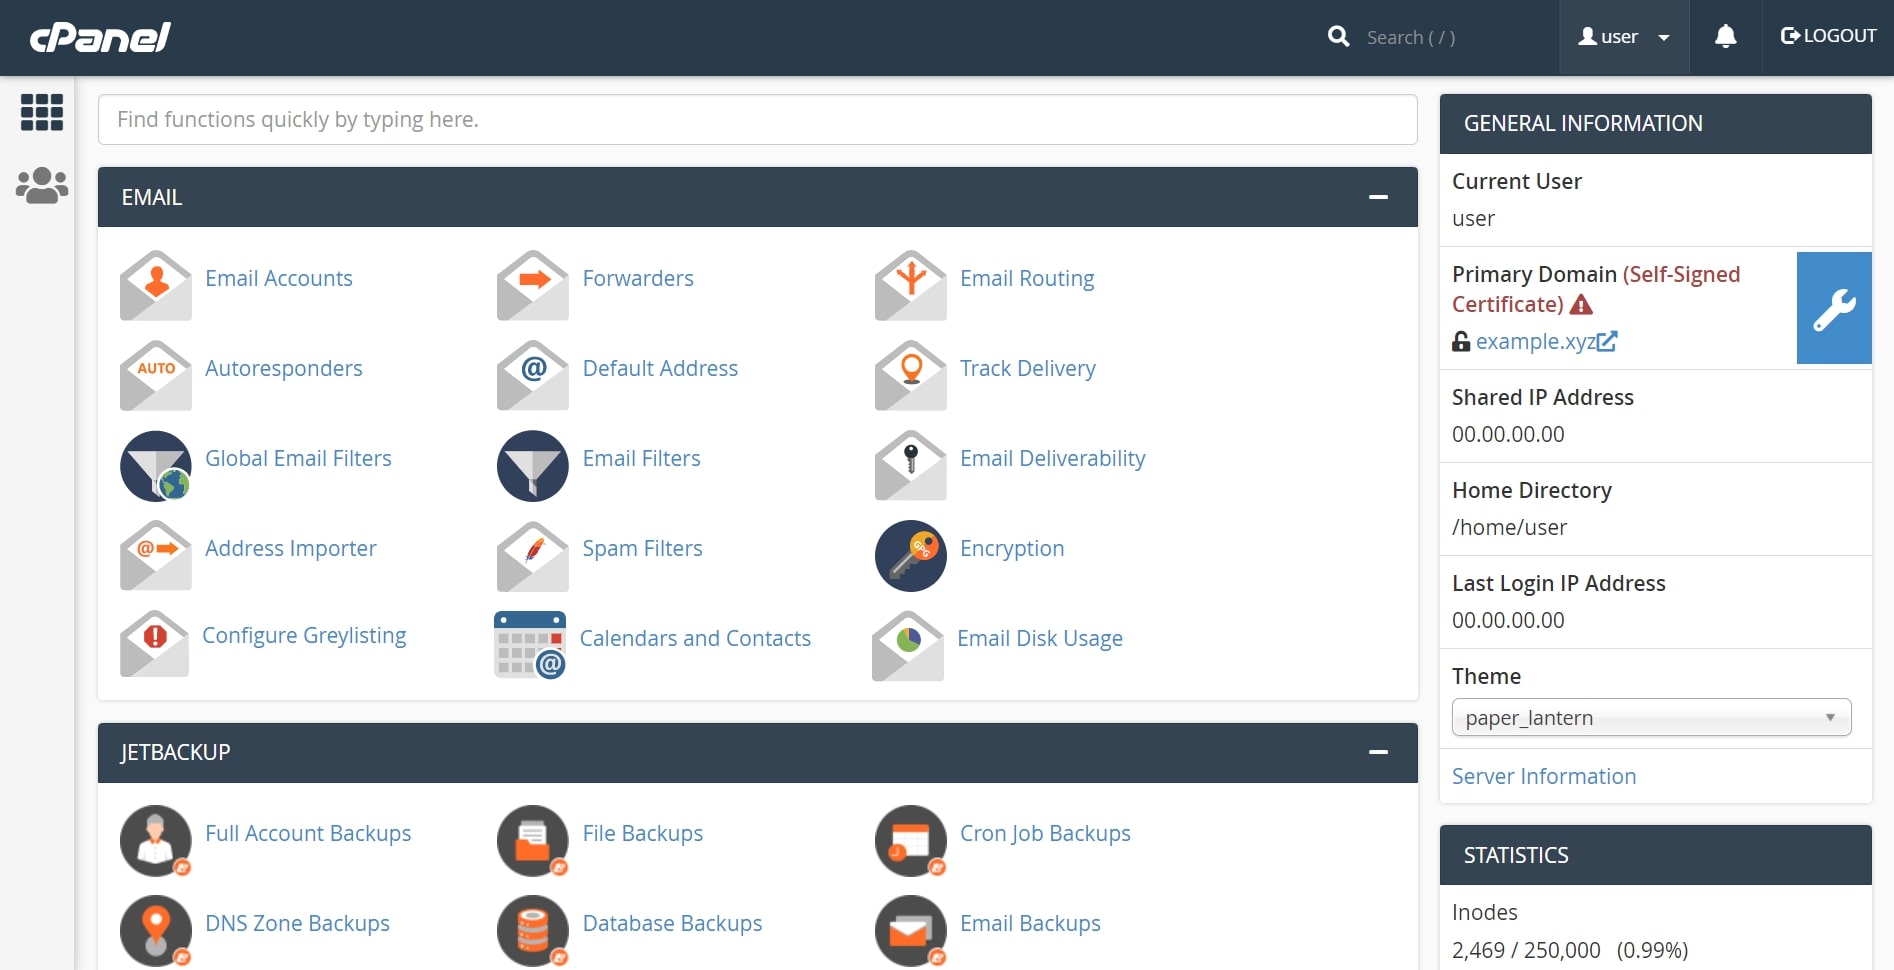
How to put in WordPress utilizing cPanel
Some internet hosting suppliers don’t provide an computerized WordPress installer like those we’ve talked about. However, there’s nonetheless a simple option to set up WordPress if the host gives cPanel.
cPanel is a widely-used management panel for hosting administration. Depending on the internet hosting service, it often has a built-in app set up script that you should utilize to put in WordPress and different CMSs. Some standard examples are Softaculous, Fantastico, or FastInstall.
If your cPanel is model 92 or up, use WP Toolkit as a substitute. This is a brand new in-app characteristic from cPanel, permitting any consumer to put in, configure, and handle a WordPress web site.
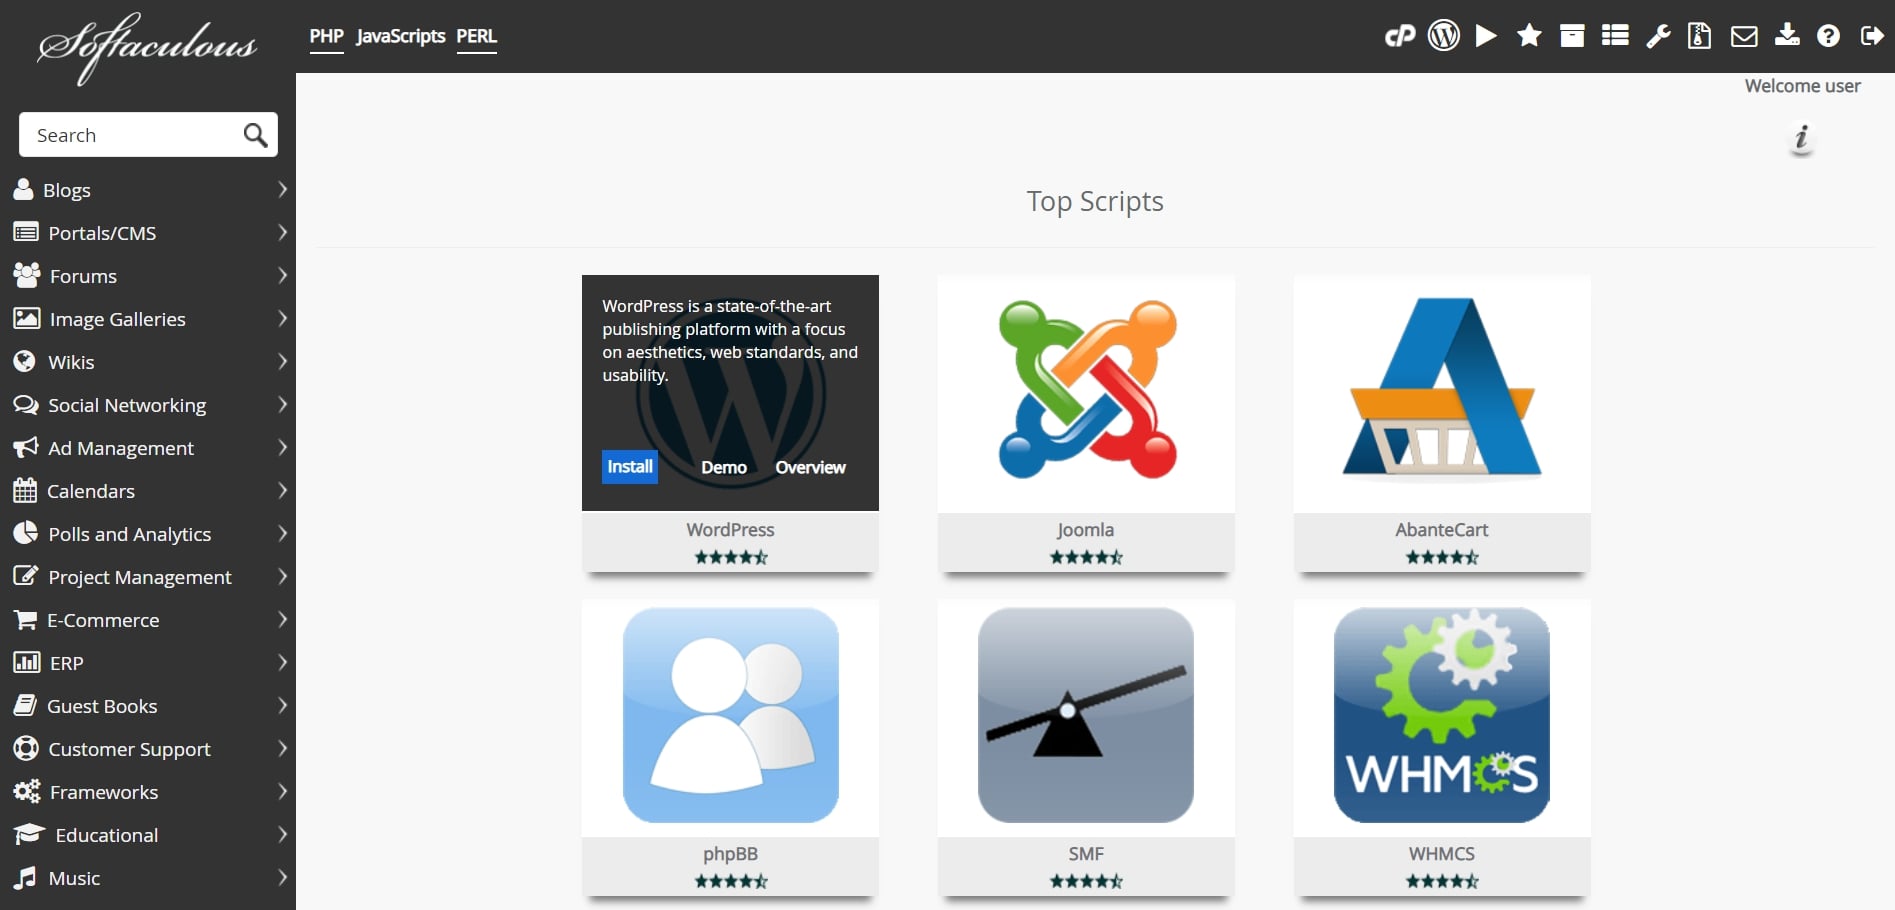
The steps are kind of the identical with all app installers, although we’ll use Softaculous for instance.
Open cPanel from the internet hosting account interface. Alternatively, sort in your area identify on the internet browser and add /cpanel on the finish.
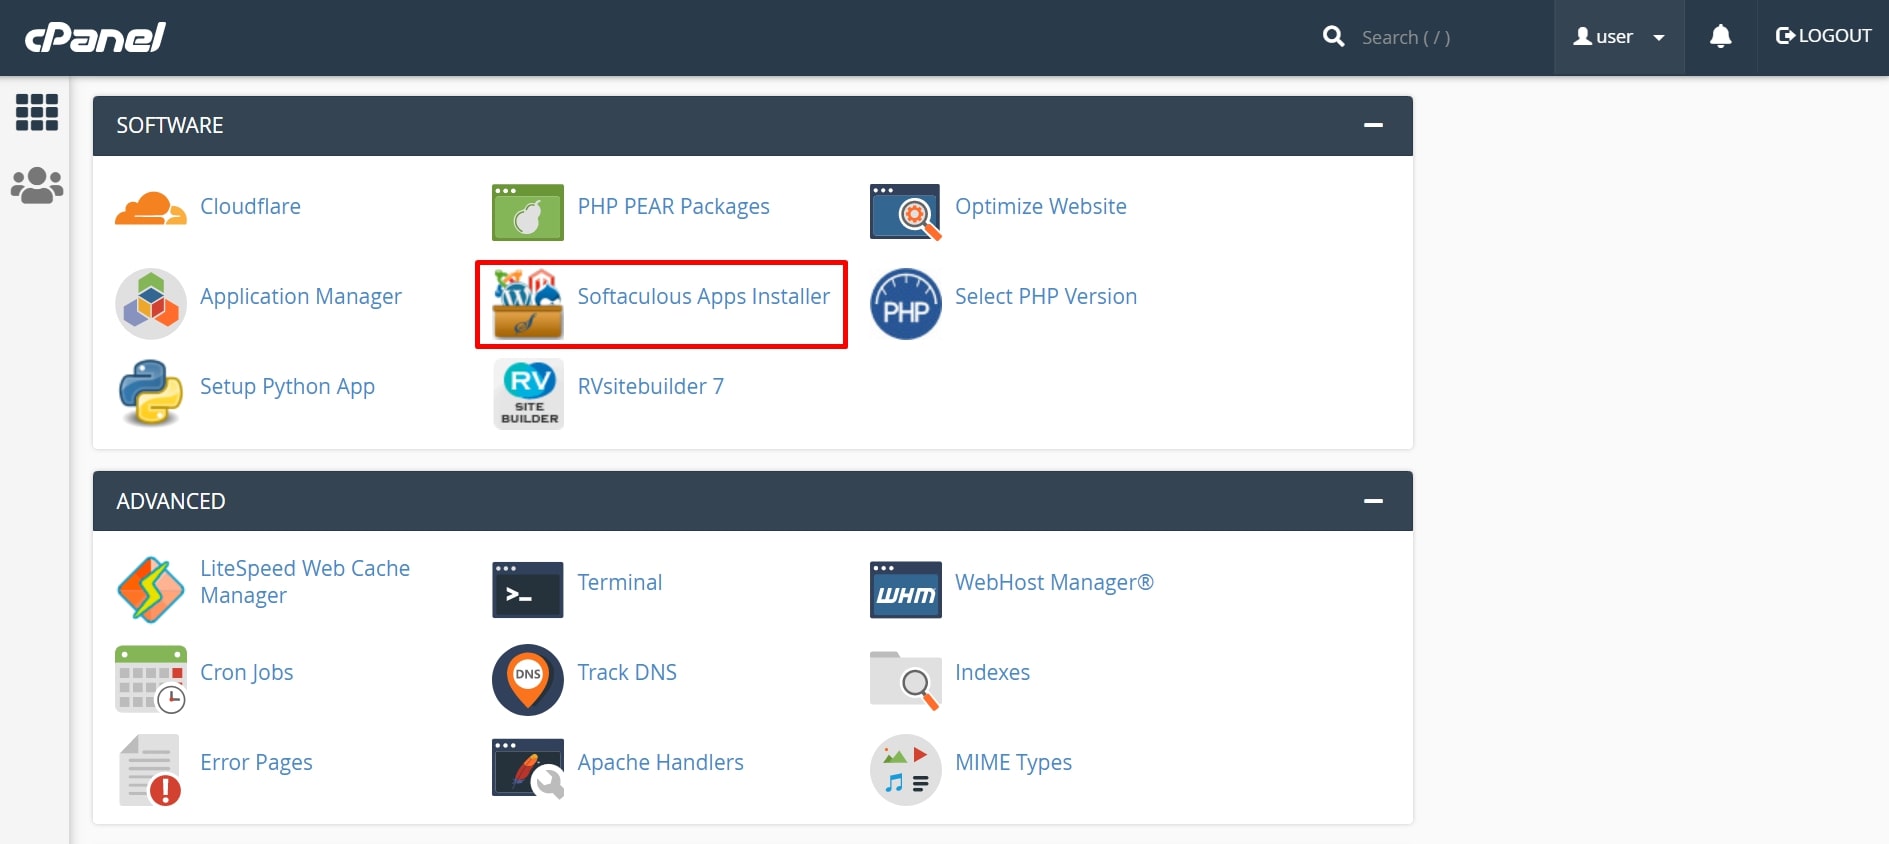
Scroll right down to find the apps installer icon.
Next, hover over the WordPress icon and click on Install.
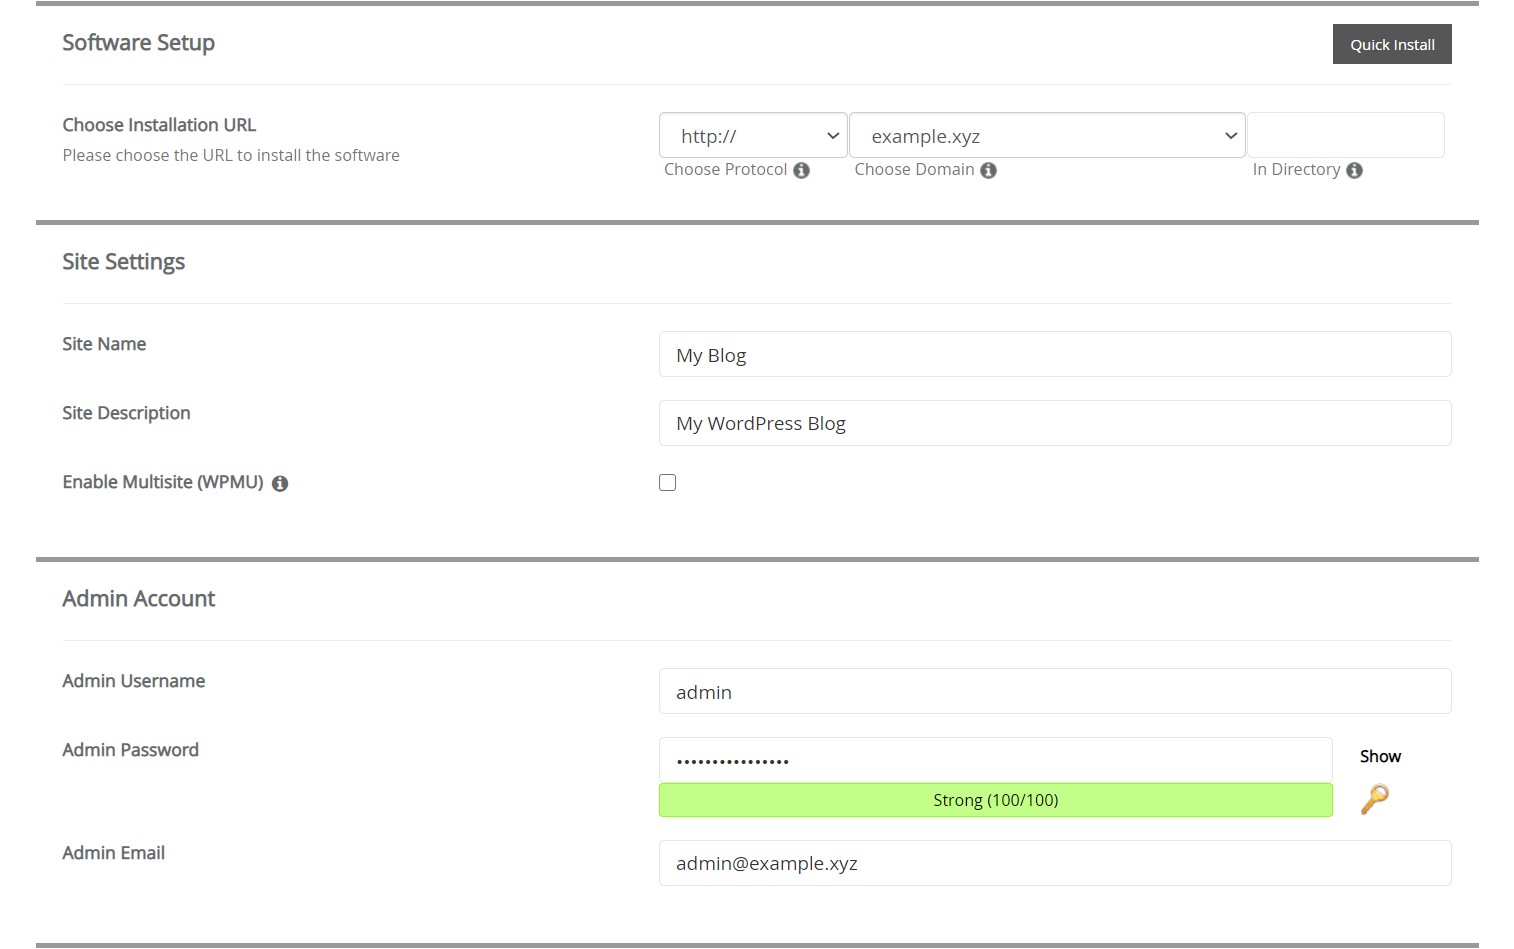
Fill within the required info for the location settings and admin account. It’s additionally attainable to configure the automated improve and backup settings. Once completed, press the Install button down beneath.
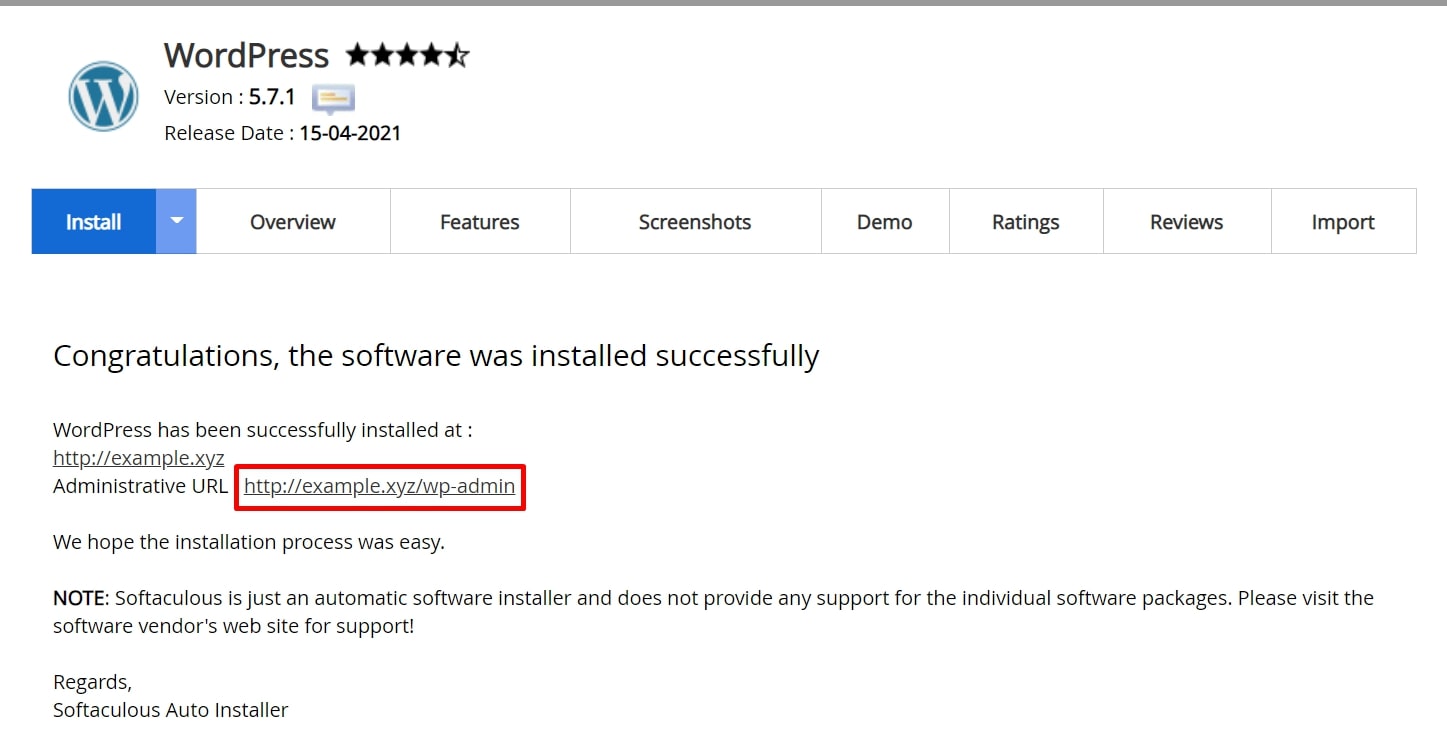
Wait for a couple of minutes to finish the set up. Then, click on on the hyperlink supplied to entry the WordPress dashboard.
How to put in WordPress manually utilizing FTP
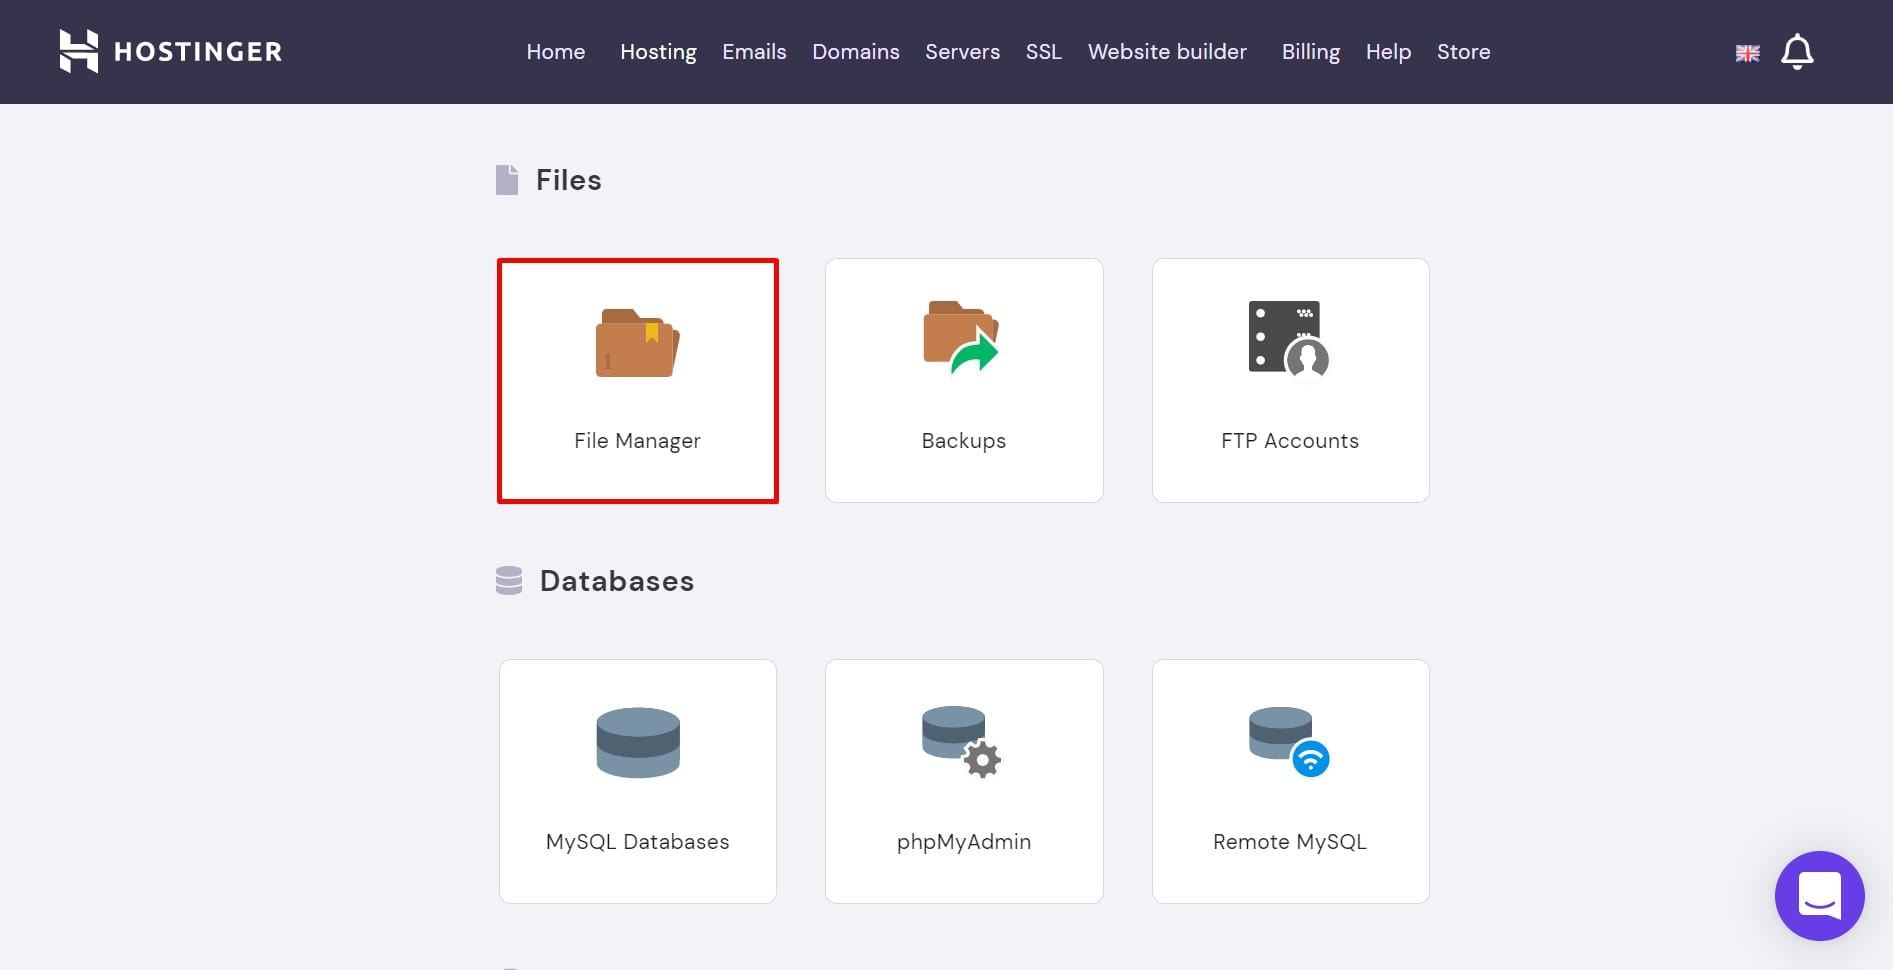
Locate your FTP account info
The first step to putting in WordPress manually is to search out your FTP account info.
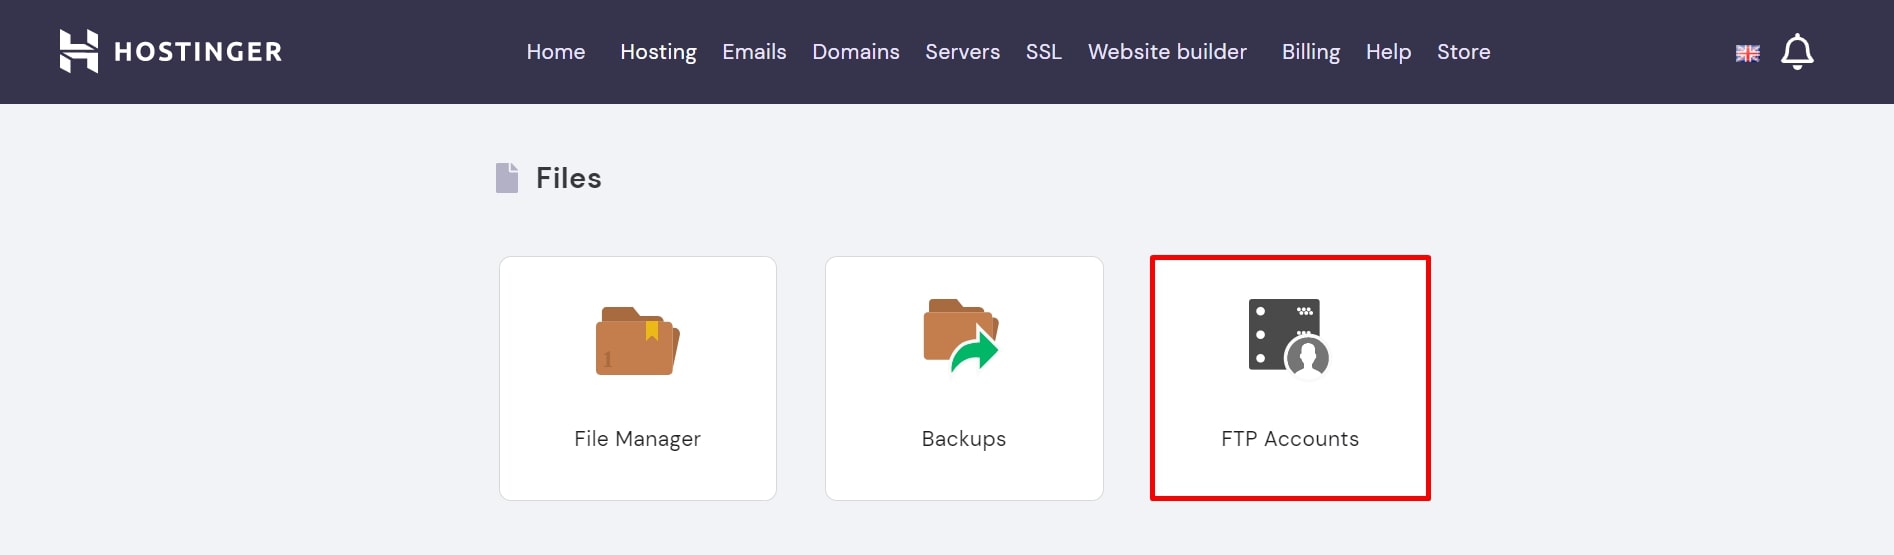
It’s often accessible in your internet hosting administration dashboard on a web page sometimes referred to as FTP Accounts or FTP Manager.
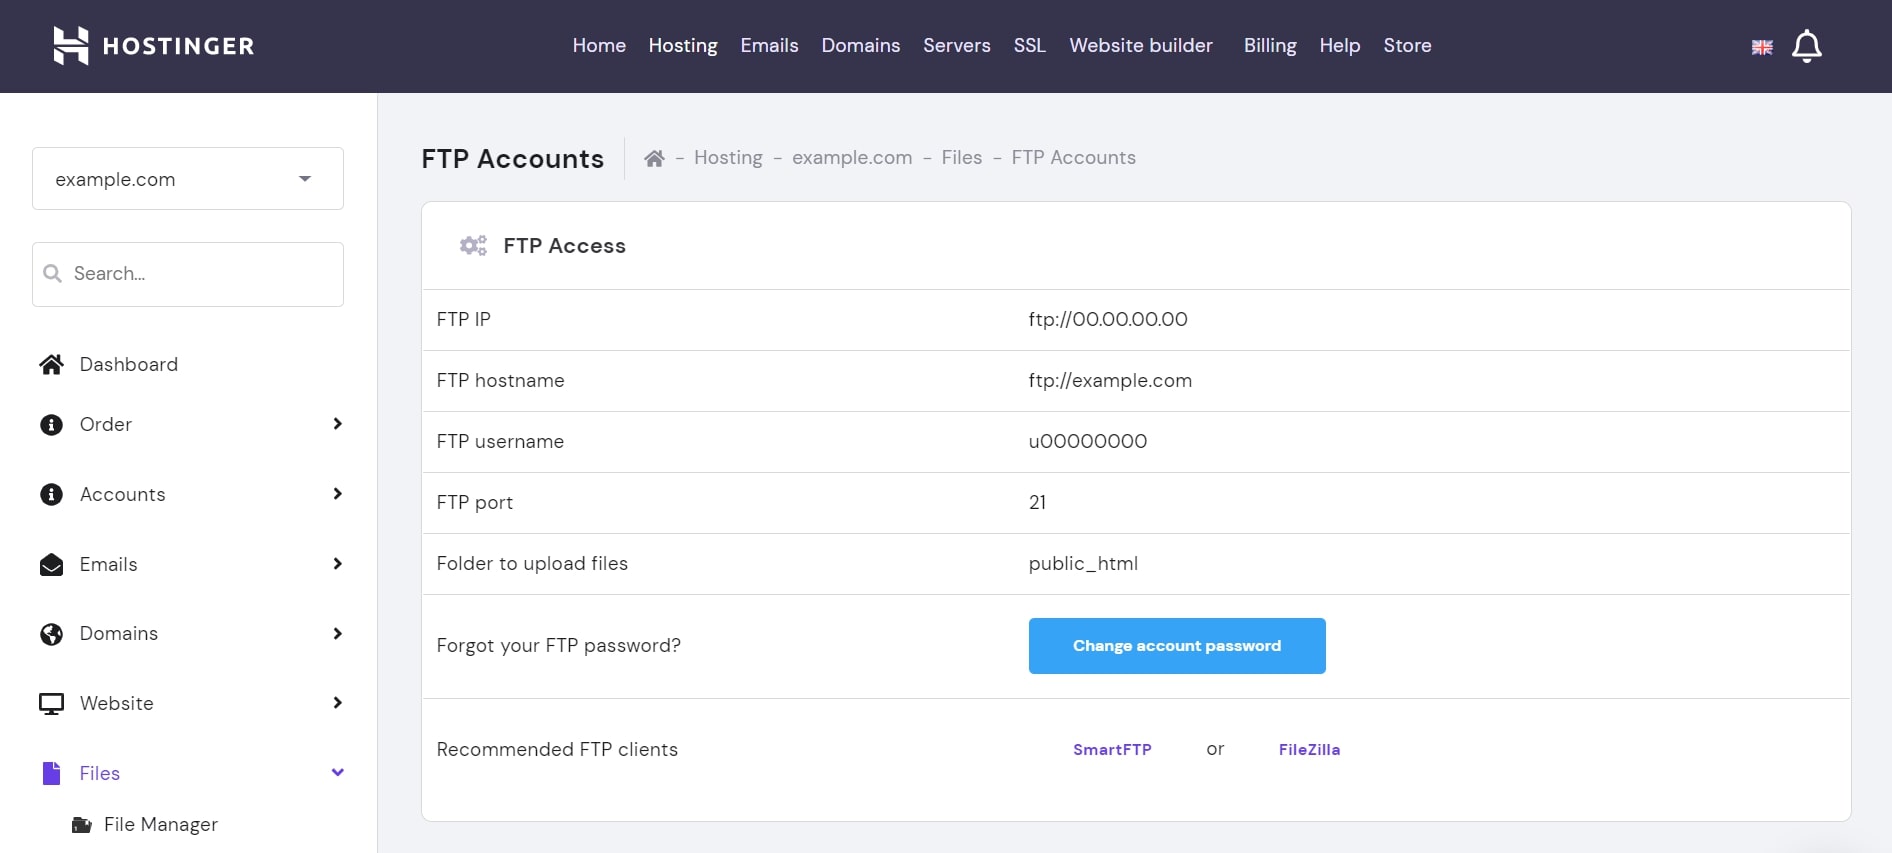
Click on the web page to see the account credentials. If you don’t know the password, think about altering it. Keep this tab open.

Now, open your FTP consumer and join it to your internet server. Those utilizing FileZilla can go to File -> Site Manager… on the highest menu.
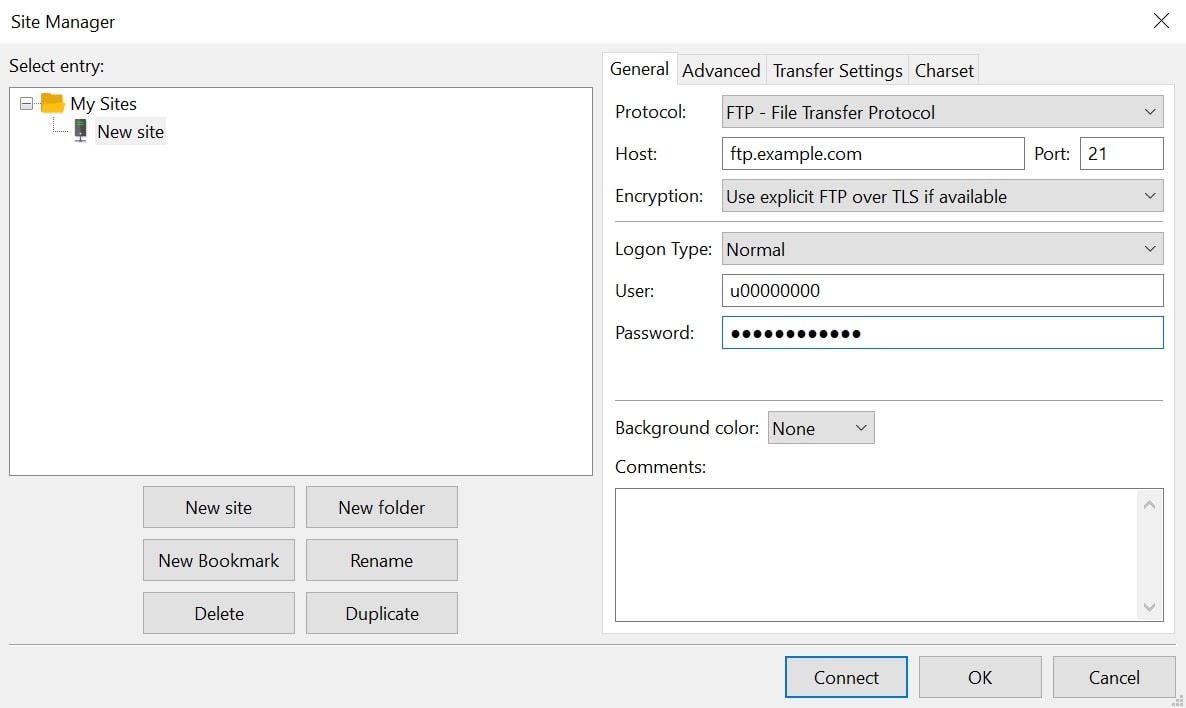
On the window, click on New Site. Fill within the FTP account info within the acceptable fields. For the Protocol, choose FTP – File Transfer Protocol. Choose to Use express FTP over TLS if accessible for the Encryption. Set the Logon sort to Normal.
Finally, press the Connect button.
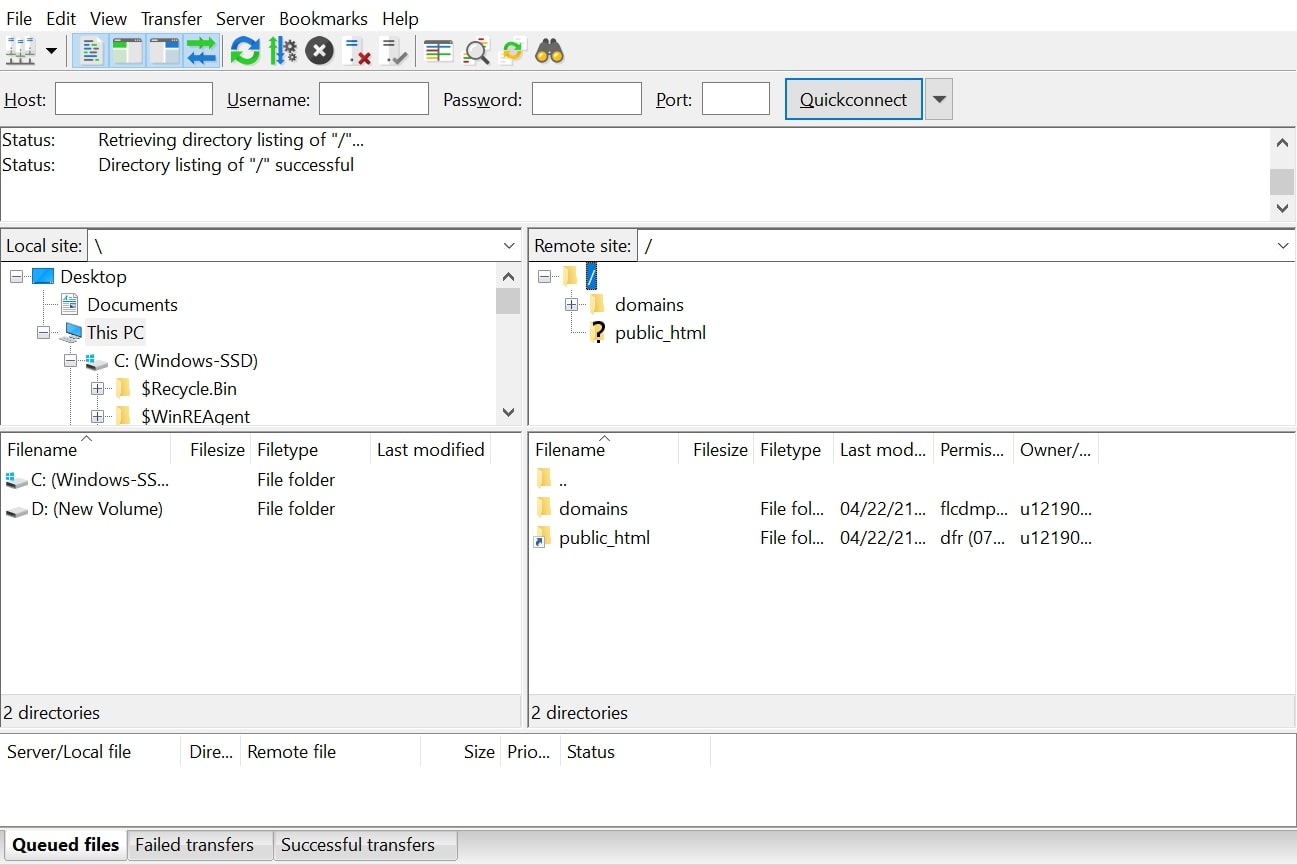
After establishing the connection, the appliance ought to seem like the image above. The Local Site panel exhibits your pc information, whereas the Remote Site shows those contained in the WordPress web site.
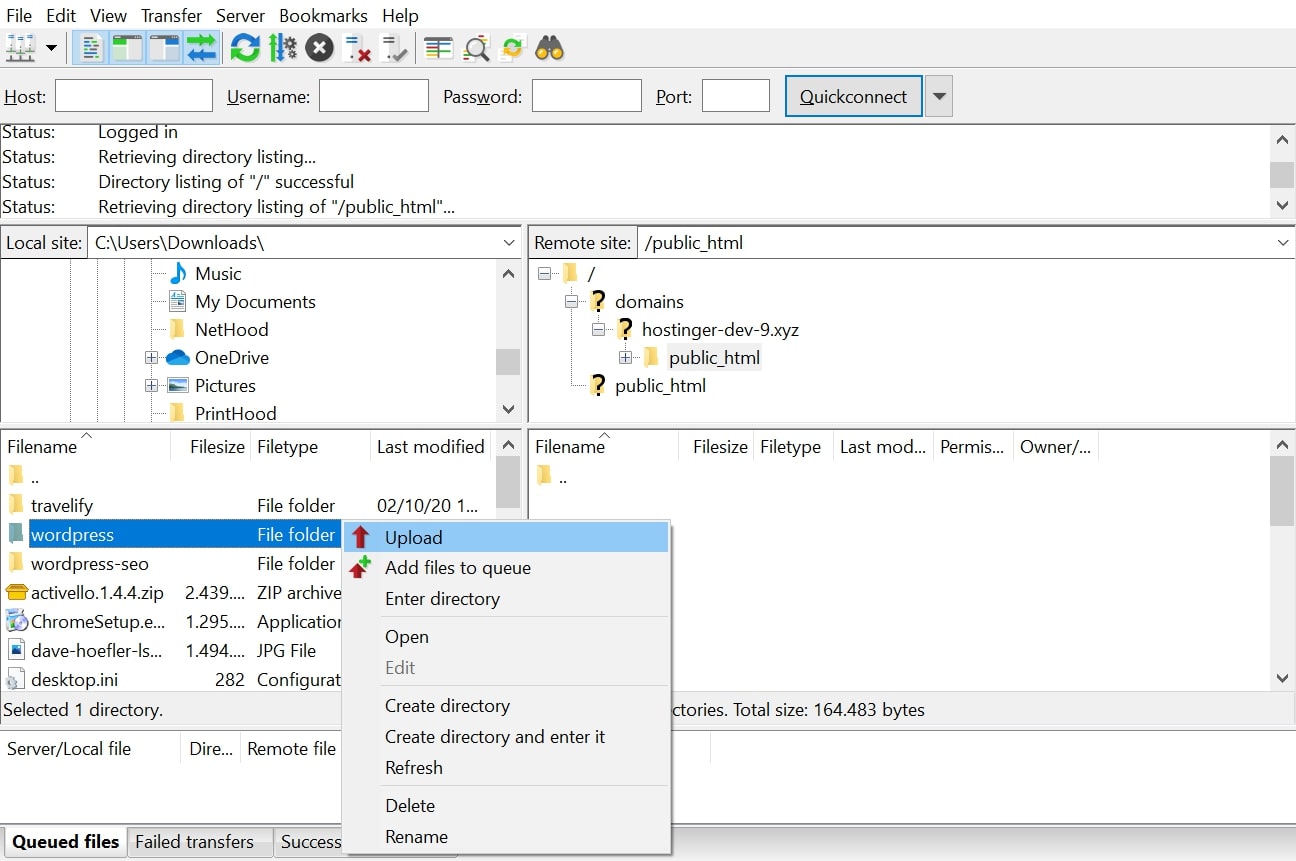
Upload the WordPress information
With the connection established, you can begin putting in WordPress by transferring the bundle information to the net server.
On the Remote Site panel, choose the public_html folder. This is the basis listing of all the web site information.
Then, on the Local Site part, discover the extracted WordPress information in your pc. Select all and right-click to Upload them to the public_html listing. Then merely look forward to the switch to finish earlier than shifting on to the following step.
Create a brand new database
Let’s create a database to retailer your entire WordPress web site content material.
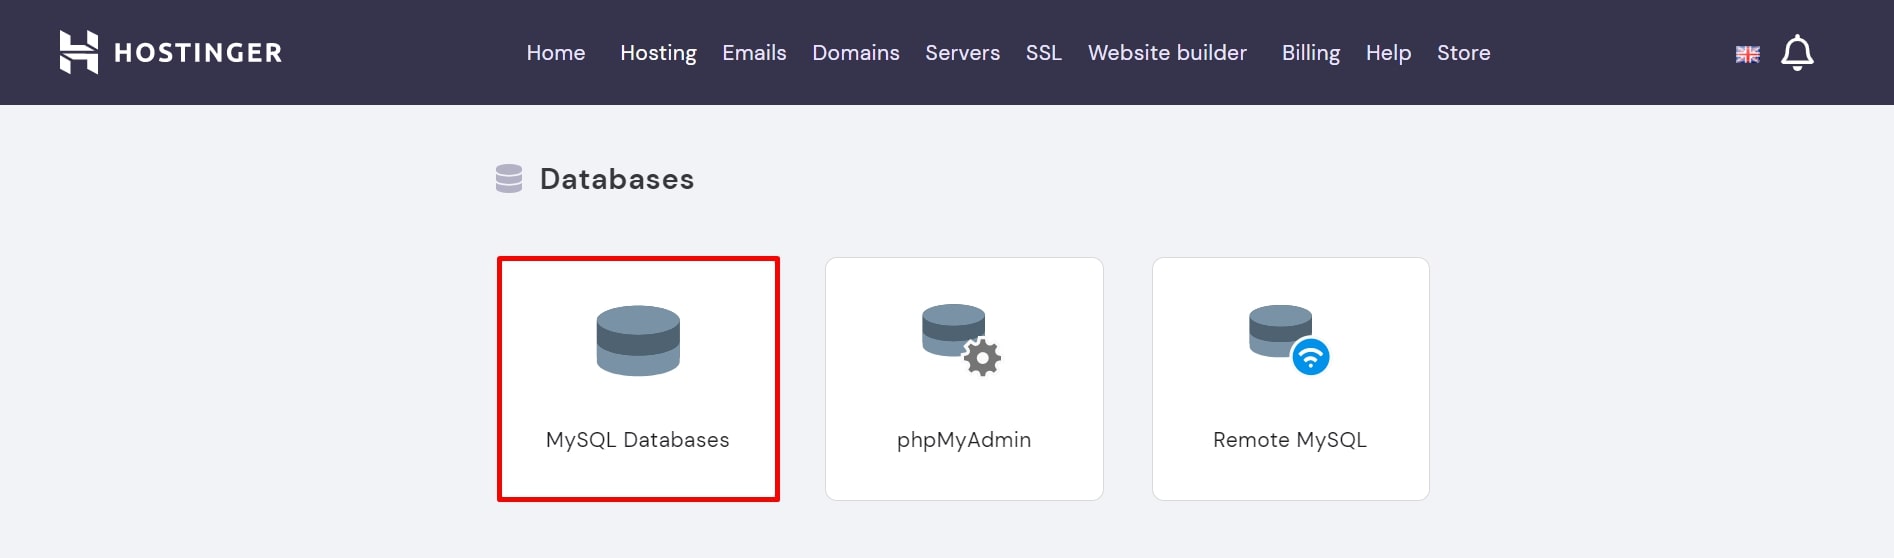
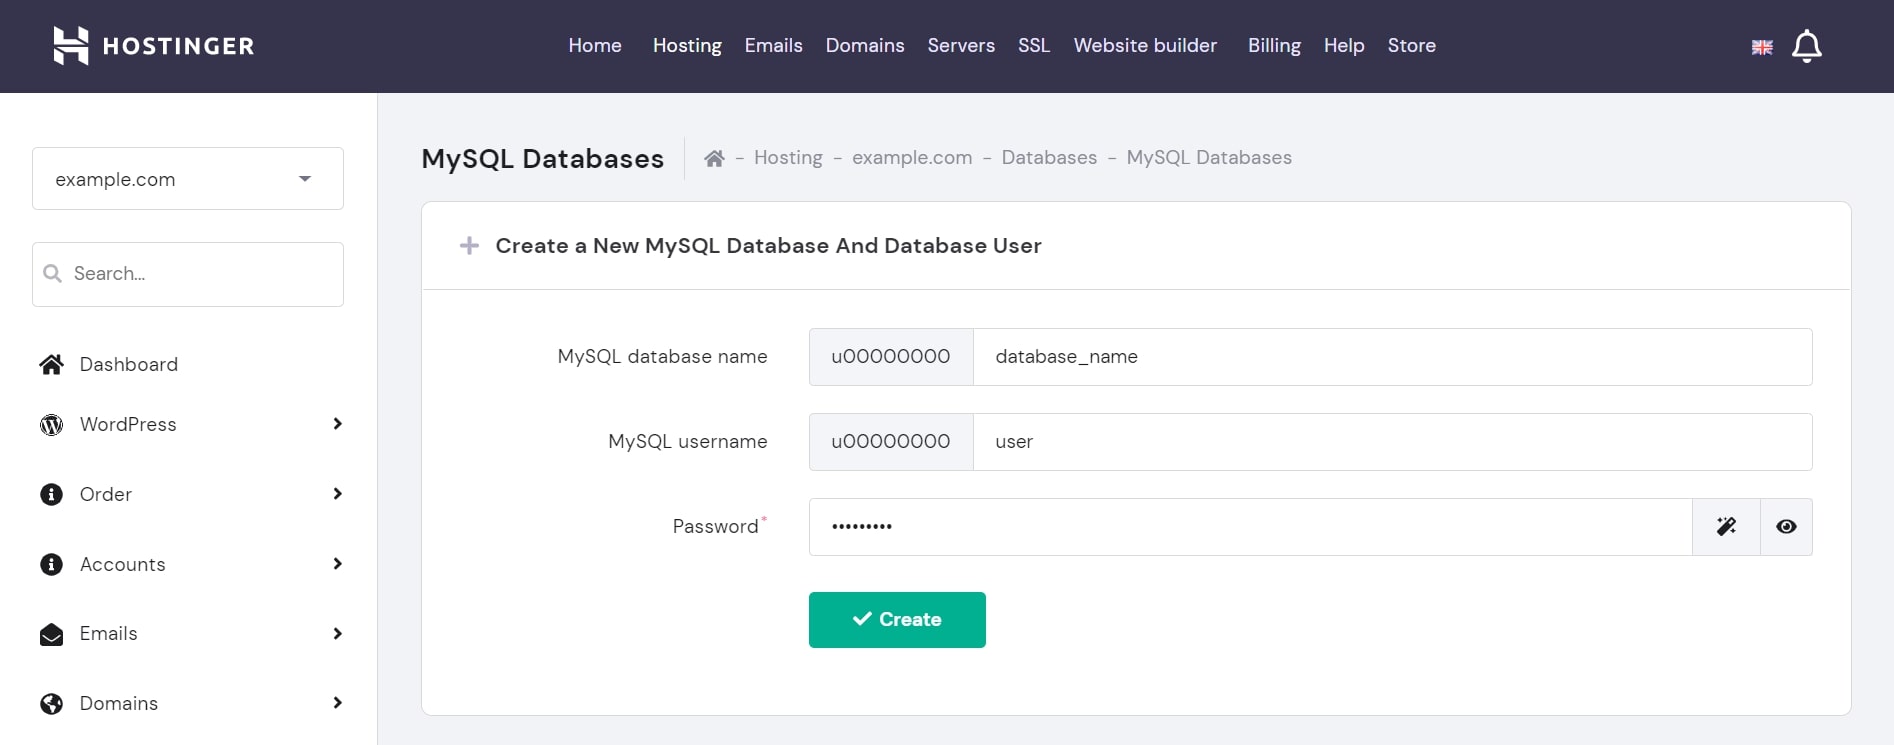
To do that, log in to your internet hosting account’s management panel and find a button that enables entry to the MySQL Database. In Hostinger, this setting is accessible underneath the Databases part.
The web page ought to have a bit the place you possibly can create a brand new MySQL database and consumer. Fill within the required fields:
- Database identify
- Database username
- Database password
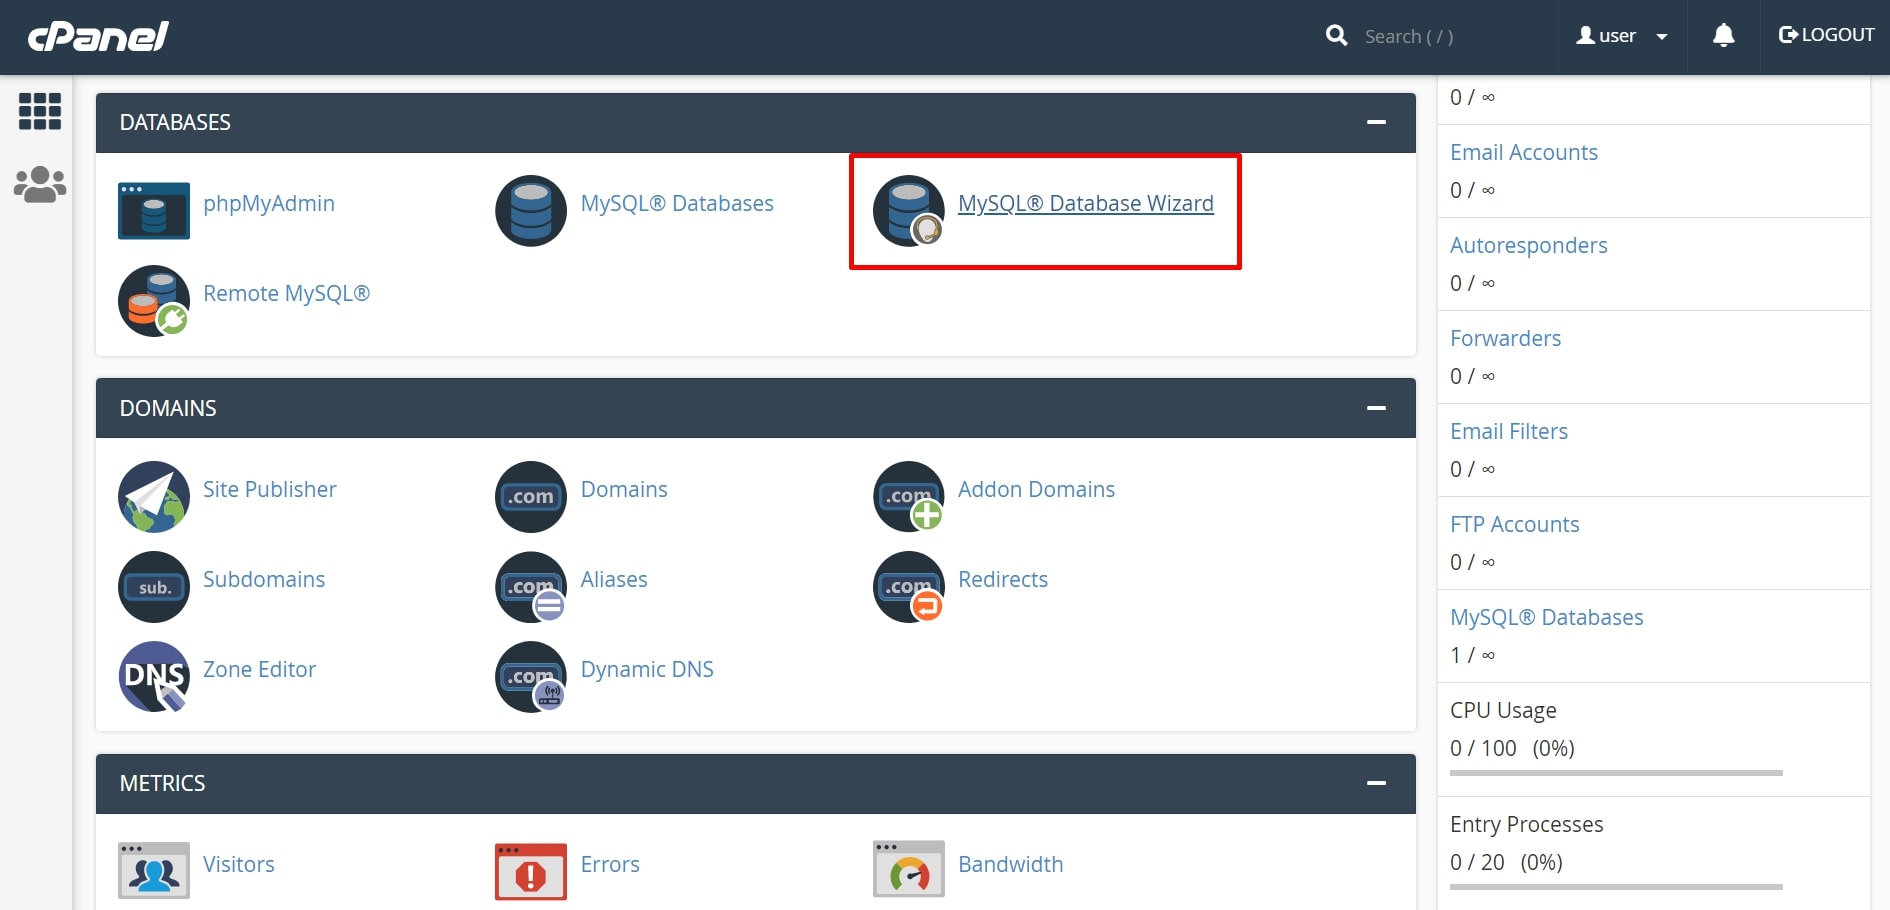
Those utilizing cPanel can create a database by utilizing the MySQL Database Wizard. The required fields are the identical as within the earlier instance.
Configure the wp-config.php file
wp-config.php holds details about the web site’s database. You have to configure this file in order that WordPress can talk with the newly-created database and retrieve information from it.
The wp-config.php file is often accessible from the File Manager on the internet host’s management panel, which is the place you possibly can arrange and edit the web site information.
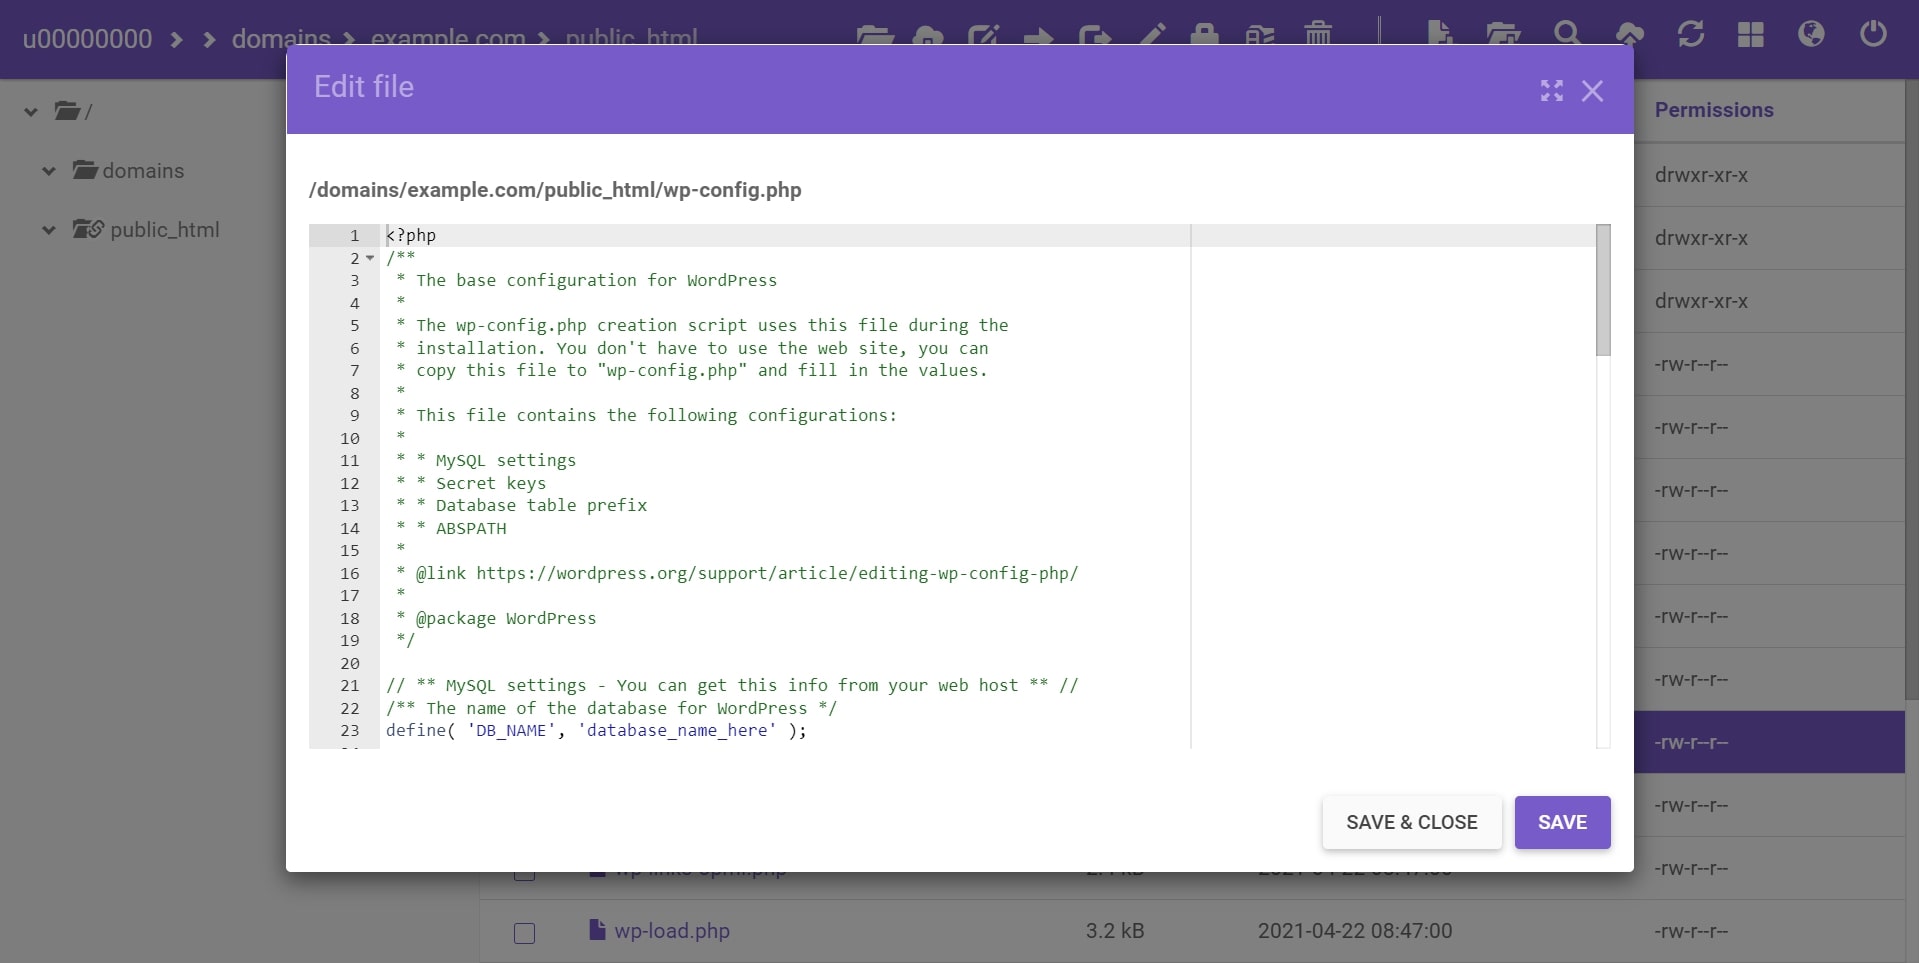
From there, open the public_html internet listing. Then find the wp-config-sample.php file. Rename this to wp-config.php, then open it.
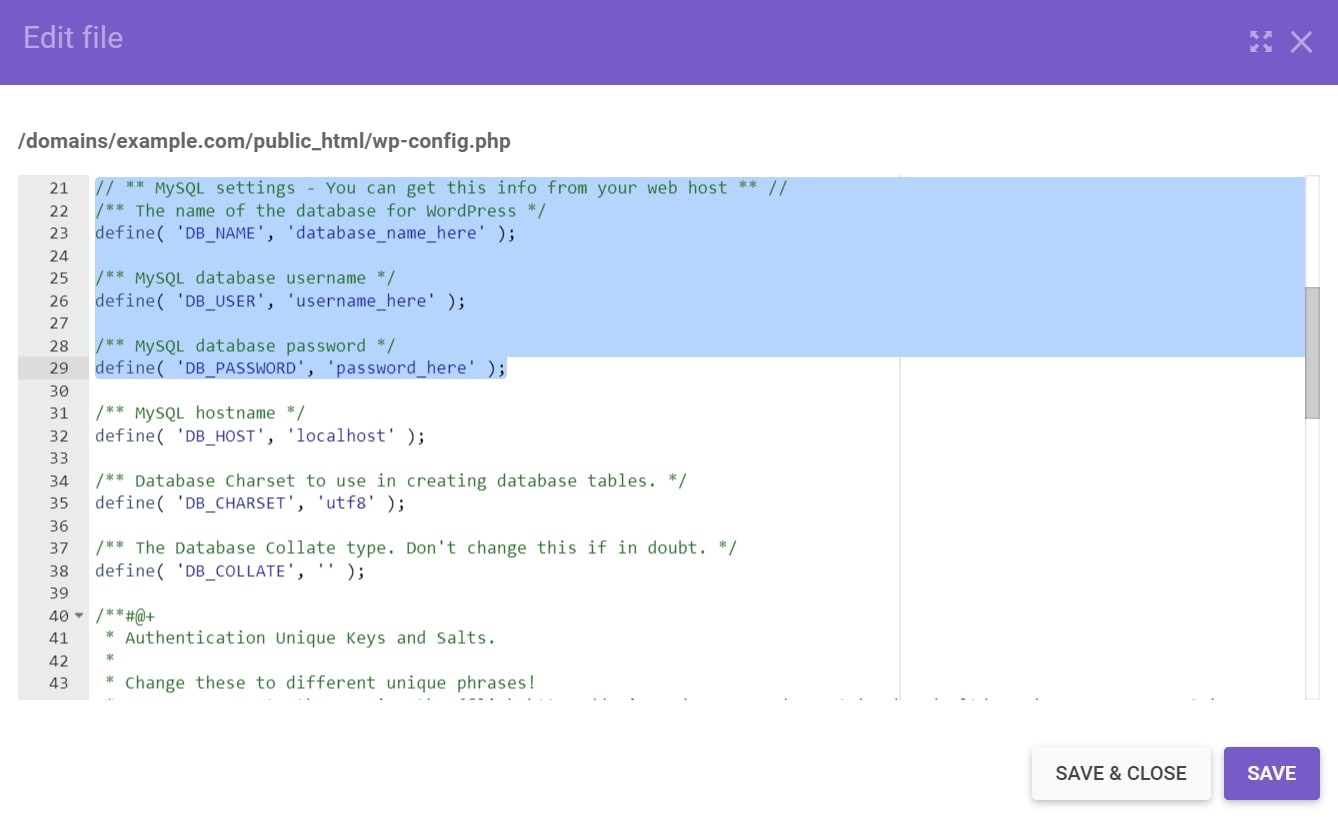
Scroll down till you discover the data highlighted above.
Replace the database_name_here, username_here, and password_here with the database info you created within the earlier step. Once completed, press Save.
Run the WordPress set up script
The WordPress set up can now start. Type within the web site’s area on the internet browser to entry the setup web page.
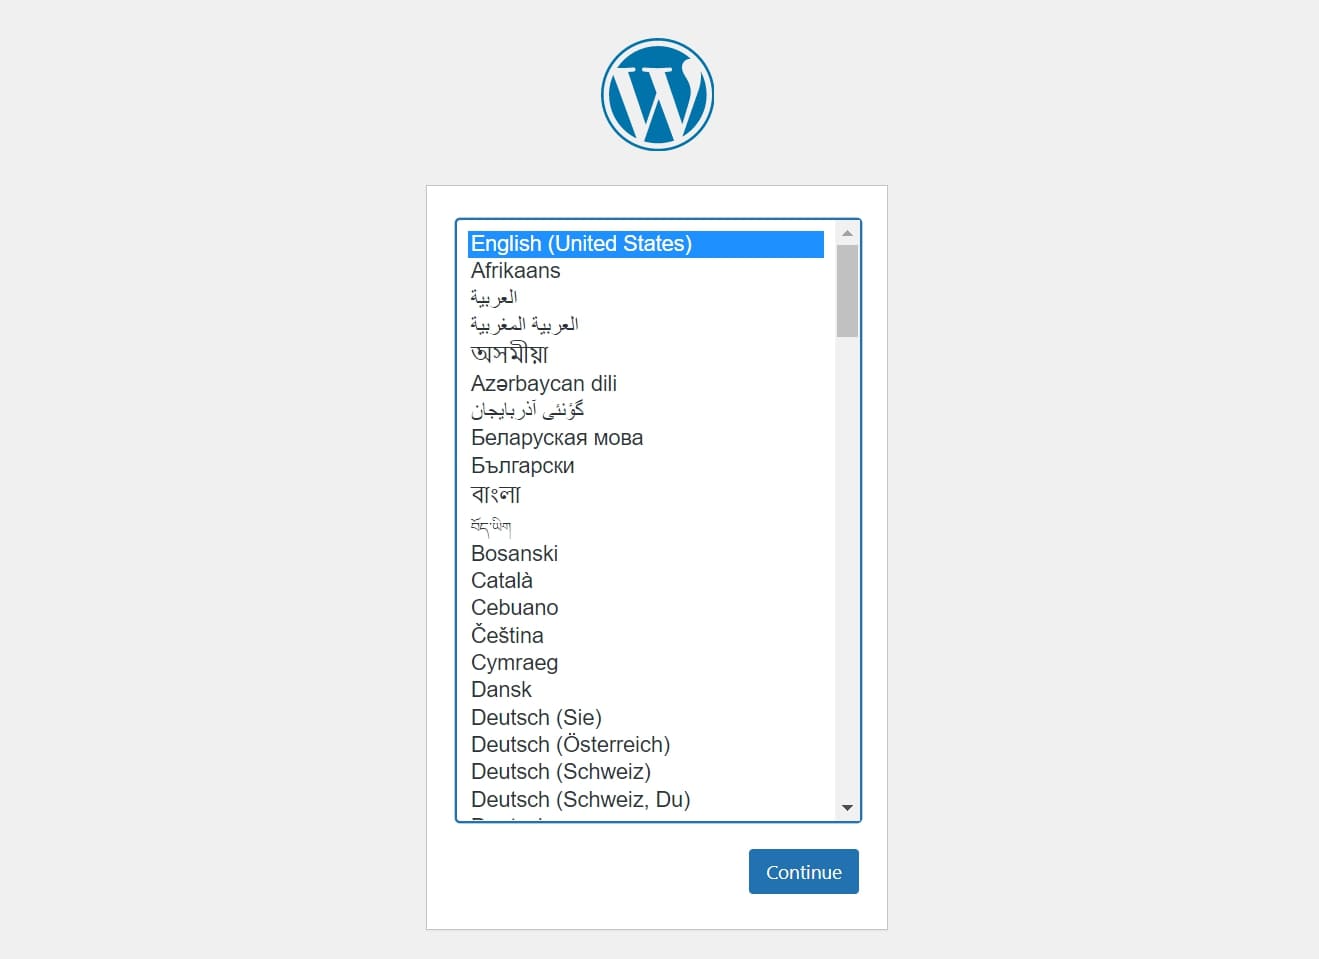
First, choose a language to make use of the software program and press Continue.
Next, insert the required details about the web site and the administrator login credentials. Then click on the Install WordPress button.
The WordPress sign-in web page will seem. Use the login credentials you created, and the admin panel will present up on the display screen. If every little thing went effectively, you’ll have simply put in WordPress manually.
How to configure permalinks on WordPress
If you are working a WordPress web site, there is a good probability you will wish to change the best way your permalinks are configured. By default, WordPress makes use of what’s referred to as “ugly” permalinks, which look one thing like this:
?p=123
While these permalinks work simply positive, they don’t seem to be very user-friendly or Web optimization-friendly. There are a couple of alternative ways you possibly can go about altering your permalink construction. The easiest method is to easily go to Settings > Permalinks in your WordPress dashboard and choose the specified permalink construction from the listing of choices.
If you wish to change your permalink construction to one thing that is not on the listing, you are able to do so by deciding on the “Custom Structure” possibility and coming into the specified construction within the area supplied. Just you should definitely use the correct code for every component of your permalink (e.g. %postname% for the submit slug).
Once you have chosen or entered your required permalink construction, merely click on “Save Changes” and WordPress will handle the remainder. That’s all there’s to it! In only a few seconds, you possibly can have way more user-friendly and Web optimization-friendly permalinks in your WordPress web site.
There are some things to bear in mind when altering your permalink construction. First, when you’re utilizing an “ugly” permalink construction (?p=123), altering to a distinct permalink construction will lead to 404 errors for your entire current content material.
To keep away from this, you should utilize a plugin like Redirection to arrange redirects out of your previous URLs to your new ones. Alternatively, you possibly can merely replace your .htaccess file with the correct redirect guidelines.
Second, make sure to not change your permalink construction too regularly. Doing so can lead to a lack of visitors and search engine rankings. If you do want to vary your permalink construction, ensure you arrange redirects out of your previous URLs to your new ones.
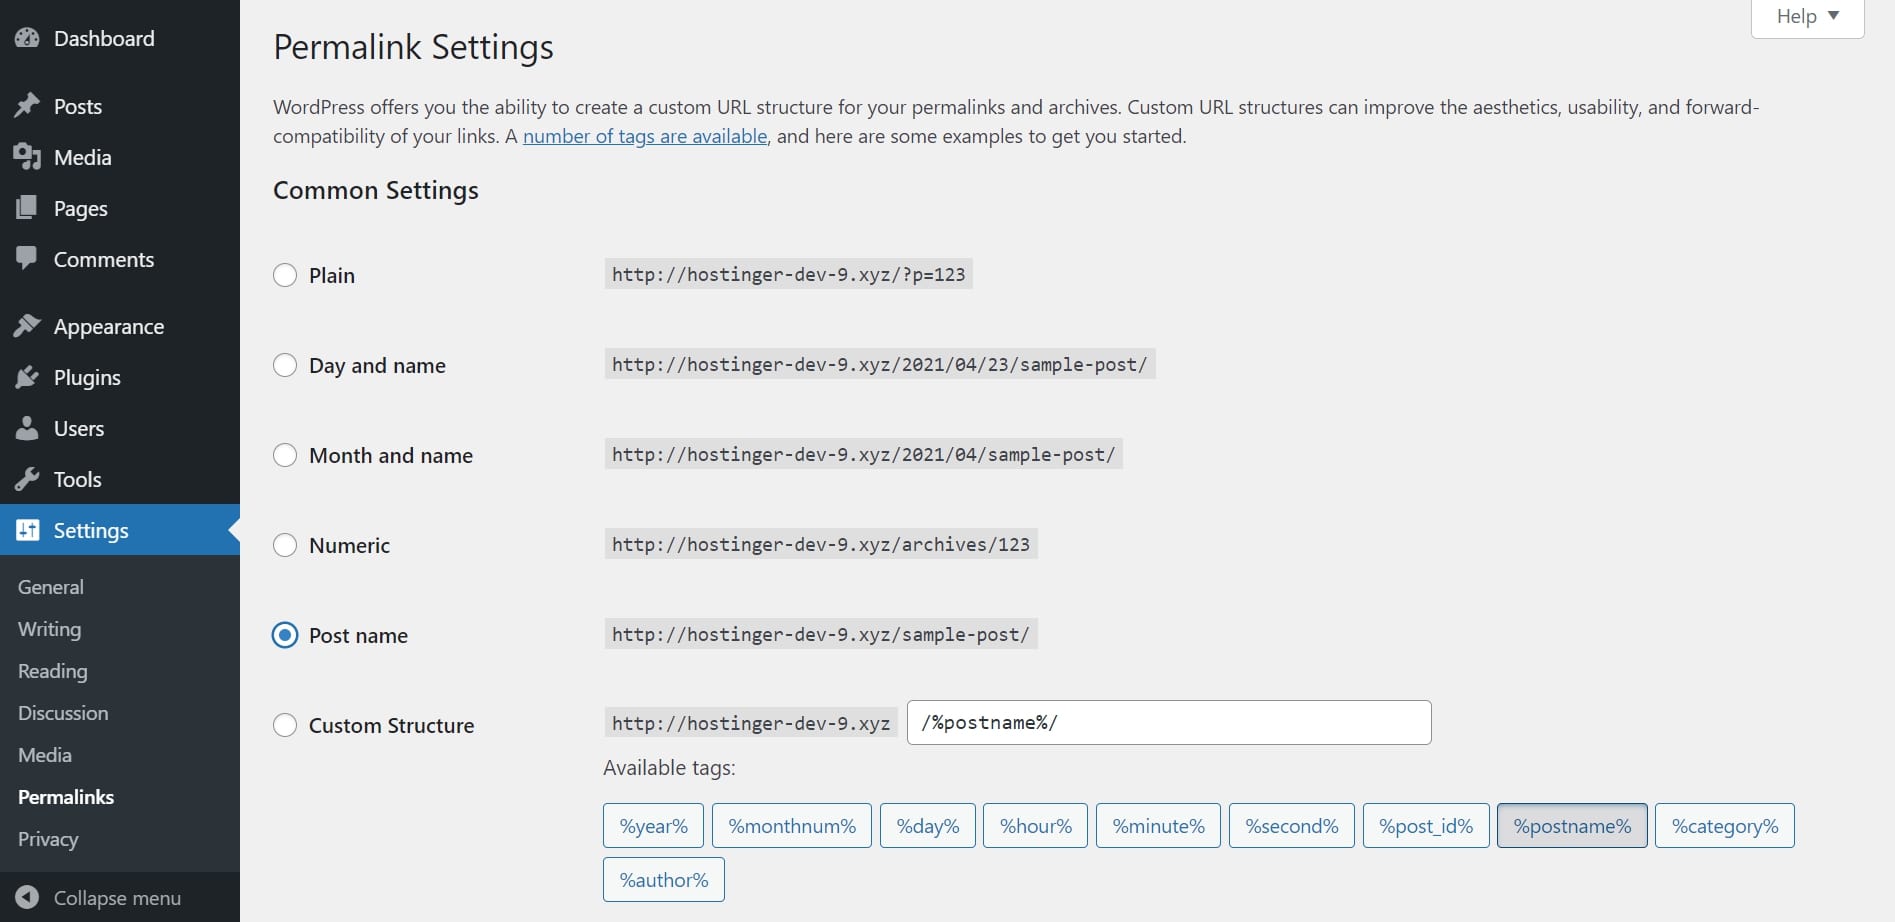
To change the URL construction on WordPress, go to the Settings -> Permalinks tab on the dashboard.
Choose one of many buildings supplied. The greatest observe is to make use of the Post identify because it’s brief but descriptive, although it might not be appropriate for a information publication. Some additionally create a customized construction utilizing the class and submit identify variables to point out the consumer their location on a web site.
After choosing a URL construction, scroll right down to Save Changes.
Which WordPress set up methodology is greatest for you?
There are some things to contemplate when deciding which methodology is greatest for you. If you might be new to WordPress, we advocate utilizing the SiteFloor Wizard to put in WordPress. The SiteFloor Wizard makes it simple to put in WordPress with only a few clicks. If you might be skilled with WordPress, you could wish to use the guide set up methodology. The guide set up offers you extra management over the set up course of and permits you to fine-tune your settings.
Another factor to contemplate is whether or not or not you need a contemporary WordPress set up or if you wish to migrate an current web site to WordPress. Migrating an current web site will be completed with both the SiteFloor Migration Plugin or by manually exporting your content material out of your previous platform and importing it into WordPress.
- One-click installer by way of internet hosting supplier – It’s essentially the most easy option to set up WordPress, solely requiring a couple of clicks and a type to fill in.
- cPanel with an apps installer – Use this methodology if the internet hosting supplier makes use of cPanel, however doesn’t provide a built-in one-click WordPress installer. The course of is simply as quick and straightforward because the earlier one.
- Install WordPress manually utilizing FTP – This possibility is greatest if the earlier strategies aren’t accessible or when you don’t wish to get any pre-installed plugins. The course of is longer and way more concerned, so it’s essential to concentrate to the directions.
Next steps
Now that you know the way to put in WordPress, all that’s left to do is flip your web site into actuality. Choose a hosting firm, provoke the software program set up, configure the permalinks, and choose some themes and plugins to customise the location.
Make positive to observe our WordPress web site tricks to set your self up for fulfillment, akin to putting in an SSL certificates and submitting your web site to Google Search Console. These two, particularly, can increase your chance of rating excessive on search engine outcomes pages.